


By Shefali Jangid
Ever tried uploading files to a website? Most of them feel like they’re stuck in the past.
Users today expect more. They want a file uploader tool that feels effortless, drag-and-drop from their desktop, instant previews, and progress bars that actually let them know what’s going on.
And it shouldn’t matter if they’re on desktop or mobile, or uploading a small image or a massive video. The experience should just work.
That’s exactly what we’re going to build in this guide.
We will be creating a modern file uploader tool with drag-and-drop uploads, real-time progress tracking, and cloud storage integration, so we don’t have to do everything from scratch.
The best part? We’ll keep the code clean and simple with explanations so you can easily use it for your own projects.
By the end of this guide, we’ll have a user-friendly file uploader tool that meets today’s expectations and makes file management feel smooth and intuitive.
Key Takeaways
- Add drag-and-drop functionality to our uploader tool that feels natural and simple to use.
- Build a robust tool that handles multiple file types and sizes efficiently.
- Integrate cloud storage seamlessly without spending days on API docs.
- Show real-time progress so users always know what’s happening.
- Handle errors gracefully, providing clear feedback.
Understanding the Challenge
Building a file upload feature sounds simple at first. We just have to let users pick a file and hit upload, right?
In reality, it’s a lot more complicated, especially if we want to build a modern file uploader tool that people actually enjoy using.
The first big hurdle is the interface. Users don’t just want a “choose file” button anymore.
They expect drag-and-drop, real-time feedback, and a smooth experience whether they’re on desktop or mobile.
Then comes the technical part. Regular file uploads using basic HTML forms are slow and confusing. Users don’t see any progress or message, which leaves them staring at a blank screen while they’re waiting for their files to upload.
As a developer, you need to check if the file is allowed, make sure it’s not too big, and handle different types of files, all while making it look easy and smooth for users.
Storage adds another layer of complexity. Do you store files locally? Set up backups? Push them through a CDN so global users don’t face delays?
Rolling out your own system is expensive and time-consuming, but cloud storage APIs can feel overwhelming, too.
On top of that, security is also a huge concern.
File uploads are one of the most common attack vectors on the web. If you don’t verify the files properly, you run the risk of facing malware and data leaks.
Learn more about secure file handling on OWASP’s guidelines!
And finally, scalability. It’s easy enough to handle uploads when you have ten users.
But what happens when hundreds are using your file uploader tool simultaneously? Now you also have to deal with internet speed, how much load your server can handle, and where to store all the files.
Building the Solution
Let’s start building our file uploader tool step by step. We’ll begin with a simple HTML structure and progressively enhance it into a smooth, user-friendly uploader that our users will actually enjoy.
Step 1: Creating the Basic Structure
First, let’s set up our HTML:
| n n n n n
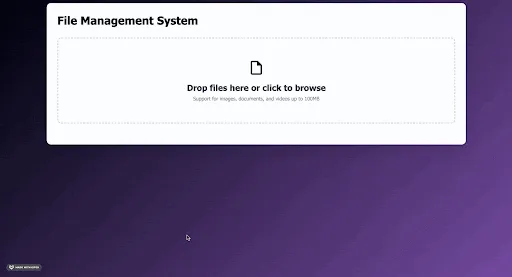
File Management System
n n n
Drop files here or click to browse
n
Support for images, documents, and videos up to 100MB
n n
n
n n n
n n n
n
n n n n |
|—-|
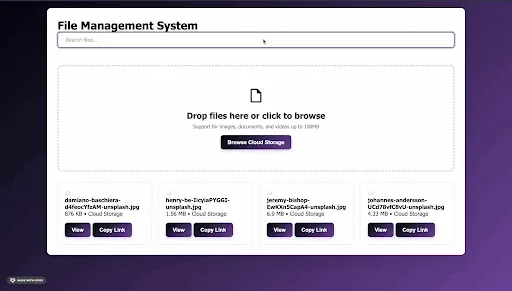
Here’s what it will look like:


Step 2: Styling for a Modern Look
Now, let’s add some CSS to make our interface visually appealing. Check out the GitHub repository for the complete CSS.
Here’s what it looks like after adding the CSS:

Step 3: Implementing Core JavaScript Functionality
In this step, we’ll build the logic that powers the file uploader, including event handling, validation, progress tracking, and file management.
Step 3.1: Class Setup and Initial Configuration
Set up the FileManager class and reference the necessary DOM elements. Initialize an empty array to track uploaded files and call the method to add event listeners.
| class FileManager { n constructor() { n // Reference DOM elements for file upload n this.uploadArea = document.getElementById(“upload-area”); n this.fileInput = document.getElementById(“file-input”); n this.progressContainer = document.getElementById(“upload-progress”); n this.progressFill = document.querySelector(“.progress-fill”); n this.progressText = document.querySelector(“.progress-text”); n this.fileList = document.getElementById(“file-list”); n n this.files = [];// Store uploaded files n this.initializeEventListeners();// Set up event handlers n } |
|—-|
Step 3.2: Setting Up Event Listeners
Attach handlers for clicking, dragging, and dropping, and file selection to make the uploader interactive.
| initializeEventListeners() { n // Open file dialog when user clicks the upload area n this.uploadArea.addEventListener(“click”, () => { n this.fileInput.click(); n }); n n // Handle file selection from the input n this.fileInput.addEventListener(“change”, (e) => { n this.handleFiles(e.target.files); n }); n n // Drag over the area – highlight the drop zone n this.uploadArea.addEventListener(“dragover”, (e) => { n e.preventDefault(); n this.uploadArea.classList.add(“dragover”); n }); n n // Remove highlight when dragging leaves n this.uploadArea.addEventListener(“dragleave”, (e) => { n e.preventDefault(); n this.uploadArea.classList.remove(“dragover”); n }); n n // Handle files dropped onto the area n this.uploadArea.addEventListener(“drop”, (e) => { n e.preventDefault(); n this.uploadArea.classList.remove(“dragover”); n this.handleFiles(e.dataTransfer.files); n }); n } |
|—-|
Step 3.3: Handling and Validating Files
Filter files based on size and only proceed with valid ones.
| handleFiles(fileList) { n const validFiles = Array.from(fileList).filter((file) => { n // Reject files larger than 100MB n if (file.size > 100 * 1024 * 1024) { n alert(`${file.name} is too large. Maximum size is 100MB.`); n return false; n } n return true; n }); n n if (validFiles.length > 0) { n this.uploadFiles(validFiles); n } n } |
|—-|
⚠️Important: Validate files on both the client and server sides. Client-side checks give instant feedback, but only server-side validation protects our app from malicious uploads.
Step 3.4: Uploading Multiple Files
Show the progress bar, upload each file one at a time, and hide the progress once done.
| async uploadFiles(files) { n this.showProgress(); n n for (let i = 0; i < files.length; i++) { n const file = files[i]; n await this.uploadSingleFile(file, i + 1, files.length); n } n n this.hideProgress(); n } |
|—-|
Step 3.5: Uploading a Single File with Progress
Simulate file upload by incrementally updating the progress bar until complete.
| async uploadSingleFile(file, current, total) { n return new Promise((resolve) => { n let progress = 0; n const interval = setInterval(() => { n progress += Math.random() * 15; n if (progress >= 100) { n progress = 100; n clearInterval(interval); n n // Add file to list once upload is done n this.addFileToList(file); n resolve(); n } n n const overallProgress = ((current – 1) / total) * 100 + progress / total; n this.updateProgress(overallProgress, `Uploading ${current} of ${total}…`); n }, 200); n }); n } |
|—-|
Step 3.6: Displaying Uploaded Files
Render the uploaded file in the UI with an icon, size, date, and a delete option.
| addFileToList(file) { n const fileCard = document.createElement(“div”); n fileCard.className = “file-card”; n n const fileIcon = this.getFileIcon(file.type); n const fileSize = this.formatFileSize(file.size); n n fileCard.innerHTML = ` n
n
${file.name}
n
${fileSize} • ${new Date().toLocaleDateString()}
n
n
n `; n n this.fileList.appendChild(fileCard); n this.files.push(file); n } |
|—-|
Step 3.7: Deleting Files
Allow users to delete files, updating the file list and UI accordingly.
| deleteFile(fileName) { n this.files = this.files.filter((f) => f.name !== fileName); n this.fileList.innerHTML = “”; n this.files.forEach((f) => this.addFileToList(f)); n } |
|—-|
Step 3.8: File Icons Based on Type
Display appropriate icons based on file MIME type for a better user experience.
| getFileIcon(mimeType) { n if (mimeType.startsWith(“image/”)) return “🖼️”; n if (mimeType.startsWith(“video/”)) return “🎥”; n if (mimeType.startsWith(“audio/”)) return “🎵”; n if (mimeType.includes(“pdf”)) return “📄”; n if (mimeType.includes(“word”)) return “📝”; n if (mimeType.includes(“excel”) || mimeType.includes(“spreadsheet”)) n return “📊”; n return “📁”; n } |
|—-|
💡Tip: Show file icons and formatted sizes to give users better feedback.
Step 3.9: Formatting File Sizes
Convert file sizes into readable units like KB, MB, or GB.
| formatFileSize(bytes) { n if (bytes === 0) return “0 Bytes”; n const k = 1024; n const sizes = [“Bytes”, “KB”, “MB”, “GB”]; n const i = Math.floor(Math.log(bytes) / Math.log(k)); n return parseFloat((bytes / Math.pow(k, i)).toFixed(2)) + ” ” + sizes[i]; n } |
|—-|
Step 3.10: Showing and Hiding Upload Progress
Control the visibility of the progress bar and update its value dynamically.
| showProgress() { n this.progressContainer.classList.remove(“hidden”); n } n n hideProgress() { n setTimeout(() => { n this.progressContainer.classList.add(“hidden”); n this.updateProgress(0, “Upload complete!”); n }, 1000); n } n n updateProgress(percent, text) { n this.progressFill.style.width = percent + “%”; n this.progressText.textContent = text; n } n } |
|—-|
Step 3.11: Initialising the File Manager
Create an instance of the FileManager class to start the functionality.
| // Start the file manager n const fileManager = new FileManager(); |
|—-|
Access the complete source code for this file uploader tool here!
With this, our file uploader tool is fully interactive, and users can drag, drop, upload, and manage files effortlessly.

Ref: MDN Web APIs – File
Step 4: Integrating Filestack for Cloud Storage
In this step, we will take our file uploader tool to the next level by connecting it to the cloud. We can use tools like Filestack to directly pull from cloud storage, generate secure links, and make everything feel seamless for users.
First, add the Filestack SDK to our HTML head:
| <script src="https://static.filestackapi.com/filestack-js/4.x.x/filestack.min.js”> |
|—-|
Then, let’s extend our FileManager class to integrate cloud uploads, show previews, and manage file links.
For detailed documentation, visit Filestack’s API reference.
Step 4.1: Extending the FileManager with Filestack Integration
| // Extend the basic FileManager class to add cloud storage functionality using Filestack n class EnhancedFileManager extends FileManager { n constructor() { n super();// Call the parent class constructor n this.client = filestack.init(‘YOURAPIKEY_HERE’);// Initialize Filestack with your API key n this.picker = null;// Placeholder for the Filestack picker instance n } |
|—-|
Important: Use your own API key in place of YOURAPIKEY_HERE; you can get it from the Filestack dashboard.
⚠️Filestack and other cloud services require API keys and setup. For production use, always protect your API keys and configure appropriate security settings.
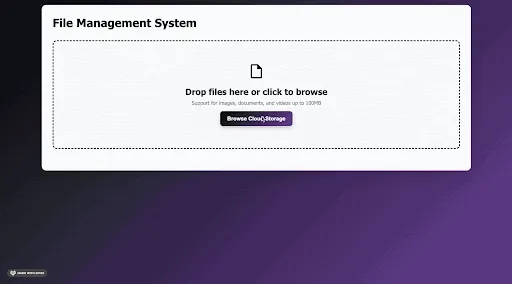
Step 4.2: Initialising Event Listeners with Filestack Button
| initializeEventListeners() { n super.initializeEventListeners();// Set up existing file selection and drag-drop listeners n n // Add a new button for accessing cloud storage through Filestack n this.addFilestackButton(); n } |
|—-|
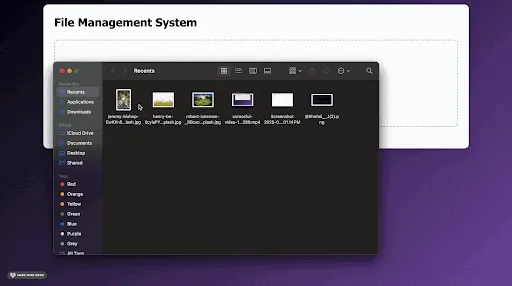
Step 4.3: Adding the Filestack Picker Button
| addFilestackButton() { n const button = document.createElement(“button”); n button.textContent = “Browse Cloud Storage”;// Button label n button.className = “filestack-btn”;// Apply styling n n // Open the Filestack picker when the button is clicked n button.onclick = (e) => { n e.stopPropagation();// Prevent triggering other events n this.openFilestack(); n }; n n // Add the button to the upload area n this.uploadArea.appendChild(button); n } |
|—-|
Step 4.4: Configuring and Opening the Filestack Picker
| openFilestack() { n const options = { n accept: [‘image/*’, ‘video/*’, ‘application/pdf’, ‘.doc’, ‘.docx’],// Allowed file types n maxFiles: 10,// Limit number of files selectable at once n uploadInBackground: false,// Upload immediately instead of in background n onUploadDone: (result) => { n // Add each uploaded file to the file list n result.filesUploaded.forEach(file => { n this.addCloudFileToList(file); n }); n } n }; n n // Open the Filestack file picker with the above options n this.client.picker(options).open(); n } |
|—-|
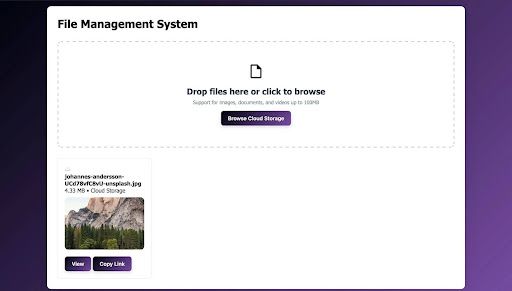
Step 4.5: Displaying Uploaded Files from Cloud Storage
| addCloudFileToList(file) { n const fileCard = document.createElement(‘div’); n fileCard.className=”file-card cloud-file”;// Styling for cloud files n n fileCard.innerHTML = ` n
n
${file.filename}
n
${this.formatFileSize(file.size)} • Cloud Storage
n
n
n `; n n this.fileList.appendChild(fileCard);// Add to the file list n } |
|—-|
Step 4.6: Uploading Files Directly to Filestack
| async uploadSingleFile(file, current, total) { n try { n // Upload file using Filestack and track progress n const fileHandle = await this.client.upload(file, { n onProgress: (evt) => { n const progress = (evt.loaded / evt.total) * 100; n const overallProgress = ((current – 1) / total) * 100 + (progress / total); n this.updateProgress(overallProgress, `Uploading ${current} of ${total}…`); n } n }); n n // Once uploaded, add the file to the list view n this.addCloudFileToList({ n filename: file.name, n size: file.size, n url: fileHandle.url n }); n n } catch (error) { n console.error(‘Upload failed:’, error); n alert(`Failed to upload ${file.name}. Please try again.`); n } n } n } |
|—-|
Step 4.7: Initializing the Enhanced File Manager
| // Instantiate the EnhancedFileManager to replace the default FileManager functionality n const fileManager = new EnhancedFileManager(); n n |
|—-|
Add this CSS to match our existing styles:
| .filestack-btn, n .btn-view, n .btn-share { n margin-top: 1rem; n padding: 0.75rem 1.25rem; n background: linear-gradient(135deg, #00030c, #764ba2); n color: #fff; n border: none; n border-radius: 8px; n font-size: 0.95rem; n font-weight: 600; n cursor: pointer; n transition: all 0.3s ease; n box-shadow: 0 4px 10px rgba(0, 0, 0, 0.15); n } n .filestack-btn:hover { n transform: translateY(-2px); n box-shadow: 0 6px 14px rgba(0, 0, 0, 0.2); n } n .filestack-btn:active { n transform: translateY(0); n box-shadow: 0 3px 7px rgba(0, 0, 0, 0.15); n } n n |
|—-|
This integration transforms our basic file manager into a powerful tool.
It can handle files from multiple sources, local uploads, cloud storage services like Google Drive and Dropbox, or even URL imports.
Filestack manages all the heavy lifting behind the scenes.
That includes handling different storage providers, CDN distribution, and file transformations.

Ref: Filestack Documentation
Enhancing the Implementation
Now, let’s add some advanced features to our uploader tool that will make our file manager stand out.
Real-time File Previews
Users love instant feedback. For images, videos, and PDFs, we can generate previews right in the file list:
| generatePreview(file) { n if (file.mimetype && file.mimetype.startsWith(“image/”)) { n return `
|—-|

Add this to our CSS file:
| .file-preview { n width: 100%; n max-height: 150px; n object-fit: cover; n border-radius: 10px; n margin-top: 10px; n cursor: pointer; n } |
|—-|
And update the addCloudFileToList function to show the previews like this:
| addCloudFileToList(file) { n const fileCard = document.createElement(“div”); n fileCard.className = “file-card cloud-file”; n const preview = this.generatePreview(file); // <– add this n fileCard.innerHTML = ` n
n
${file.filename}
n
${this.formatFileSize(file.size)} • Cloud Storage
n ${preview} n
n
n `; n n this.fileList.appendChild(fileCard); n } |
|—-|
💡Tip: Instant previews improve user trust by letting them confirm uploads visually.
Search and Filtering
Make our file uploader tool even more user-friendly by letting users search and filter files in real time:
| implementSearch() { n const searchInput = document.createElement(“input”); n searchInput.type = “text”; n searchInput.placeholder = “Search files…”; n searchInput.className = “search-input”; n n this.uploadArea.insertAdjacentElement(“beforebegin”, searchInput); n n searchInput.addEventListener(“input”, (e) => { n this.filterFiles(e.target.value); n }); n } n n filterFiles(query) { n const fileCards = this.fileList.querySelectorAll(“.file-card”); n fileCards.forEach((card) => { n const fileName = card.querySelector(“h4”).textContent.toLowerCase(); n card.style.display = fileName.includes(query.toLowerCase()) n ? “flex” n : “none”; n }); n } |
|—-|
In the EnhancedFileManager constructor, call this.implementSearch(); like this:
| class EnhancedFileManager extends FileManager { n constructor() { n super(); n this.client = filestack.init(“YOURAPIKEY”); n this.picker = null; n n this.implementSearch();// <– add this n } n … n } |
|—-|
And add this CSS:
| .search-input { n width: 100%; n padding: 0.75rem 1.25rem; n margin-bottom: 20px; n border: 2px solid #e2e8f0; n border-radius: 8px; n font-size: 0.95rem; n color: #2d3748; n outline: none; n transition: all 0.3s ease; n box-shadow: 0 2px 6px rgba(0, 0, 0, 0.05); n } n .search-input:focus { n border-color: #764ba2; n box-shadow: 0 0 0 3px rgba(118, 75, 162, 0.3); n } n .search-input::placeholder { n color: #a0aec0; n font-style: italic; n } |
|—-|
⚙️Best Practice: Always allow users to filter files easily when managing large lists.
The beauty of using Filestack is that many advanced features come built in.
You get image transformations, document conversions, and even intelligent cropping out of the box.
That means you don’t need to build these complex features from scratch.
And you won’t have to maintain multiple third-party services either.
Best Practices & Common Pitfalls
Here are some important lessons I’ve learned (sometimes the hard way) while building file uploader tools:
- Validate Files on Both Client and Server: Client-side validation is helpful because it gives users quick feedback, but real security comes from checking files on the server too. Never trust user input, even if it’s coming from your own app’s interface.
- Handle Errors Properly: Uploads don’t always go smoothly. Files can fail, networks can drop, or servers can crash. Always show clear error messages and give users a way to try again.
- Accessibility Matters: Make sure your uploader works for everyone. Add ARIA labels for screen readers, allow keyboard navigation, and don’t rely on colors alone to show messages. Use proper HTML structure and test with accessibility tools.
- Watch Upload Performance: Big files on slow networks can time out or fail. Using chunked uploads can help, and showing users how much time is left makes a big difference. Tools like Filestack handle this for you, but if you’re building it yourself, don’t skip it.
- Plan for Storage Costs: Storing files can get expensive quickly. Clean up temporary files, compress them where possible, and set limits on file size based on your infrastructure’s capacity. This helps you keep costs under control.
- Store Files Securely: Always store uploaded files outside your web root directory and serve them through signed URLs to prevent unauthorised access and improve security.
Conclusion
Building a modern file uploader tool doesn’t have to be complicated. Start with a solid HTML foundation, enhance it step by step, and use tools like Filestack for cloud storage.
The goal is a smooth, user-friendly uploader that people actually enjoy using. Focus on the experience first: make drag-and-drop feel natural, previews load instantly, and progress bars meaningful.
Keep the complex tech behind the scenes, hidden behind a clean and simple interface. Once that’s working, you can add advanced features like file sharing, collaborative editing, or automated workflows.
File management is something users interact with every day. Get this right, and you’ll have happier users, better engagement, and far fewer support tickets.
Resources for Further Learning
- GitHub Repository with Complete Code
- MDN Web APIs – File
- OWASP – Secure File Upload
- Filestack Documentation
About the Author
Shefali Jangid is a web developer, technical writer, and content creator passionate about building intuitive developer tools and educational resources. She shares tutorials, code snippets, and practical tips on her blog, shefali.dev, helping developers create better web experiences with clean, efficient, and accessible code.


