


What is a slideshow on TikTok?
A TikTok slideshow is a post format that lets you share up to 35 photos in one video-style presentation. There are two types: swipeable slideshows, where viewers manually swipe through each image at their own pace, and non-swipeable slideshows, which play automatically like a short video with background music or sound effects.
You can upload high-quality photos or still images from your camera roll, add transitions, and customize the visuals with text overlays, filters, or TikTok templates. The TikTok app handles sounds differently depending on the format: non-swipeable slideshows let you sync to trending tracks or add a voiceover, while swipeable slideshows use simpler audio or background music that plays continuously.
Swipeable vs non-swipeable slideshows on TikTok
Choose based on reader control vs pacing. Swipeable slideshows let viewers move through photos at their own pace, while non-swipeable slideshows play automatically like a short video with background music or sound effects. Each format has its own strengths, editing options, and creative limits.
Swipeable slideshow
Best for:
- Tutorials, instructions, and recipes that viewers need time to read.
- Product showcases with captions, prices, or details under each image.
- Before-and-after photos or comparison posts where users may swipe back and forth.
Watch-outs:
- You can only use one audio track for the entire slideshow.
- Viewers may stop swiping before reaching the end, so front-load your key visuals and captions.
Accessibility note: Swipeable slideshows give readers more control, making them ideal for text-heavy or reading-focused content.
Non-swipeable slideshow
Best for:
- Storytelling, travel recaps, and music-synced visuals.
- TikTok slideshow videos built with trending songs or templates.
- Thematic brand stories or short video clips where pacing matters more than control.
Watch-outs:
- The selected TikTok template controls image timing and transitions.
- Choose your image thumbnail carefully, since it becomes your video’s cover on your profile.
3 key benefits of creating a TikTok slideshow
Short videos may dominate TikTok, but slideshows continue to stand out for their flexibility and ease of use. They’re one of the simplest ways to share engaging, story-driven content without needing to film or edit a full video.
1. Fast to create
TikTok slideshows are quick to produce, even if you have no editing experience. Select your images or short video clips, choose a song, add captions, and your post is ready to share.
This format helps creators and brands publish high-quality, polished content in minutes instead of hours. As the platform with the most downloads in 2024, 773 million to be exact, and 1.6 billion active users, having a presence here is huge; the easier it is, the more consistent you can be with posting.
2. Adaptable for any goal
You can use TikTok slideshows to illustrate a step-by-step tutorial, showcase new products, or highlight customer stories. The slideshow format turns still images into dynamic, scrollable narratives that work well for both educational and promotional posts.
3. Keeps viewers engaged
Slideshow posts invite interaction. Viewers can move through each image at their own pace or watch automatically as visuals and music flow together. This gives your audience a more active role and keeps them watching longer, which helps improve overall engagement and reach.
How to make a TikTok slideshow in 7 steps
1. Start a new post and select photos
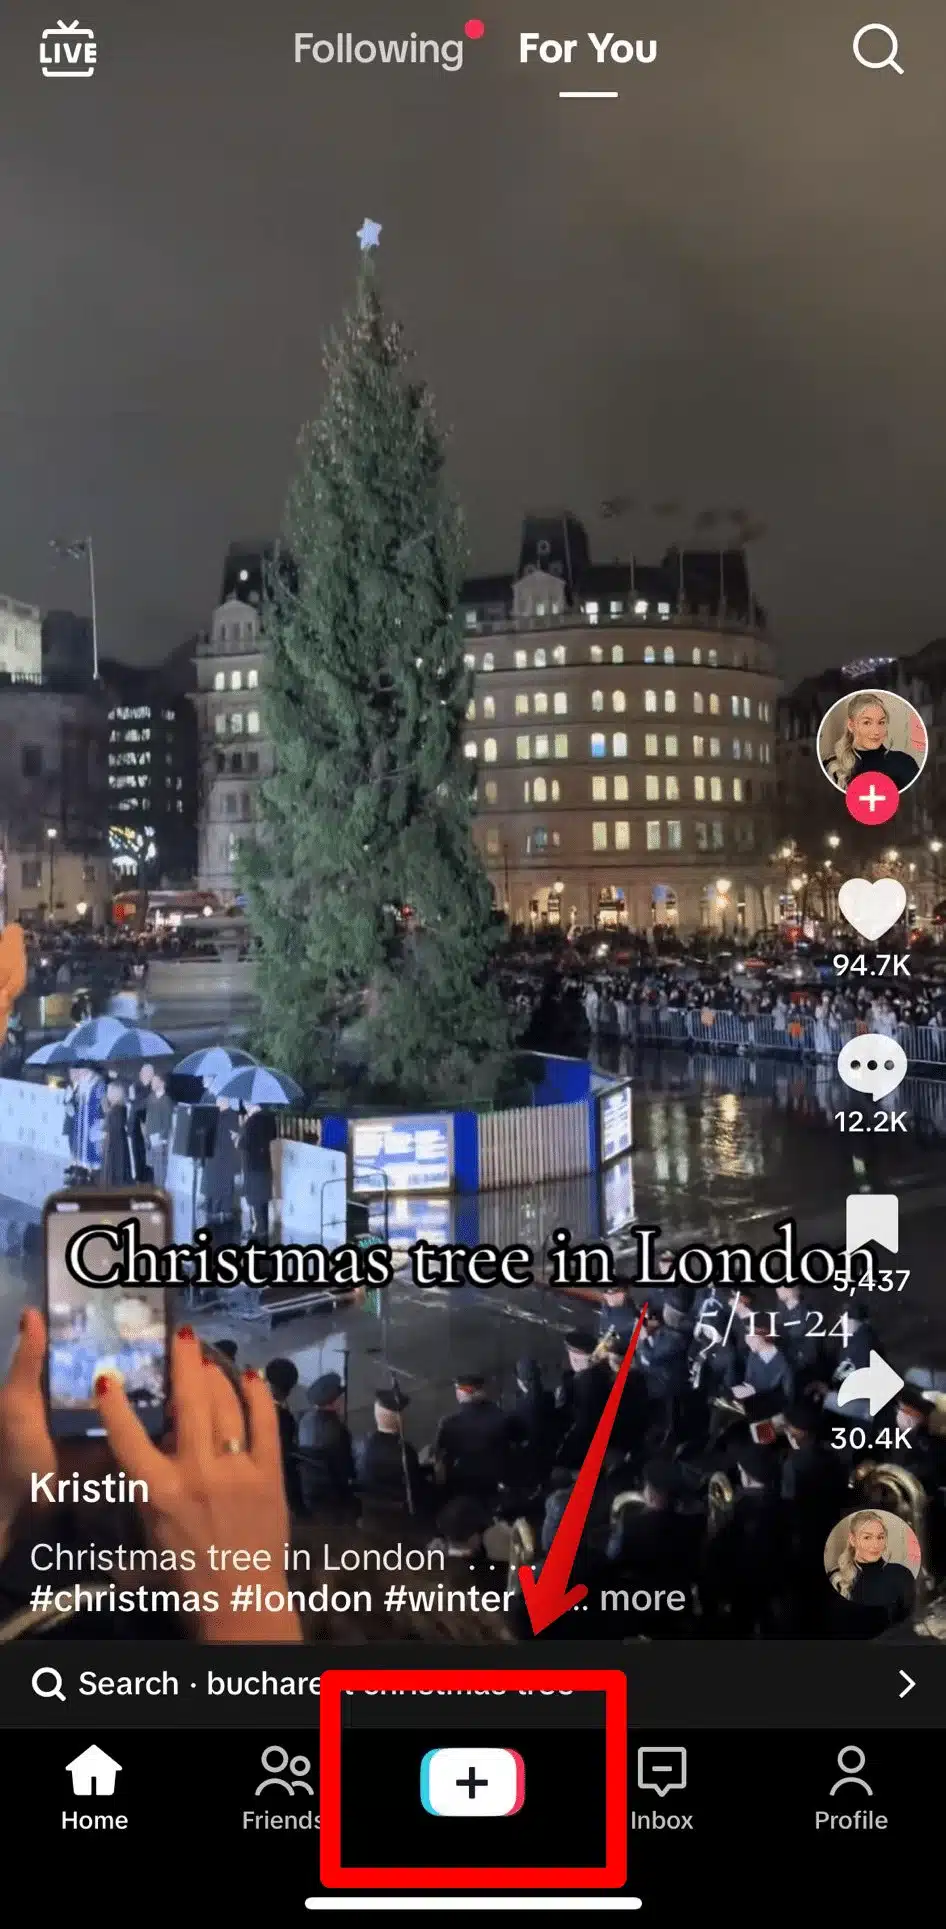
Open the TikTok app, tap the “+” icon, and start creating.

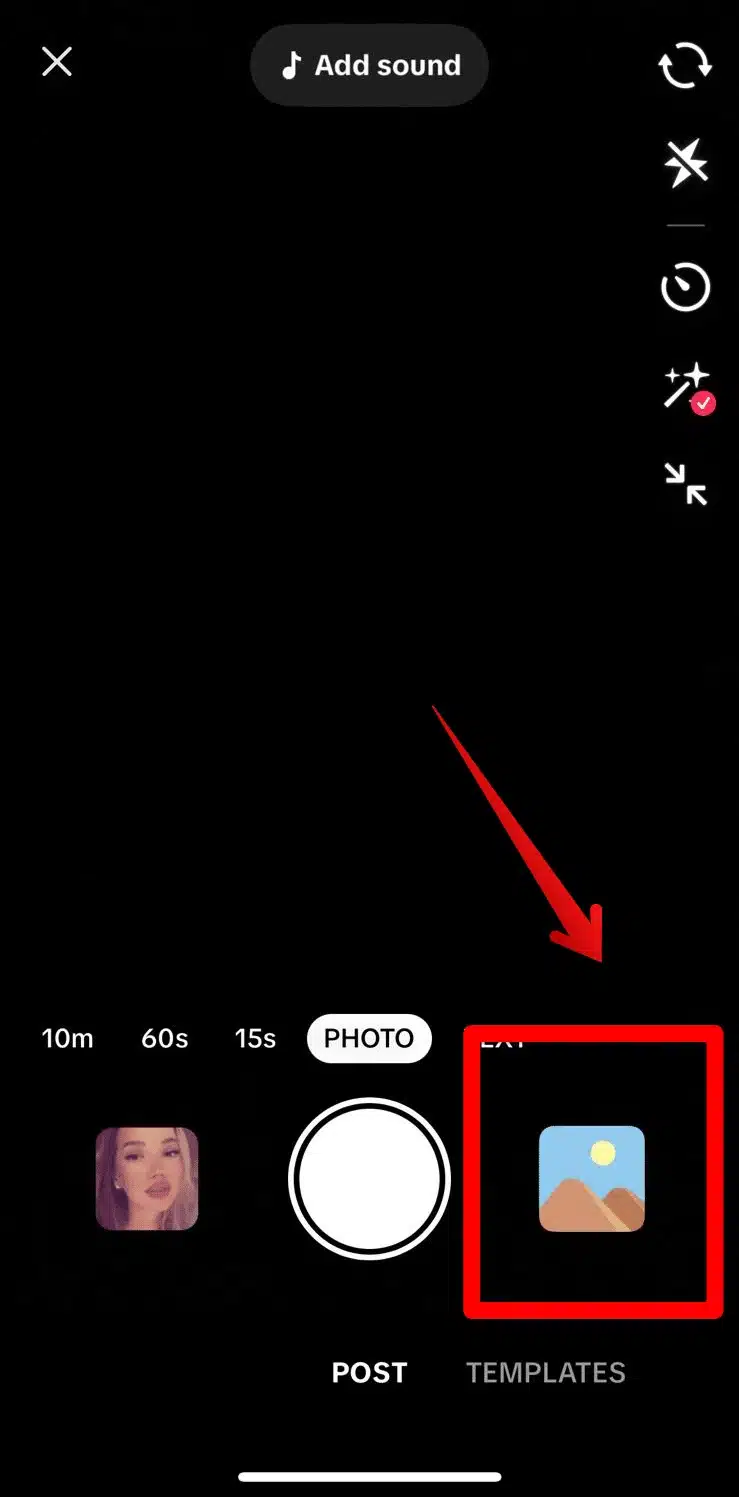
Choose Photo mode, then tap the image icon on the bottom right to open your camera roll.

Toggle Select Multiple and pick up to 35 high-resolution images you want to feature in your slideshow on TikTok.
Select images that share the same aspect ratio and theme for a clean visual story. Use consistent lighting, framing, and file quality to avoid background noise or blurred frames.
2. Choose your format: swipeable or AutoCut
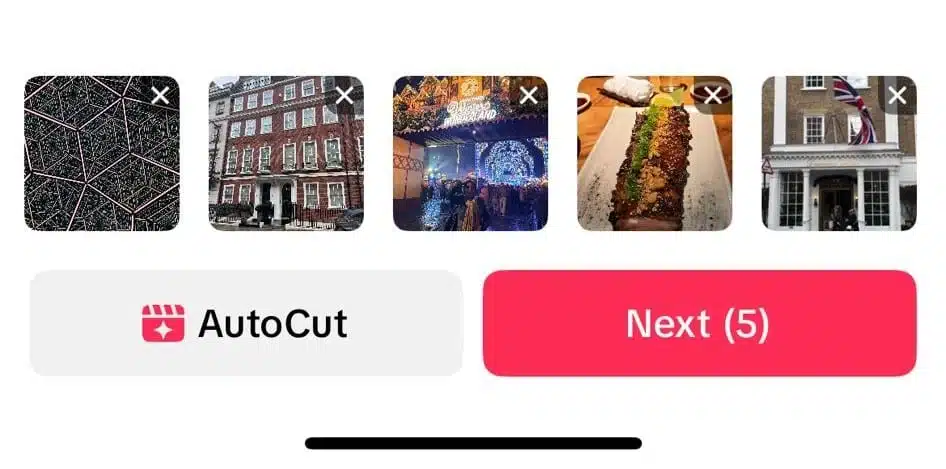
Once your photos are selected, you’ll see two options: Next and AutoCut.
- Tapping Next creates a swipeable slideshow where viewers manually swipe through photos at their own pace.
- Choosing AutoCut creates a non-swipeable slideshow that plays automatically like a short video, complete with transitions and music.

You can switch later by tapping the Format toggle on the top-right of your editing screen. Template selection directly affects pacing and transitions, so preview 2–3 TikTok templates with your photos before finalizing.
3. Reorder and refine your frames
Arrange your photos or still images in a sequence that tells a story logically. Crop or resize images for consistent framing, especially when combining product showcases, tutorials, or before-and-after examples.
Front-load your key visuals, since viewers may swipe away or scroll before finishing the full TikTok slideshow.
4. Add audio and text
Add music, sound effects, or a voiceover to make your slideshow more engaging. Keep in mind that swipeable slideshows allow only one audio track for the entire post, while AutoCut syncs transitions to the selected sound or track.
Use text overlays, captions, or on-screen prompts to highlight steps, prices, or context. This helps guide your target audience and makes your slideshow more accessible.
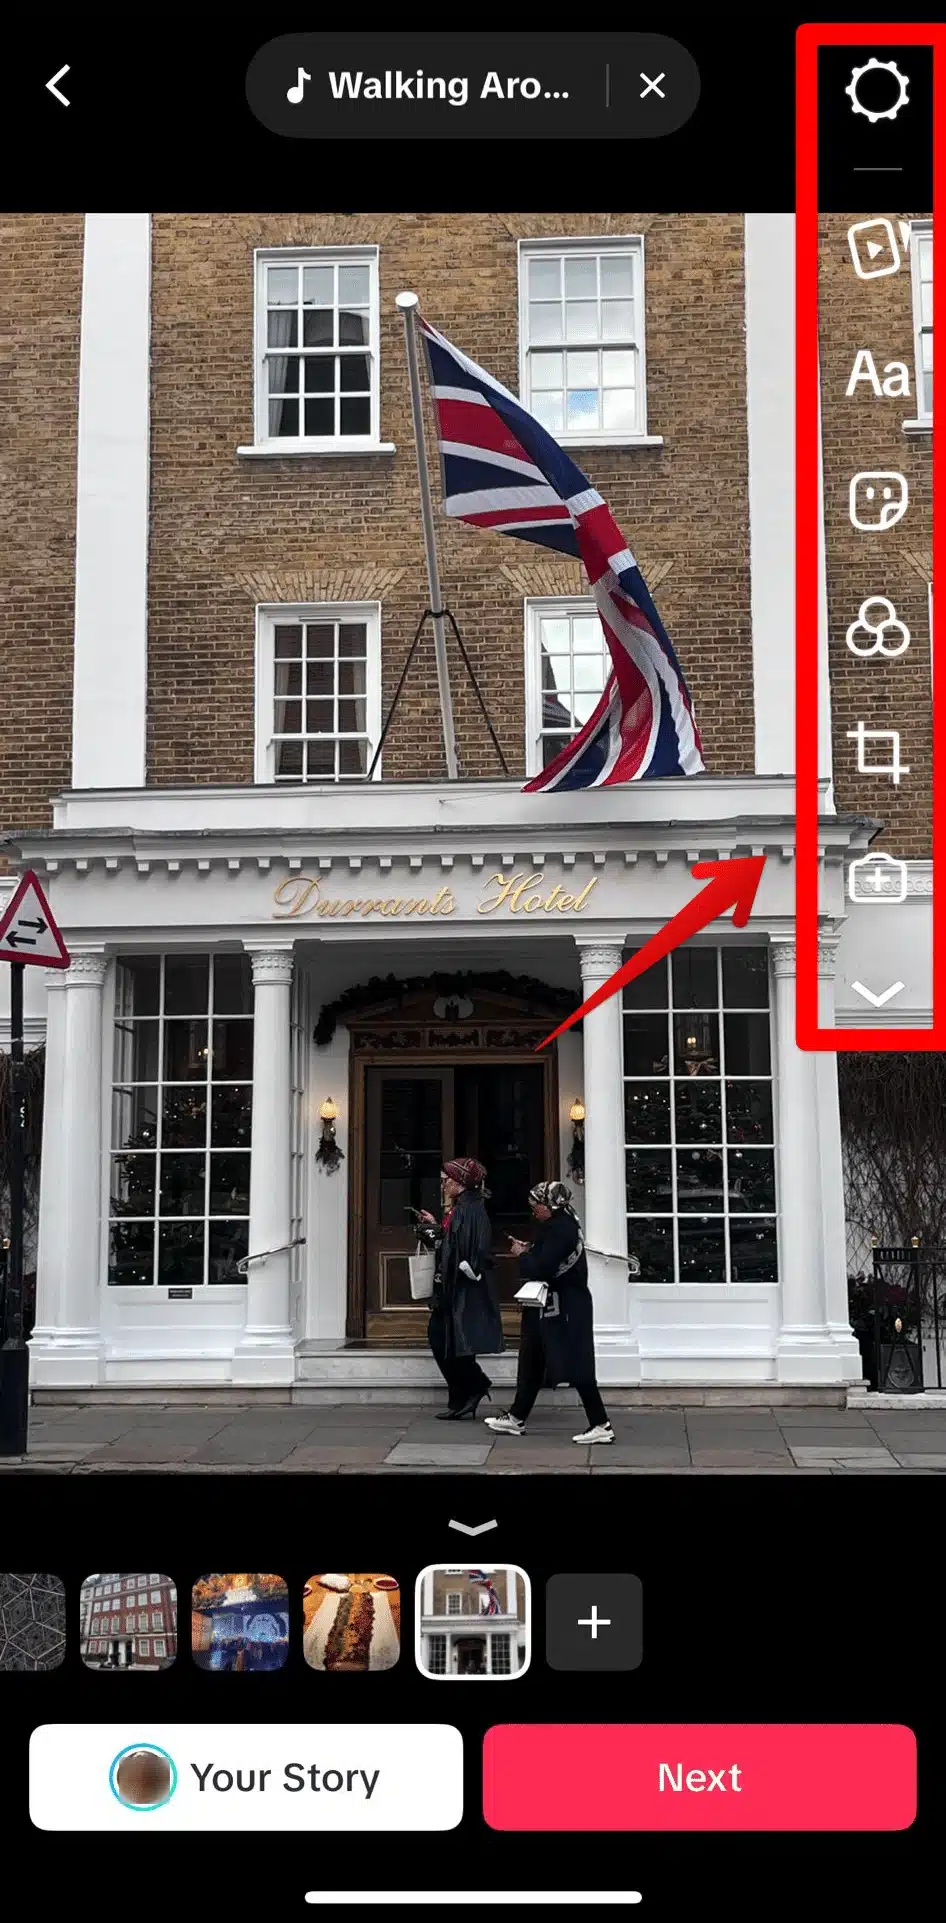
5. Apply effects and transitions
This is where you shape your slideshow’s tone and pace.
For swipeable slideshows:
Add stickers, filters, and captions per image. Adjust text placement carefully to avoid covering faces or products.

For AutoCut slideshows:
Pick a template that fits your story’s rhythm. Each template applies its own transitions, background music, and timing, so choose one that complements your visuals. You can still tweak text, timing, and filters afterward.
Accessibility checklist:
- Use strong text contrast for readability.
- Keep text short (6–10 words per frame).
- Add captions that describe visuals (acts like alt text).
- Avoid text over key visuals or faces.
6. Set title, description, and cover
Swipeable slideshows allow you to add a title that displays above the image series. For non-swipeable slideshows, you can edit the cover image thumbnail that appears on your TikTok profile grid.
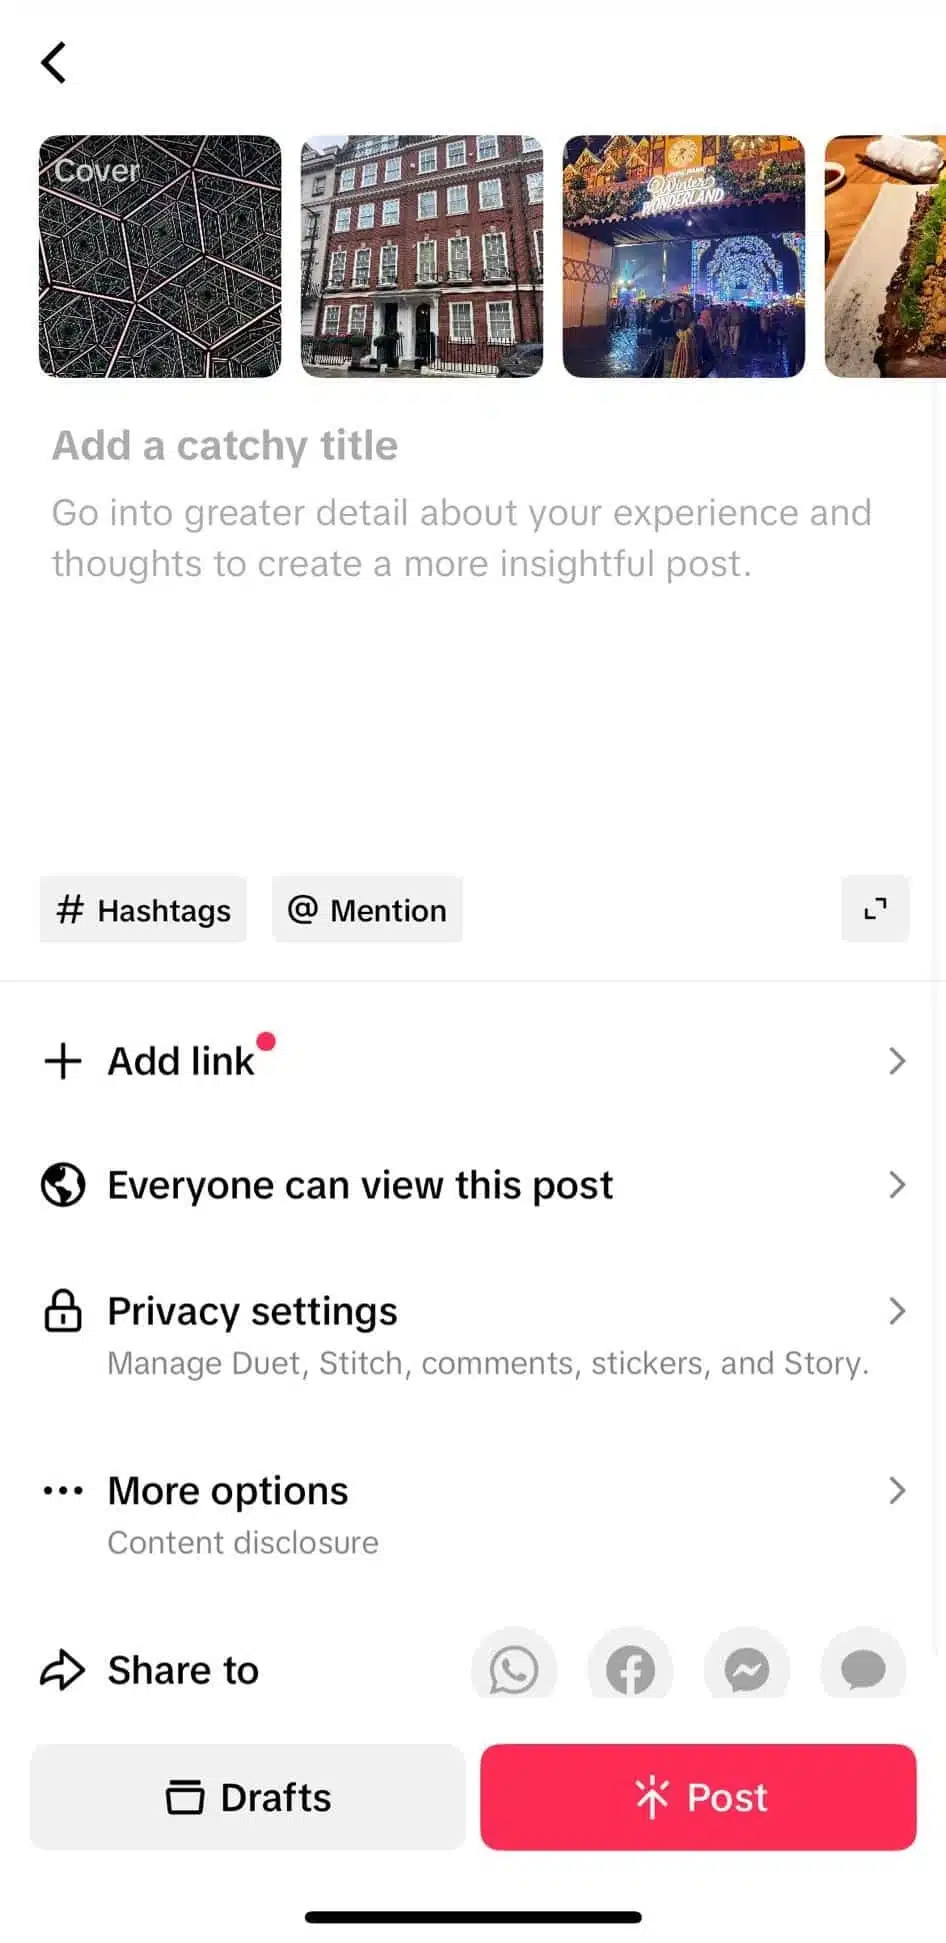

Write engaging captions and include relevant hashtags to help your slideshow reach more people.
7. Review privacy, accessibility, and post
Before posting, check your privacy settings, accessibility features, and audience targeting. Add a location or link if relevant, then preview your slideshow once more to ensure transitions, visuals, and audio align smoothly.
When everything looks right, tap Post. You can also queue your TikTok slideshow videos in SocialBee to keep your posting cadence consistent across platforms. Batch your slideshows into content categories, automate scheduling, and maintain a steady presence without manual uploads.
How to make a slideshow on TikTok with SocialBee
A TikTok scheduling tool saves hours, keeps your posting consistent, and helps you plan content that fits trends and timing better than posting from the app. With SocialBee, you can create TikTok slideshow videos, organize them into content categories, use AI to generate captions, collaborate with your team, and publish automatically at the exact time you schedule.
Here’s how to schedule a TikTok slideshow with SocialBee:
1. Connect your TikTok account. In SocialBee, connect your TikTok profile so you can schedule posts from one place alongside other platforms. This lets you manage multiple accounts without switching apps.
2. Click Create Post and choose TikTok. Select TikTok as your destination. If you manage several brands, pick the right profile before you start creating. This keeps your workflow organized and avoids publishing to the wrong account.
3. Upload your slideshow visuals from your device or design in Canva. Add the slideshow you exported as a video from TikTok, CapCut, or Canva, or upload high-quality photos you plan to share as a short video. You can also create graphics on the spot with Canva integration or pull free high-resolution images via Unsplash, then attach them to the post.


