


Installing an Amazon Echo Hub typically means dealing with power outlets and visible cables that can ruin your smart home’s clean aesthetic. I solved this by setting up Power over Ethernet while finishing my basement, and the professional results make the extra effort absolutely worthwhile.
Why I Needed PoE for My Echo Hub
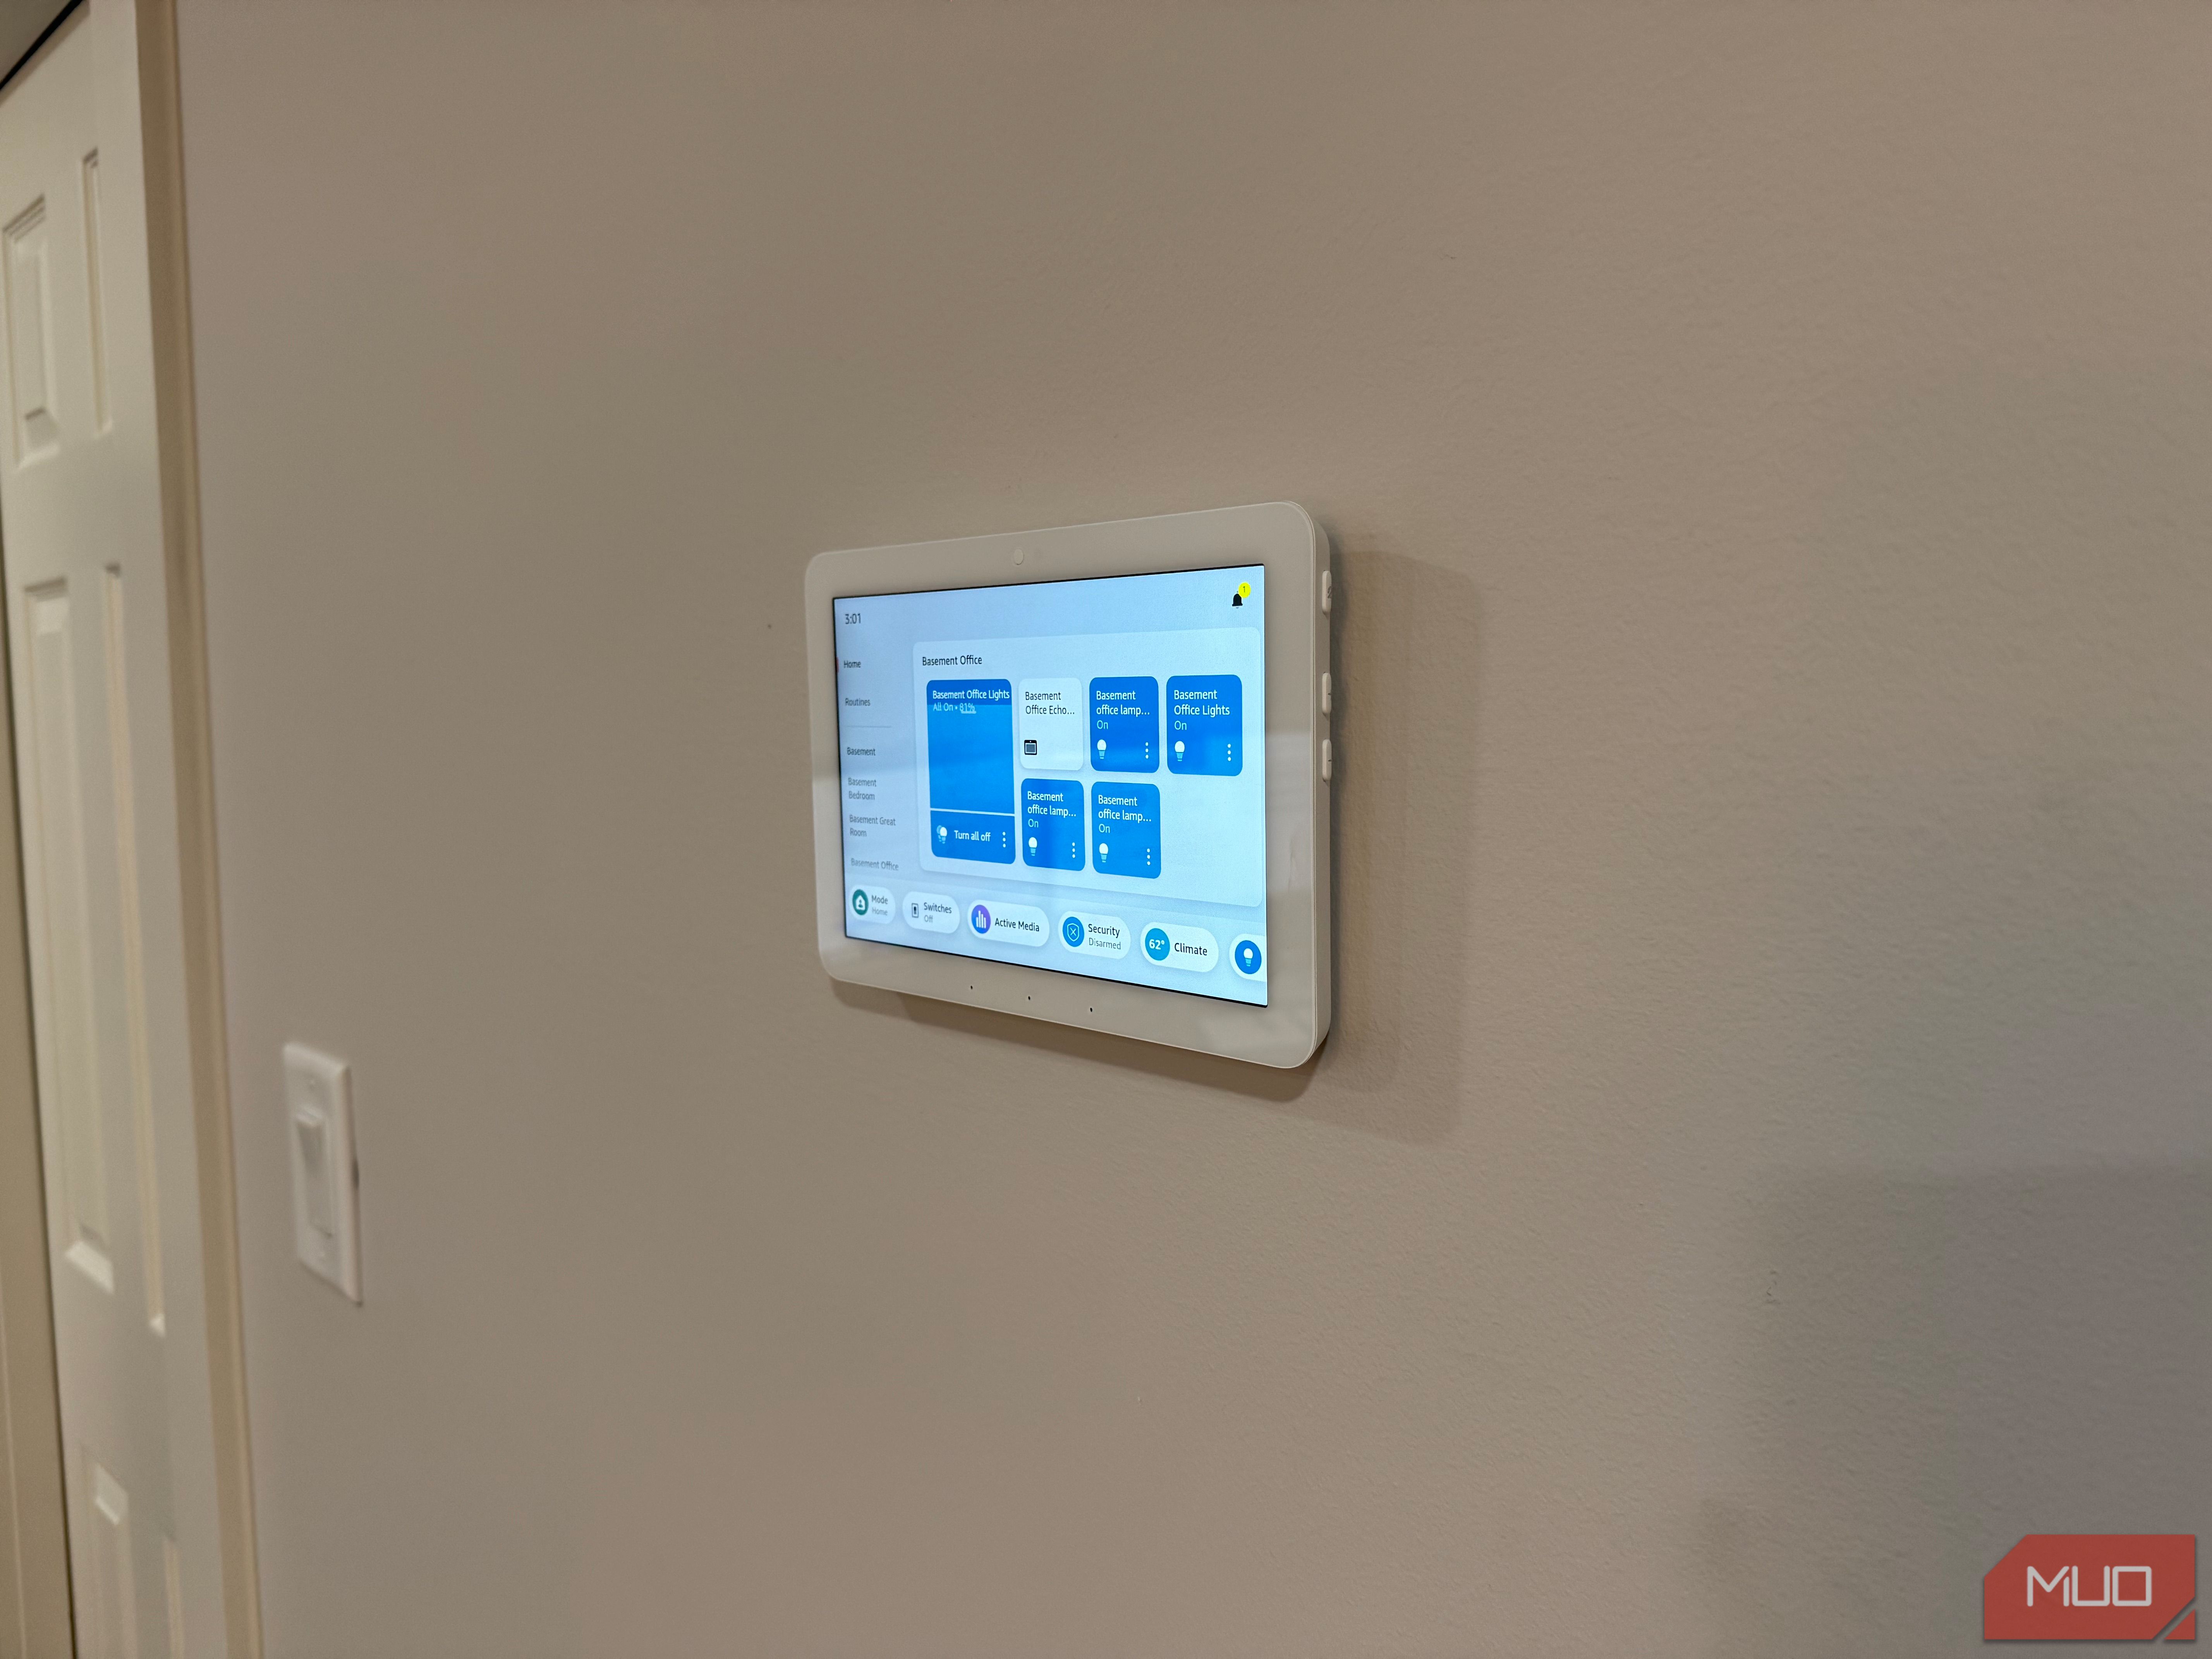
When I was finishing my basement, I planned to install three Echo Hubs throughout the space—one in my home office, one in the gym area, and one in the main hallway at the stair landing. Since this was a complete build-out from an unfinished space, I had the perfect opportunity to run all my low-voltage cables properly. The problem was that putting power outlets would be hard to fully hide behind the Echo Hubs, and I wanted that professional look with no visible wires.
Since I was already running Ethernet cables for smart TVs, computers, etc., throughout the basement during the build-out, adding PoE (Power over Ethernet) capability for all three Hubs seemed like the perfect solution. The Echo Hub works with thousands of connected cameras, lights, locks, plugs, and thermostats, so having rock-solid network connectivity would be a bonus beyond just the clean installation.
My PoE Setup: UDM Pro and NP Converter
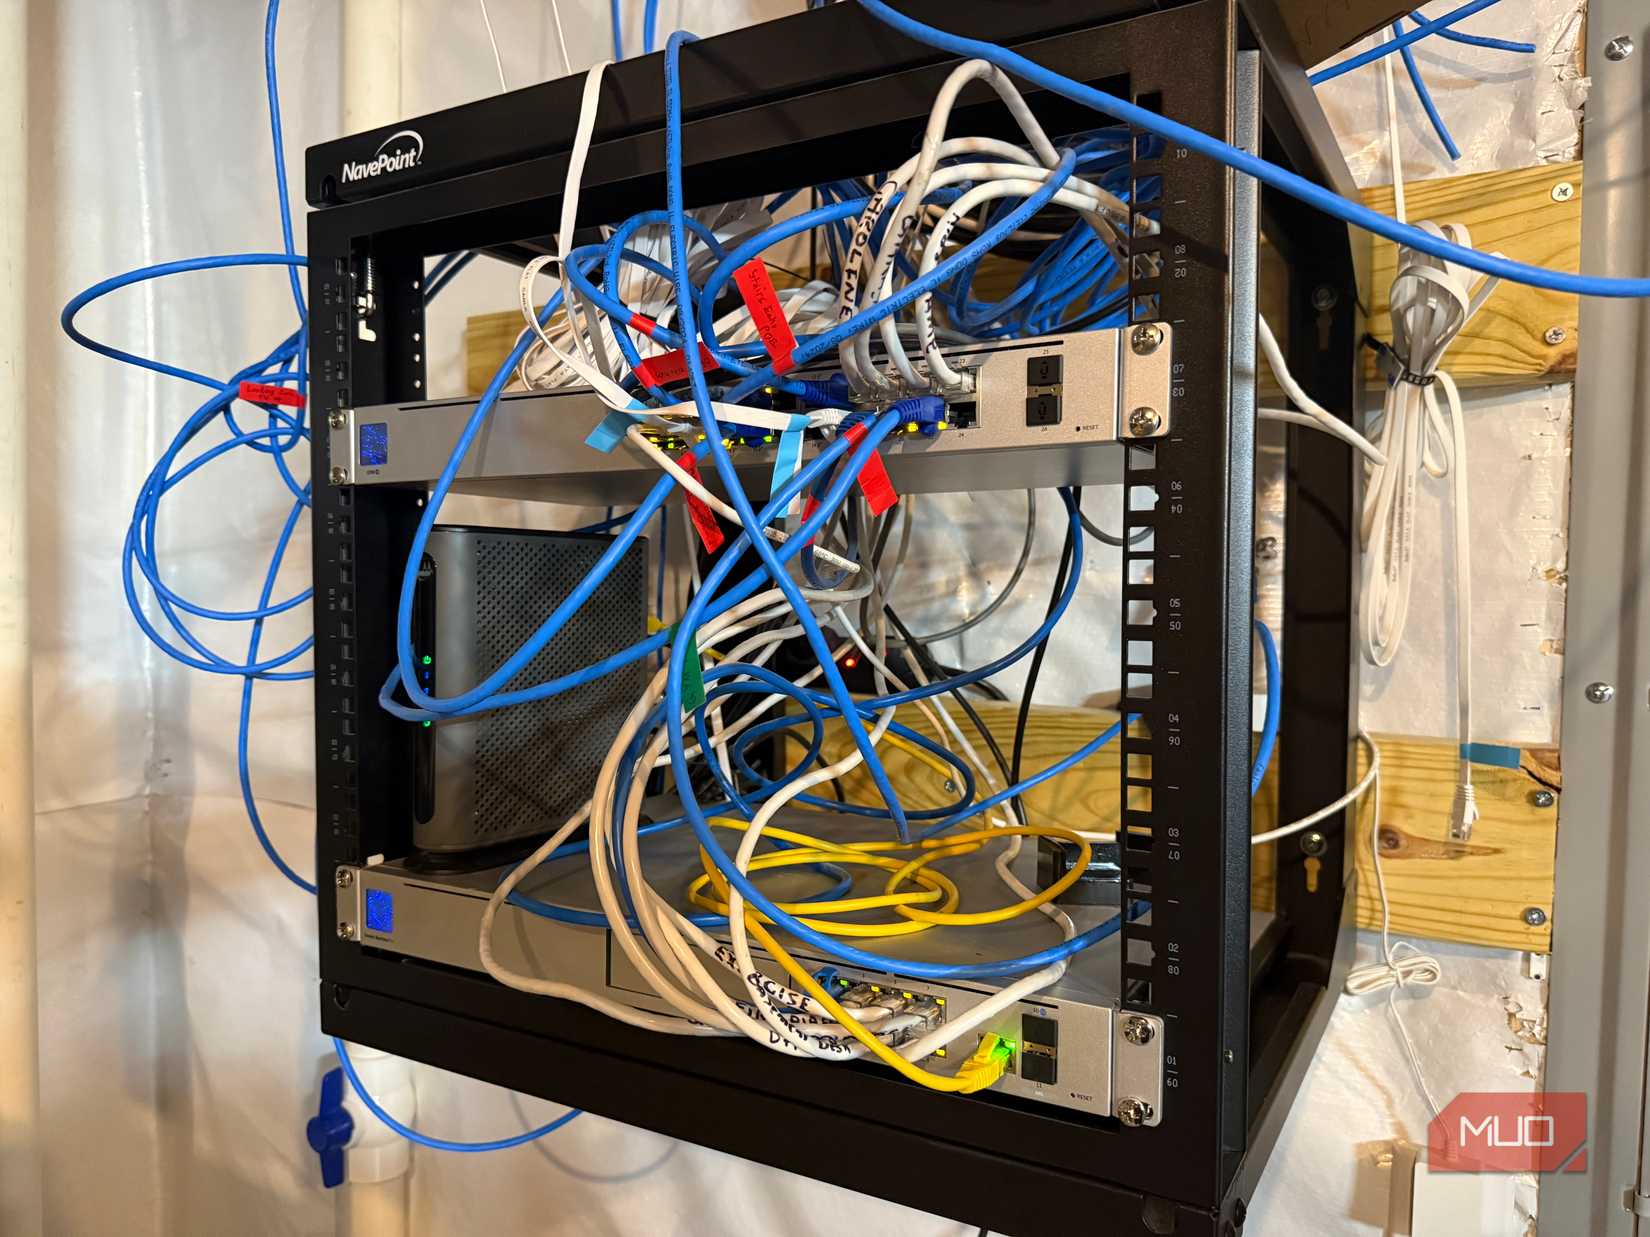
My network setup centers around a Ubiquiti Dream Machine Pro and a network switch I installed when we built the house. It handles routing and switching for my entire home network. This network setup has PoE ports I can use to power compatible devices over Ethernet.

My Hardware Setup:
The NP converters were the key components—each takes PoE input from my network and converts it to USB-C power plus data output that the Echo Hubs expect. At around $50 each, they’re specifically designed for devices like the Echo Hub that need both power and network connectivity through USB-C.

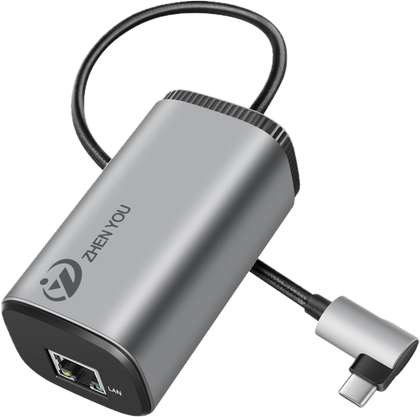
- Output Connection
-
USB-C
- Input Connection
-
Ethernet (RJ45)
Installation During Basement Finishing
Since I was building out my basement from a completely unfinished space, running low-voltage cables was part of the natural construction process. I planned for three Echo Hub locations plus two additional Ethernet drops in what will eventually become a great room and theater area. Here was my installation process:
Planning the Cable Routes
During the framing and electrical rough-in phase, I mapped out all five Ethernet locations and ran Cat6 cables from my network rack to each spot. The three immediate Echo Hub locations were in the office, gym, and main hallway at the stair landing. PoE technology allows you to extend power and data up to 328 feet from the source, so distance wasn’t a concern for any location in my basement.
Connecting to the UDM Pro and Network Switch
I had plenty of PoE ports available on my Ubiquiti network switch, and I connected three of them to my Echo Hub Cat6 runs. Then I wrapped up plenty of extra Ethernet cable length at the wall locations I’d be installing the Echo Hubs.

I marked each location on the floor. Once I installed drywall, I marked it as a reference for where I needed to cut holes with a 2-inch hole saw drill attachment. Then I pulled the Ethernet cable through the hole, wired in a connector, and attached it to the NP converter.
Setting Up the NP Converters
Each NP converter connects between the Ethernet cable and each Echo Hub via USB-C, providing both power delivery and gigabit network connectivity. The converters have indicator lights that show power and data transmission status. After connecting the Ethernet cables to the NP converter and the USB-C cable to the Echo Hub, I pushed the connector through the 2-inch hole and mounted the Echo Hub over it.

Real-World Performance and Benefits
Rock-Solid Network Connection
The wired Ethernet connections eliminated the occasional Wi-Fi hiccups I experienced with other smart displays. Each Echo Hub’s built-in smart home hub supports Wi-Fi, Bluetooth, Zigbee, Sidewalk, Thread, and Matter devices, and having reliable wired backhauls ensures these connections stay stable even during network congestion across all three locations.
Perfect Placement Flexibility
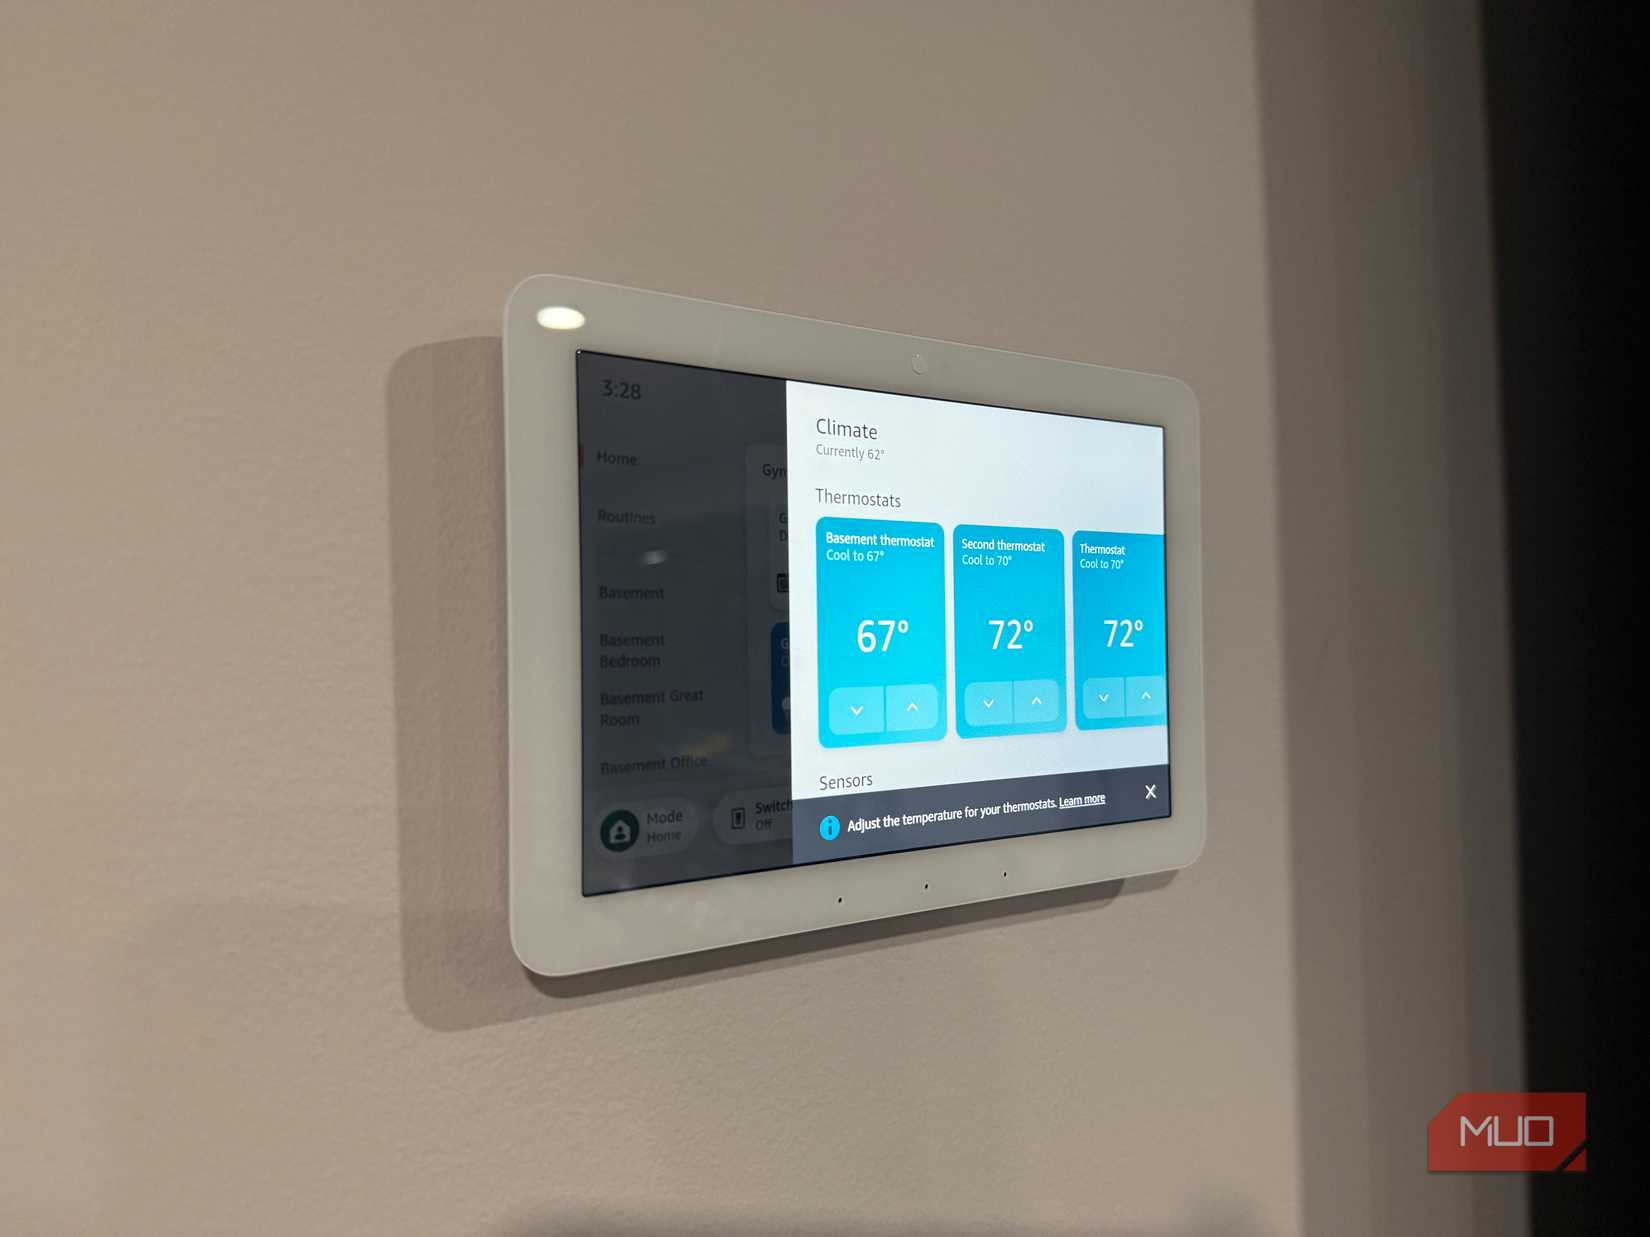
Without being constrained by outlet locations, I could position each Echo Hub in the optimal spot for smart home control in each area. I use the office Hub to handle lighting and climate control, the gym Hub for entertainment and viewing the Ring doorbell camera, and the hallway one serves as the main command center that’s easily accessible to family members throughout our basement.
Professional Installation Aesthetic
Three Ethernet cables, properly routed through the walls during construction, create a completely clean installation throughout the basement. No visible power adapters, no cable management issues—just three sleek smart home control panels that look like they belong in each space.
Future-Proofing Benefits
The PoE infrastructure I installed includes two additional Ethernet drops in my future great room and theater area. When I finish those spaces, I can easily add more PoE devices without any extra wiring work.
Who Should Consider PoE Installation
This installation approach makes the most sense if you:
- Are finishing unfinished space or doing new construction
- Already have or plan to install Ethernet runs for multiple devices
- Value a completely clean, professional installation aesthetic across multiple locations
- Want the most reliable network connection possible for your smart home hubs
If you just want to get a single Echo Hub running quickly without any construction work, the standard power adapter is definitely the simpler choice.
Performance After Six Months
Six months into using my three PoE-powered Echo Hubs, I’m convinced the extra installation work was worth it. All three systems have been completely reliable—no connectivity issues, no power problems, and the installations still look as clean as the day I mounted them.
The NP converters have all run continuously without issues, though they do get slightly warm during operation. Each Echo Hub works seamlessly with my Ring cameras, Philips Hue lights, Amazon Smart Thermostats, and various other smart home devices. The rock-solid wired connections ensure everything responds instantly when controlled through any of the three interfaces, and having dedicated control panels in each area of the basement has proven incredibly convenient.
The Bottom Line: Perfect for the Right Situation
If you’re finishing unfinished space or already have a network switch or router that supports PoE, powering multiple Echo Hubs over Ethernet delivers truly professional-looking installations that maximize both reliability and aesthetic appeal. The NP Type-C to Gigabit PoE Converters make the technical implementation straightforward, even if they add some bulk to each setup.
However, this approach is overkill for most users who just want to mount an Echo Hub and start controlling their smart home. The standard power adapter works perfectly fine and gets you up and running in minutes rather than requiring construction-level planning. However, you’ll have to deal with the visible power cord.
For my situation—finishing a basement with the opportunity to run cables properly and install multiple Hubs—PoE installation was absolutely the right choice, delivering the clean, professional smart home control system I envisioned throughout the space.


