


Cell phone signal boosters are the kind of tech that only crosses your mind only after an important call gets dropped, say that phone interview you were nailing, or a sales call with a prospective client. And we all know that taking calls in the car, you’re way more susceptible to driving through random dead zones where calls magically drop out. That begs the question: are there cell signal boosters for your car? Yes, they do in fact exist, and come in handy when taking important calls down those long, dusty roads miles away from civilization.
Dropped calls are an all-too-familiar reality for road warriors; the traveling sales reps and service technicians who spend their days on the road. You can easily picture it – you’re seconds away from closing on that much anticipated deal, and bam, the call drops. There goes that commission. Womp Womp.
Due to living near the mountains and winding canyons, dropped calls are unfortunately a part of my daily life. I have found myself often saying “I’m going to lose you here, I’ll call you back.” Having tested some of the best cell phone signal boosters, like the SureCall Flare 3.0, I was pretty eager to see how well the SureCall Fusion2GO XR Cell Phone Vehicle Signal Booster held up in those mountainous dead zones.
SureCall Fusion2GO XR review: Specifications
| Row 0 – Cell 0 |
SureCall Fusion2GO XR |
|
Uplink (MHz) |
698-716 / 776-787 / 824-849 / 1710-1755 / 1850-1915 |
|
Downlink (MHz) |
728-746 / 746-757 / 869-894 / 1930-1995 / 2110-2155 |
|
Maximum Gain |
50 dB |
|
Cable Type Outside |
RG-58U (17 feet) |
|
Cable Type Inside |
SC-174 (10 feet) |
|
Power Supply Cable |
18 feet |
|
Dimensions |
6.58 x 4 x 1.125 inches |
|
Weight |
1.43 pounds |
SureCall Fusion2GO XR Review: Setup and installation
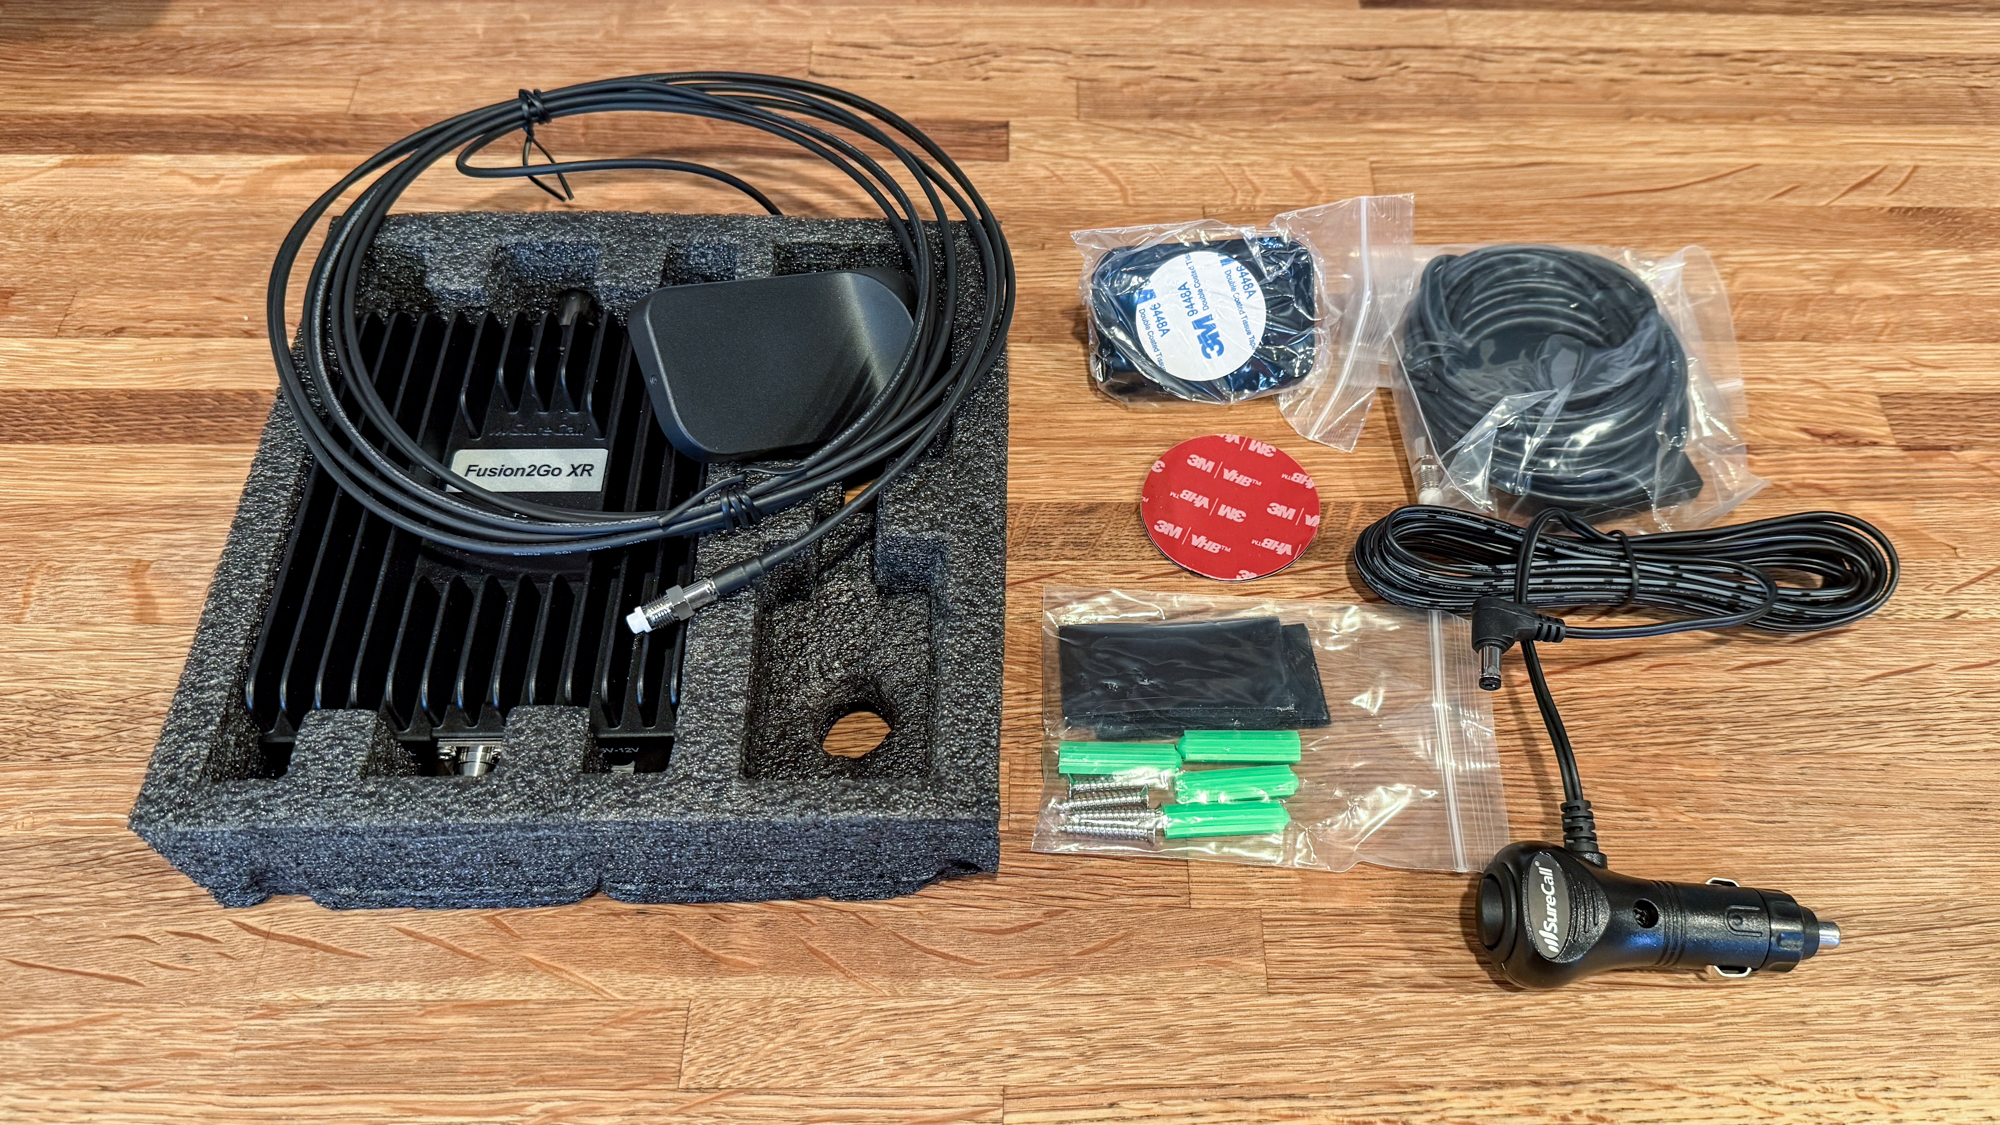

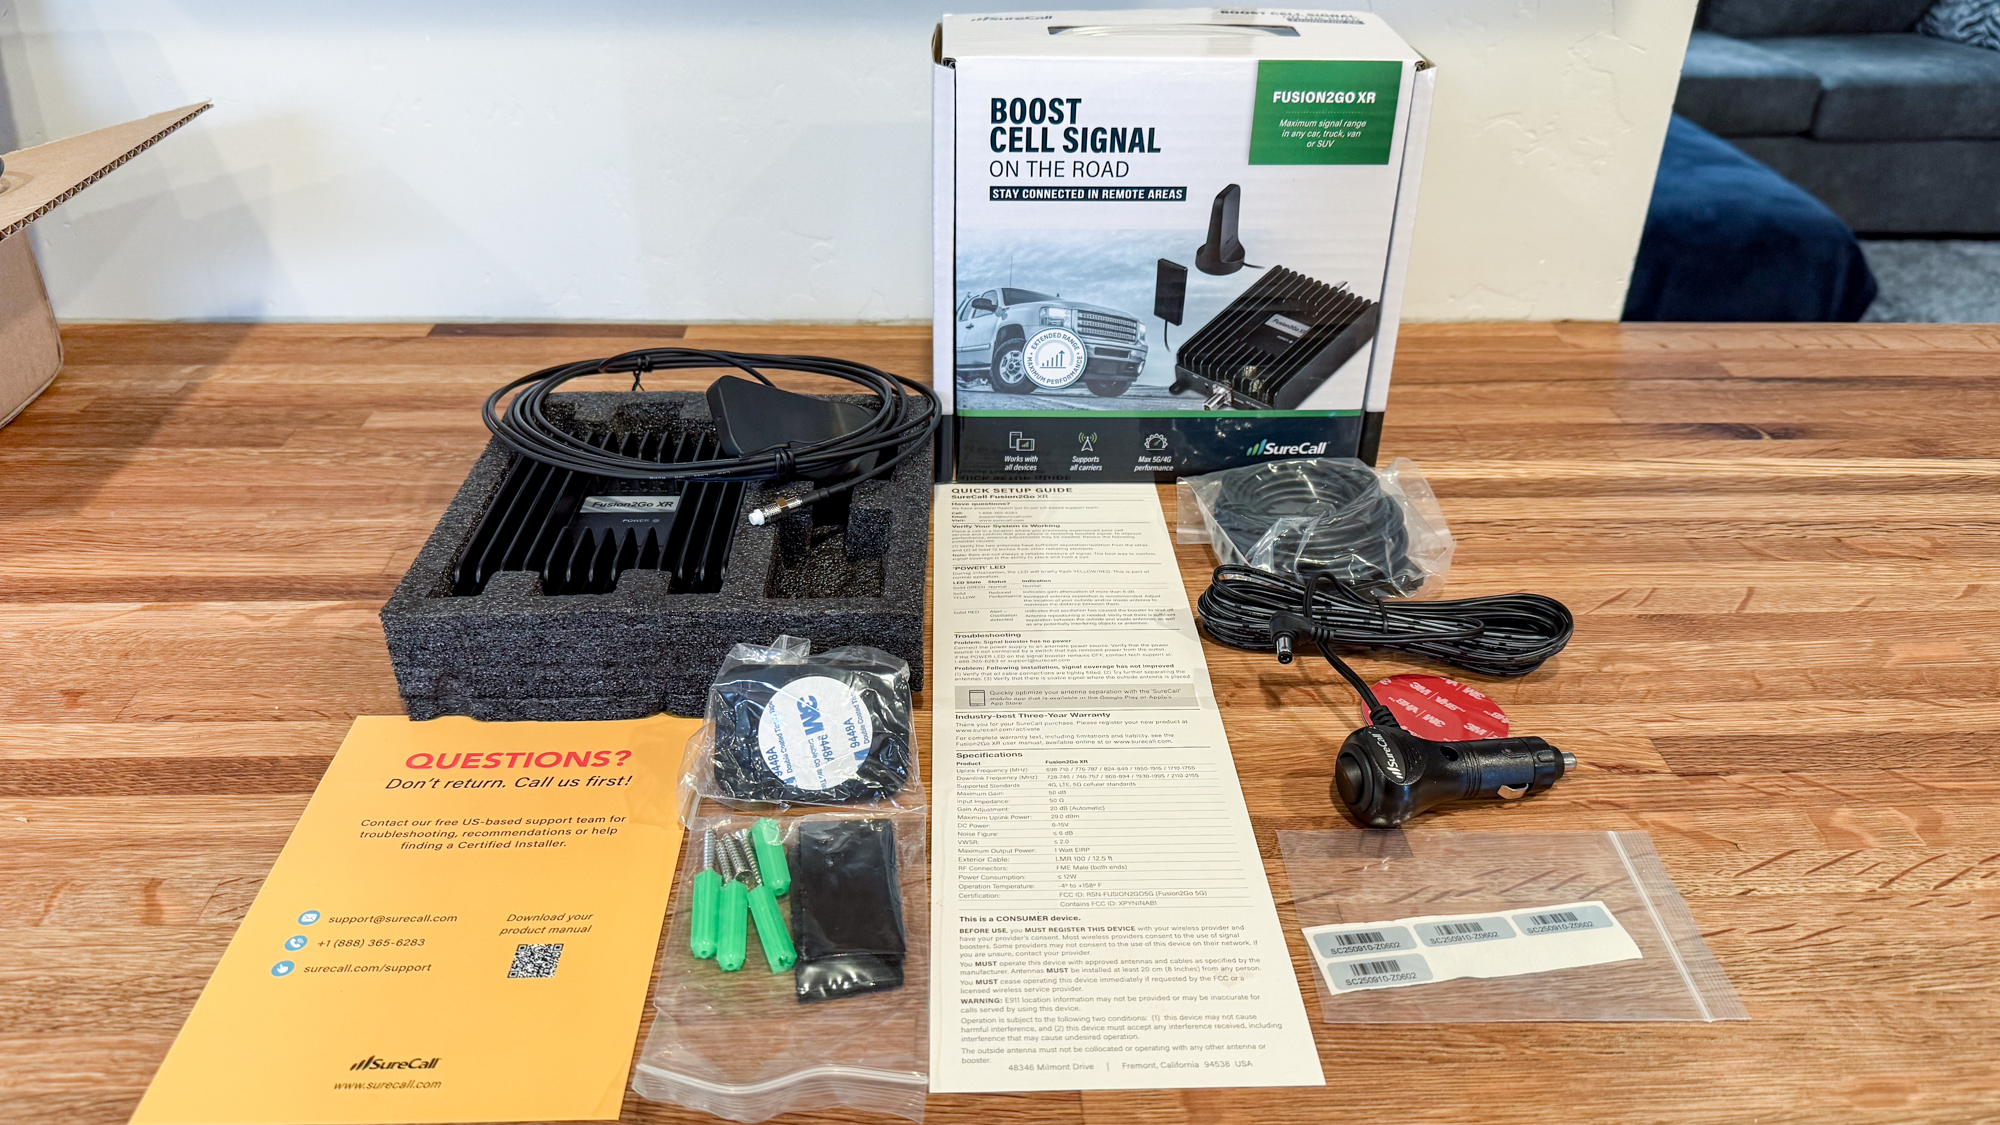
Inside the box you will find everything you need to get started. Included are installation instructions, QR code access to the manual, inside and outside antennas, signal booster, mobile device mount, DC power supply, and even adhesive patches (with screws and hardware for long term install).
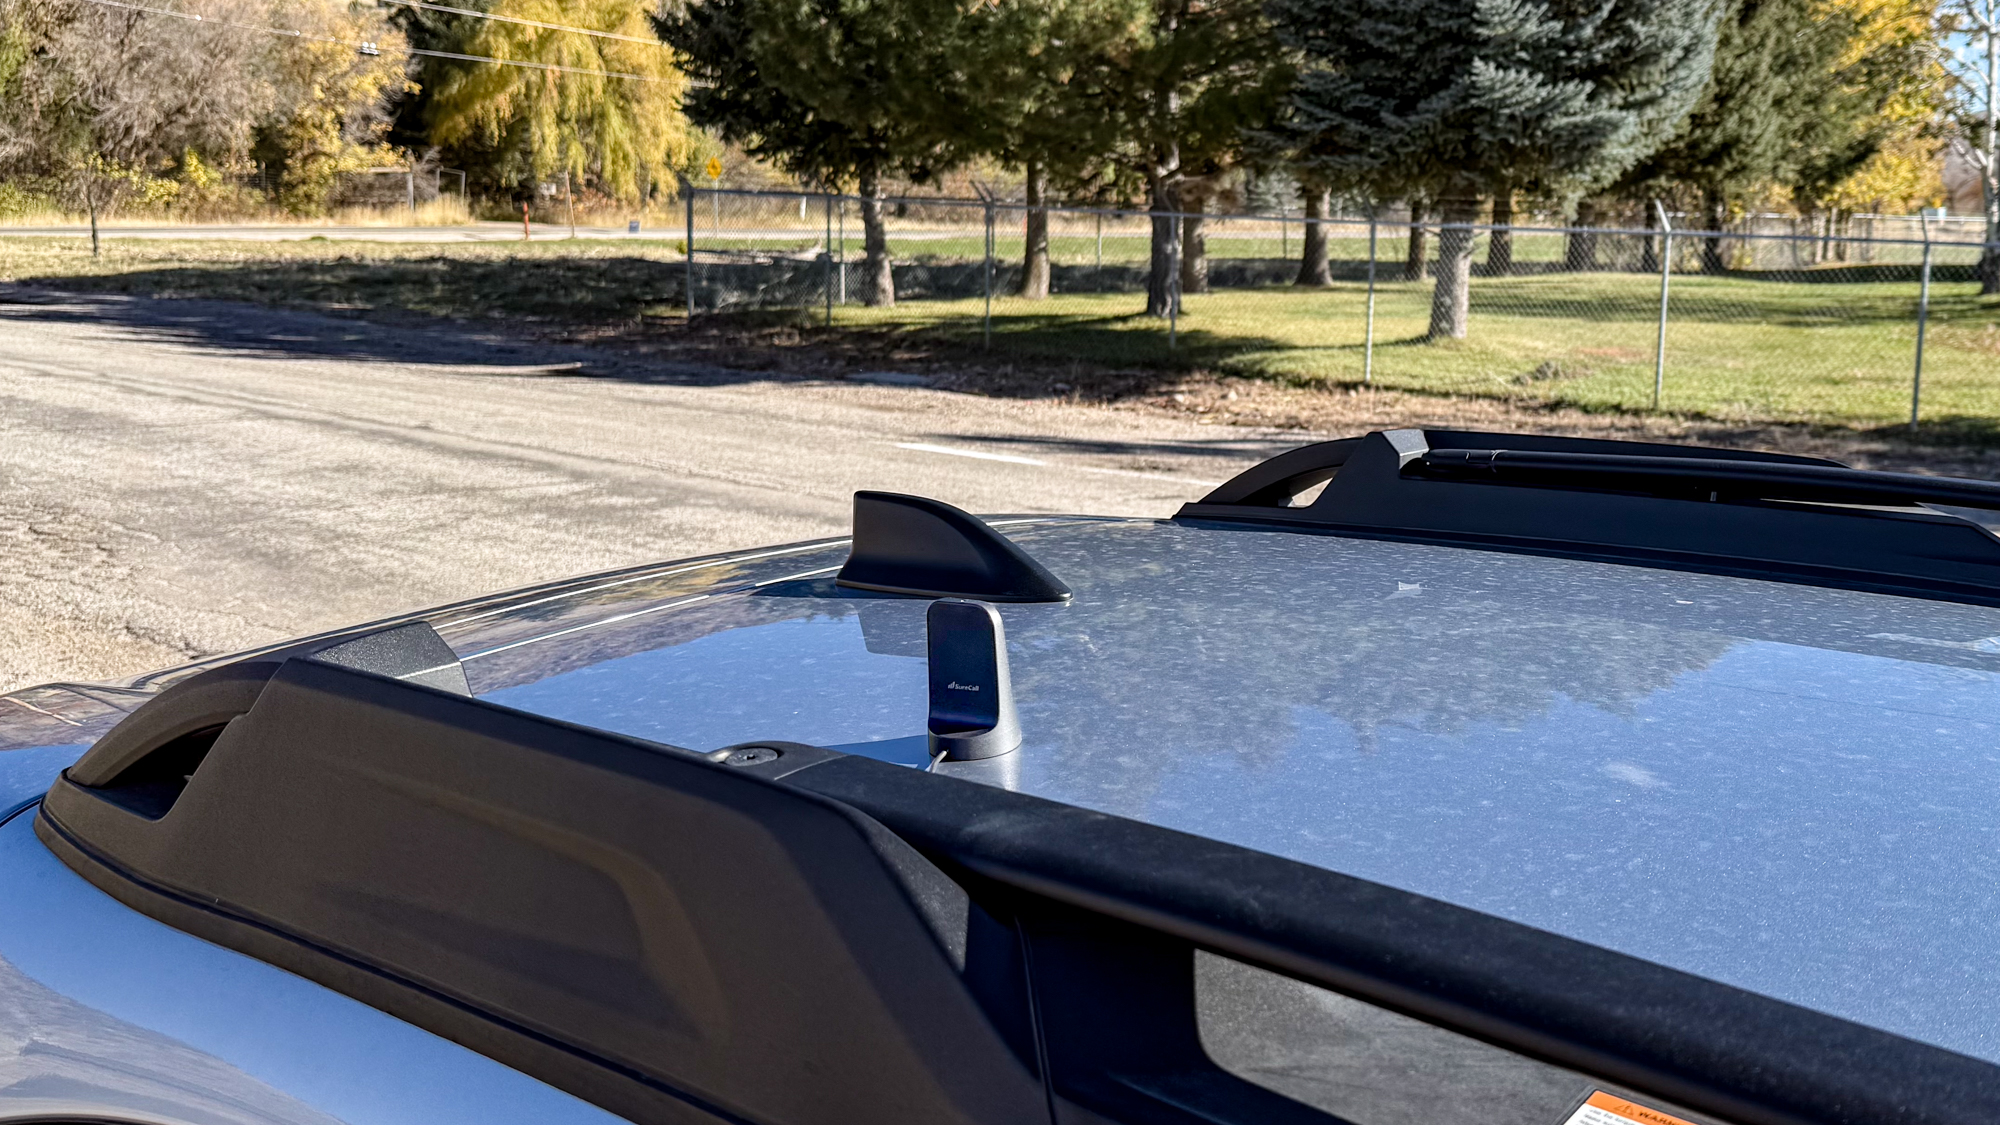
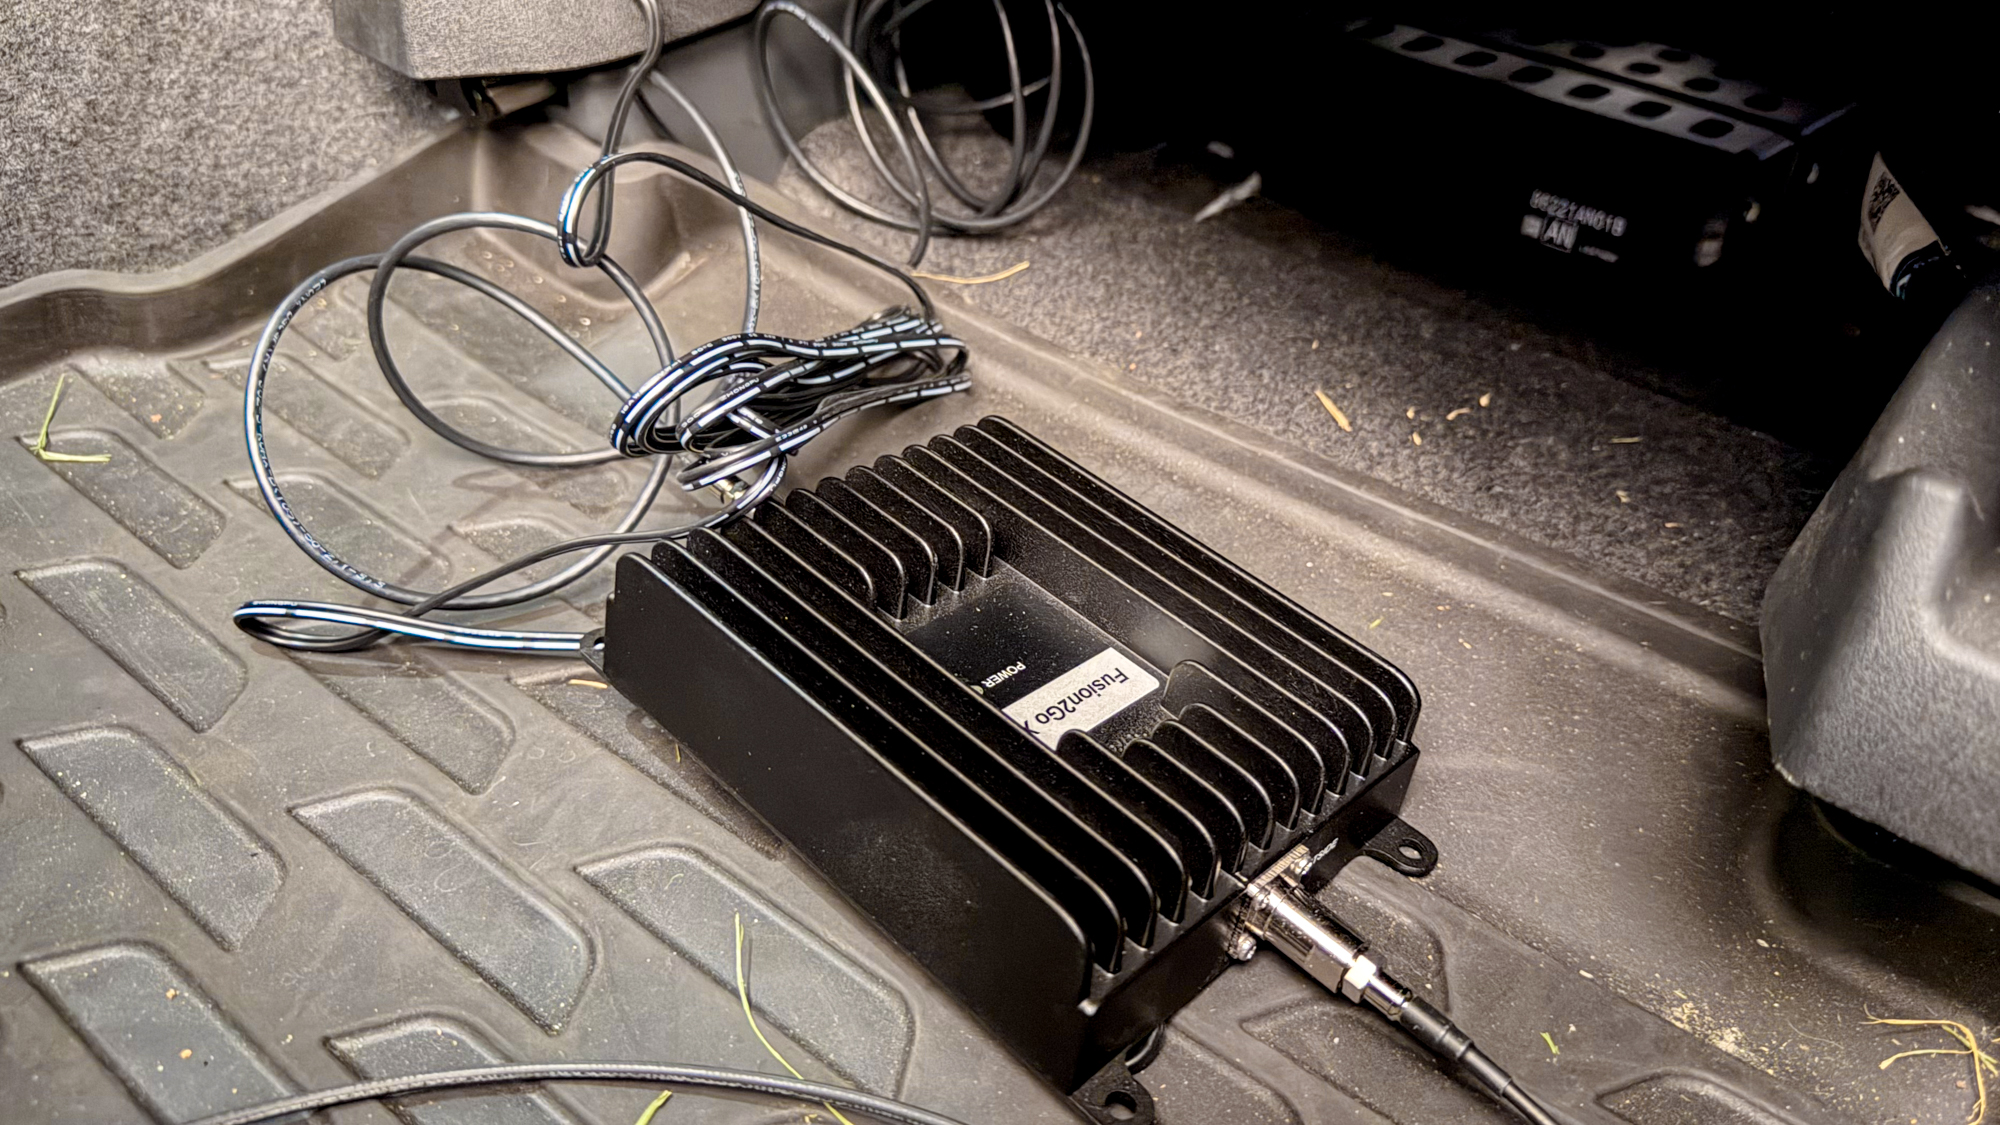
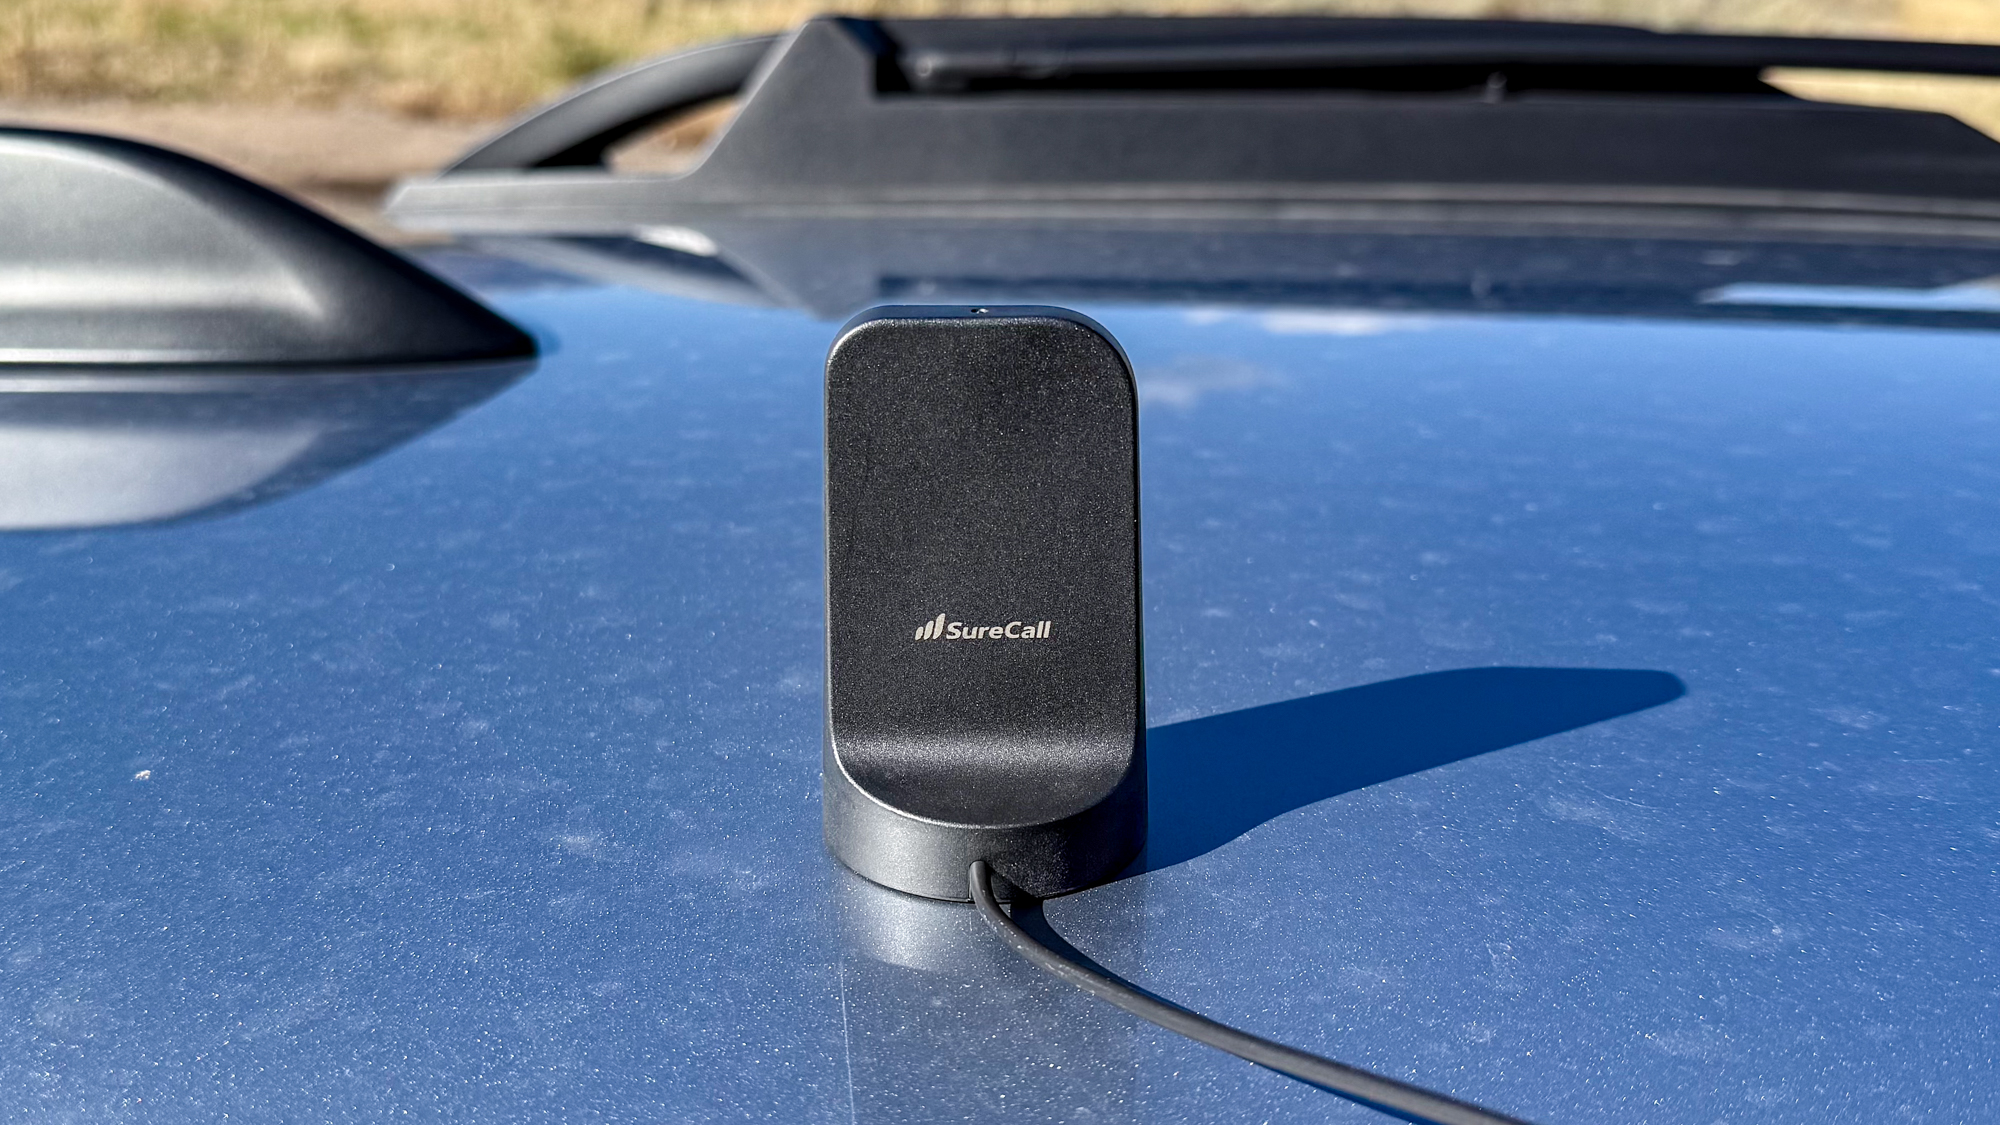
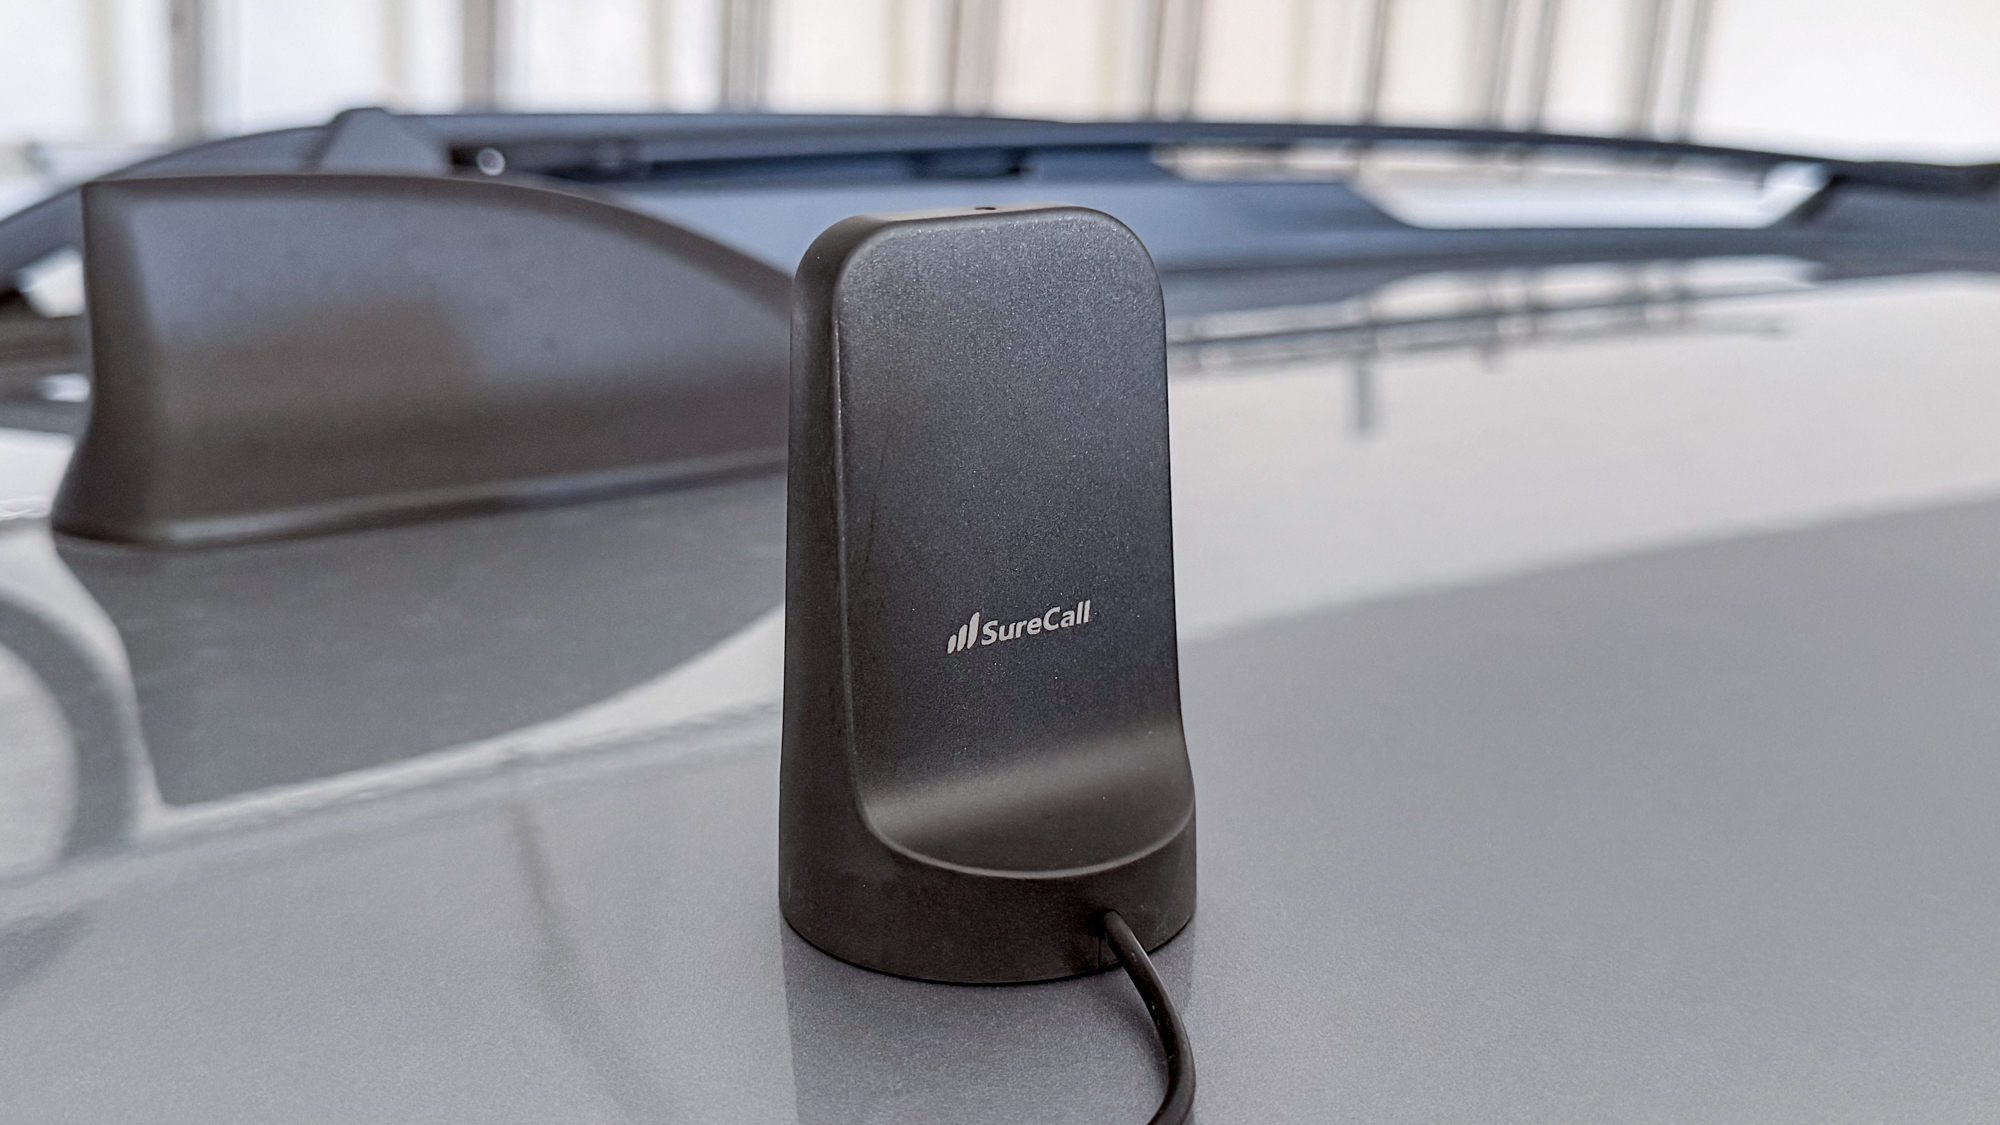
Following the instructions, I placed the outdoor antenna on the roof of my car about 12-inches away from the radio antenna. I ran the cables through my back passenger window. Note: this was for testing purposes only, the instructions advise you to run the cables through the seal of your car to conceal the wiring better. I placed the metal booster box under my passenger seat. The booster box is clearly labeled on both ends making it easy to decipher which antenna connection goes on either end.
For the indoor antenna, placement was tricky due to my car’s large console screen display. I opted to place it inside of my cup holders. This was a great solution as the antenna and my interior are both black, making it virtually undetectable. From there it was pretty easy to run the cable between the cup holders and passenger seat for direct connection to the booster box below.
The last step was plugging in the DC power to my 12V power outlet (commonly known as the cigarette lighter). The DC adaptor has a power switch button on the end with a small indicator light. Once clicked on, the light turns red indicating it is receiving power.
The booster box also has lights indicating power and functionality. After connecting the DC adaptor, the booster box should blink yellow/red followed by solid green if the device is functioning properly. Per the owner’s manual, if the device is blinking yellow, it indicates reduced performance potentially due to the spacing between antennas. If the device is blinking red it indicates antenna oscillation (antenna movement) occurred causing the booster to shut off. The instructions advise repositioning the antennas for both scenarios prior to powering on the device again.
I didn’t run into any issues with the installation and the booster powered on, blinking green instantly. The total install time was less than 10 minutes.
SureCall Fusion2GO XR Review: Performance
Before diving into the performance of the booster, let’s get the technical jargon out of the way. Cell signal strength is measured using a metric known as Reference Signal Received Power (RSRP). Another related metric, called Reference Signal Received Quality (RSRQ), is used to gauge the overall quality of the signal.
Here’s a breakdown of the measurements and what they mean:
- RSRP – Lower (more negative) numbers mean weaker signals.
- Good range:
- Excellent: ≥ -80 dBm
- Good: -80 to -90 dBm
- Fair: -90 to -100 dBm
- Poor: < -100 dBm
- Good range:
- RSRQ – Higher (less negative) numbers are better.
- Good range:
- Excellent: ≥ -10 dB
- Good: -10 to -15 dB
- Poor: < -15 dB
- Good range:
There is a field testing menu that you can get to on your iPhone to test cell phone signal strength. I used this to test my iPhone’s signal strength to get hard data (the numbers) when I was out and about. I’d take the numbers when my cell phone service was so bad I could no longer hold a call, and I’d record the numbers again after turning the booster on.
But I also did the practical thing: I called my wife to find places where the call dropped out repeatedly, then turned the booster on, called her back, and noted if I was able to hold the call without dropouts. Now that I have all the tech mumbo out of the way, let me dive into the actual performance.
Living so close to the canyons has some beautiful advantages, and for testing purposes, there are several areas riddled with dead zones. I called my wife and began my drive. It wasn’t 10 minutes into the canyon when we both noticed a decrease in service as we were beginning to break up. At this point the call had not completely dropped so I continued driving.
About 15 minutes later, now outside the canyon, on the other side of the mountain range from our house, our call dropped completely. Here, I pulled over and tested the booster. Below are my RSRP and RSRQ measurements:
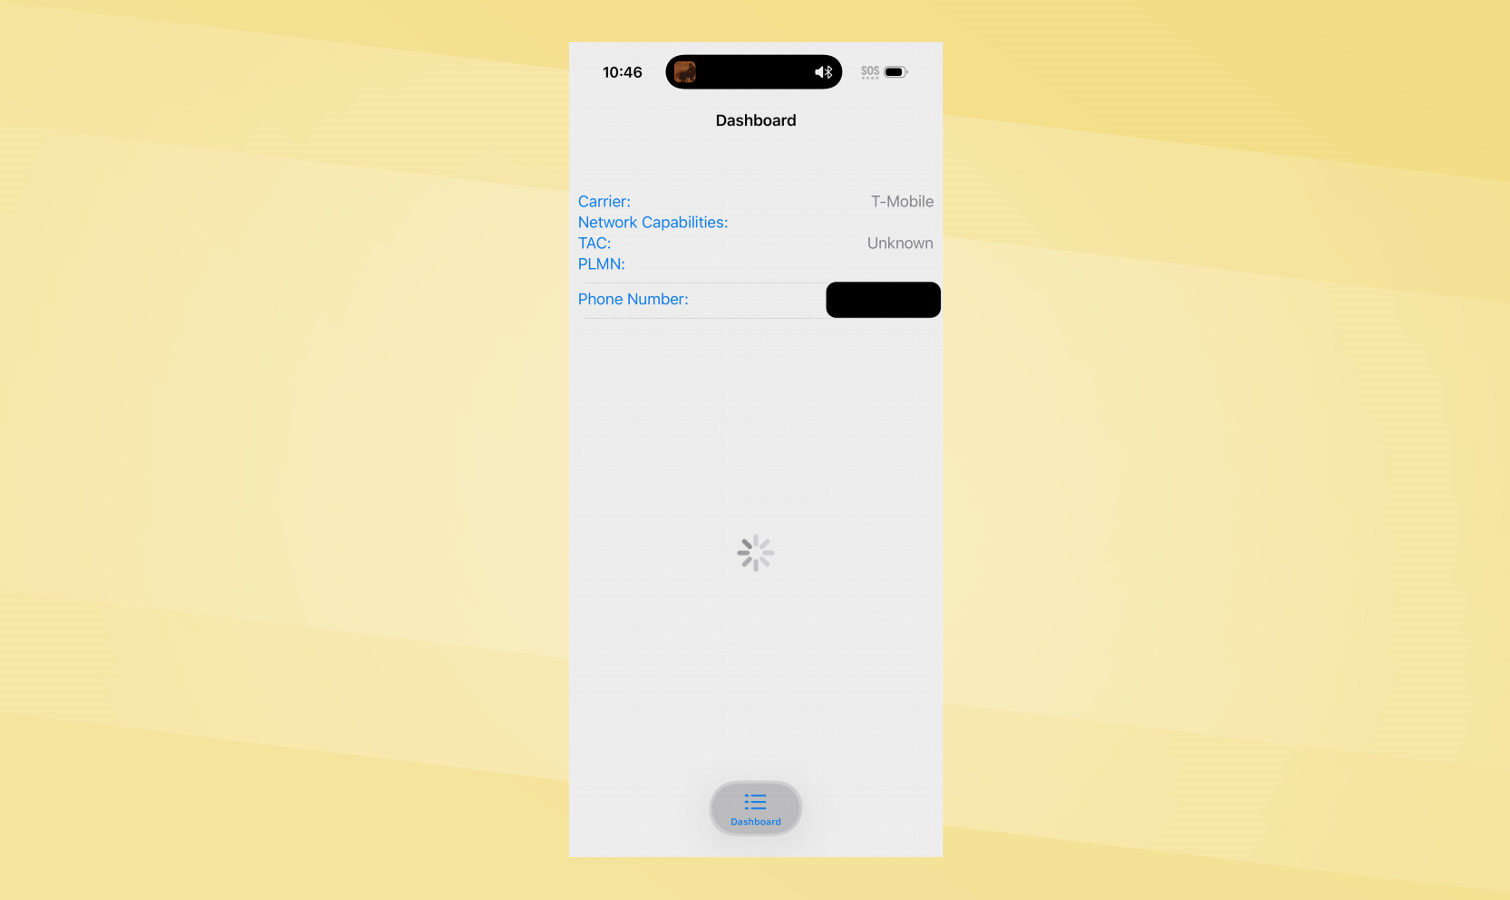

As you can see, they are non-existent because my service was completely gone. My iPhone entered SOS mode. I turned the booster on. After waiting a few seconds my phone signal was back — up to 3 bars — and I was able to call my wife back.
The call clarity was strong, especially considering I couldn’t even make the call moments before. The quality for the both of us was as good as driving in the city. To ensure it would work through the rest of the canyon, I left the booster on and kept driving. The call never dropped and the clarity remained the same.
Below are my RSRP and RSRQ measurements after powering the booster box:
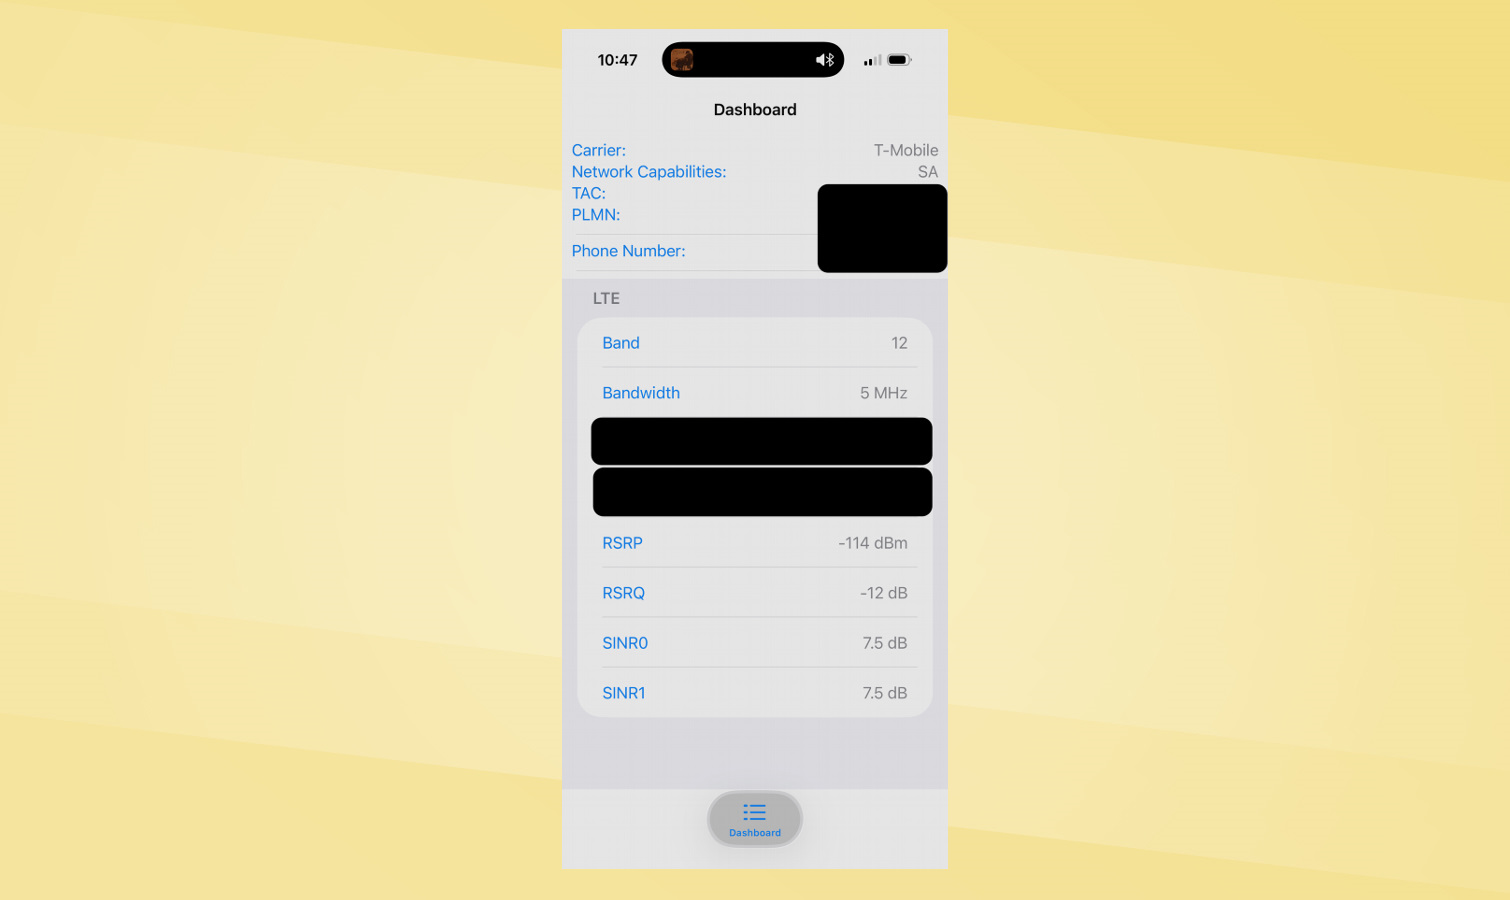
The RSRP was boosted to a 117 dBm initially and seconds later a 114 dBm placing it in the “fair” category, while the RSRQ was boosted to a -12 dB, placing it in the “good” category. Of course this doesn’t compare to the signal strength in the city, but it was no longer a dead zone and the call clarity was completely clear.
That being said, during the call I also attempted to send images and text messages to my wife, but they would not send. At first, I thought it was the size of the image files that was perhaps too much for transfer. So I tried regular texts and those wouldn’t go through either until I was out of the remote area.
Overall, I was pleasantly surprised to make and keep a call in areas I have driven for years knowing inevitably my calls would drop. But text messages were another story, and wouldn’t go through in the dead zone, regardless of my repeated attempts with the booster. It’s hard to say why it’s happening, but it could also be the network trying to reestablish the connections for those services.
SureCall Fusion2GO XR Review: Cost and value
Staying connected while on the road is a non-negotiable for some road warriors. This booster can certainly help in that department.
The SureCall Fusion 2Go XR retails for $549.99 from the manufacturer’s website. You can also find it on Amazon for the same price. Considering the amount of times I find myself driving in remote areas (which isn’t often), the price point seems steep, but for the off-times my family and I go on a weekend camping trip, or a day adventure kayaking this would allow us to stay connected and safe. That peace of mind alone is worth it.
I could also see the appeal for those driving to and from prospective clients, patients, or properties for their on-the-road job. Staying connected while on the road is a non-negotiable for some road warriors. This booster can certainly help in that department.
SureCall Fusion2GO XR Review: Verdict
For me, the price tag is a steep one — you can buy a Google Pixel 9a for less — but I can see the appeal and usefulness, especially for those who spend the majority of their time, and work, in their car. It can quickly be installed if you don’t mind the wiring being a little unsightly, or you can take a little more time and hide the wires behind seals and in-between seats.
The dead zone I had entered was devoid of any signal where making a call was impossible. I experienced my iPhone dropping the call, entering SOS mode. Then turning on the booster and gaining 3-4 bars within a minute all because of the power behind the SureCall Fusion 2Go XR signal booster.
The call was clear, but I still wasn’t able to send texts. The former alone, though, could be priceless for road warriors making a living in their cars.


