


In our previous tutorial, we taught our application to work with references and palettes. Now, it’s time to add more options for fine-tuning color and visual effects.
We will introduce a few new tools that allow for more flexible image manipulation. Additionally, we will explore a new color model, HSV, which works with colors differently than RGB and LAB. This model makes it easier to manipulate characteristics like hue, saturation, and lightness, which makes it particularly useful for adjusting colors in images. This innovation will open up new creative possibilities and opportunities for experimentation.
The full project code is available at this link.
We’ve already seen how limiting a palette can alter the appearance of an image.
For more flexible filter and image processing adjustments, we will add the ability to control the number of colors extracted from the image. Now, you can precisely set how many colors are highlighted in the image, allowing for better control over visual effects. This feature is especially useful when working with palettes for creating filters, as changing the number of colors applies to a wide range of design tasks.
The app now features a slider that lets you choose the number of colors extracted from the image (from 10 to 20). This adjustment impacts the filter results and helps achieve better visual effects.
<div style={{ marginBottom: 12 }}>
  <label>Number of Colors</label>
  <input
    type="range"
    min="10"
    max="20"
    value={colorCount}
    onChange={(e) => setColorCount(Number(e.target.value))}
    style={{ width: "100%" }}
  />
</div>
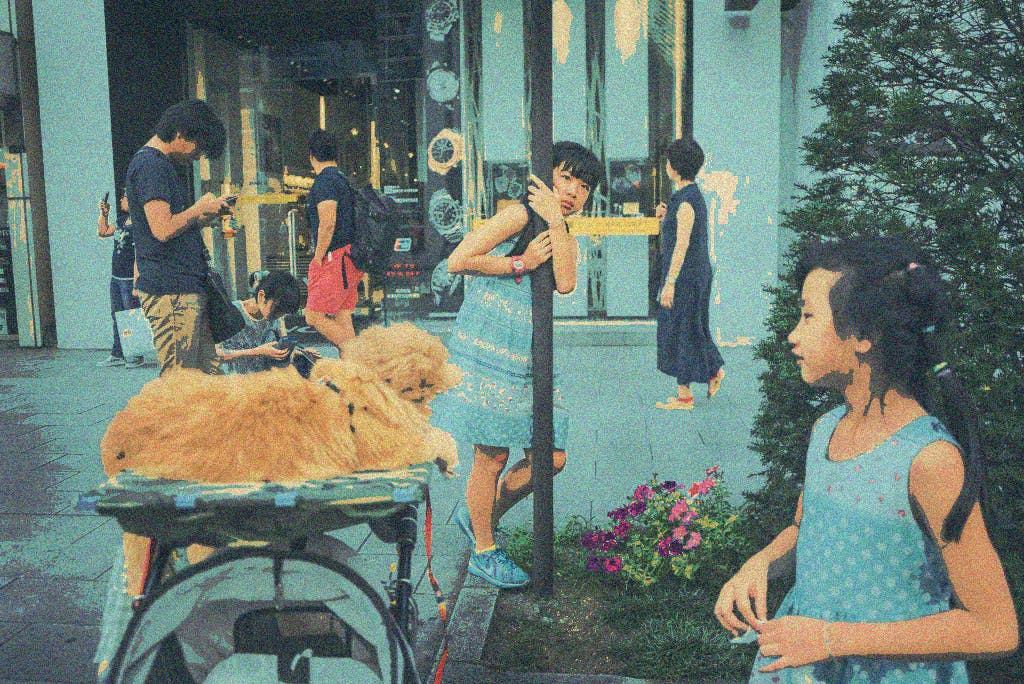
We will be experimenting with the stunning photograph by So Sasaki for Void Tokio. It features a wide range of colors and shades, making it the perfect subject for our exploration.


Below you can compare what the image looks like with a palette of different sizes.


Filter Intensity Slider
To make the filtering process more flexible, we will add a slider to control the intensity of the palette application to the image. This slider allows you to adjust the balance between the original image and the palette.
Simply choose the desired filter intensity and click “Apply filter”.
<div style={{ marginBottom: 16 }}>
  <label style={{ display: "block", marginBottom: 6 }}>Filter Intensity</label>
  <input
    type="range"
    min="0"
    max="100"
    value={intensity}
    onChange={(e) => setIntensity(Number(e.target.value))}
    style={{ width: "100%" }}
  />
</div>

How does it work?
When the intensity is set to 100%, the image will be fully transformed using the colors from the selected palette. The lower the intensity value, the less influence the palette has on the image, allowing you to maintain more of the original colors.
HSV Color Model
HSV (Hue, Saturation, Value) is one of the most popular color models, often used to represent color in terms of its hue, saturation, and brightness.
- Hue (color): This represents the primary color (such as red, green, blue, etc.), measured in degrees from 0 to 360.
- Saturation: This indicates the intensity of the color. Saturation is affected by the amount of gray in the color: 100% is a fully saturated color, and 0% is gray.
- Value (brightness): This represents how bright the color is. A value of 0% gives black, while 100% is the brightest version of the color.
Differences from RGB and LAB:
-
Unlike RGB, where colors are combined based on the intensities of red, green, and blue, HSV is based on human visual perception. This makes it more intuitive for tasks like color correction and design work.
-
Compared to LAB, which uses a more complex mathematical model for precise color representation across different lighting conditions, HSV is more intuitive and user-friendly.
Sample code for converting RGB to HSV:
function rgbToHsv(r, g, b) {
  r /= 255;
  g /= 255;
  b /= 255;

  const max = Math.max(r, g, b);
  const min = Math.min(r, g, b);
  const delta = max - min;

  let h = 0, s = 0, v = max;

  if (delta !== 0) {
    s = delta / max;
    if (r === max) {
      h = (g - b) / delta;
    } else if (g === max) {
      h = 2 + (b - r) / delta;
    } else {
      h = 4 + (r - g) / delta;
    }
    h *= 60;
    if (h < 0) h += 360;
  }

  return [h, s * 100, v * 100];
}
Below are examples of images in the same palette, but in different color models.

Contrast Slider
Contrast refers to the difference between the lightest and darkest points in an image. Adjusting the contrast allows you to either enhance or reduce this difference. The higher the contrast, the more pronounced the light and dark areas will be.
How does contrast adjustment work?
When contrast is increased, the dark areas of the image become even darker, and the light areas become even brighter. This effect can make the image appear more vivid and sharp, enhancing its visual impact.
Example code for changing contrast:
const applyContrast = (r, g, b, contrast) => {
  const contrastFactor = (259 * (contrast + 255)) / (255 * (259 - contrast));
  r = contrastFactor * (r - 128) + 128;
  g = contrastFactor * (g - 128) + 128;
  b = contrastFactor * (b - 128) + 128;
  return [r, g, b];
};

Algorithm Description:
The contrast algorithm uses a factor that depends on the current contrast value. This factor is applied to each color component (red, green, and blue), adjusting their brightness based on the contrast level.
Noise Slider
For those who want to have a little fun, we’ve added a noise slider. Adding noise to an image helps create a vintage photo effect or makes the image feel more “alive”. This effect is used to conceal imperfections or add an artistic touch to the image.
How does the noise work?
The noise slider allows you to control the amount of random variations applied to the color of each pixel in the image. The higher the noise value, the greater the amount of random changes applied to the image.
When noise is added to an image, small, random variations are introduced to the RGB values of each pixel, resulting in a grainy effect. This effect can be subtle or pronounced, depending on the amount of noise applied. This can help give the image a more textured look or simulate the appearance of an old, low-resolution photo.
const applyNoise = (r, g, b, noise) => {
  r += Math.random() * noise - noise / 2;
  g += Math.random() * noise - noise / 2;
  b += Math.random() * noise - noise / 2;
  return [r, g, b];
};


Algorithm Description:
A random value is added to each pixel within a specified range. This creates the effect of random color changes, giving the image a noisy or grainy appearance. In our case, we’re simply simulating distortions, which don’t have any relation to real film grain or noise. However, the earliest digital filters (such as those used in early mobile phones like the Sony Ericsson W810) worked on the same principle.
By controlling the amount of noise, users can experiment with different levels of intensity to achieve various creative effects or simulate imperfections in a photograph.
And of course, we’ve added a Reset Settings button to clear all filters and revert to the original image.


Throughout our articles, we’ve delved into the fundamentals of color correction and explored various tools and techniques for applying it. We’ve examined how to extract and adjust color palettes, the effects of contrast, saturation, and noise, and how to work with different color models — RGB, LAB, and HSV.
Color correction is a crucial aspect of image processing, enabling us to enhance visual perception, highlight certain elements, and achieve harmony between colors. We’ve demonstrated how adjusting the number of colors in a palette or modifying contrast settings can completely transform an image, making it more expressive and dynamic.
It’s important to note that color and contrast adjustments not only affect the appearance of an image but also influence how it’s perceived. This makes color correction not just a technical process but also an art form.


