Ever scrolled past a video because the sound was terrible? You’re not alone. Viewers consider poor audio quality just as big a turn-off as blurry footage. Clear, crisp sound can make your content feel professional and keep your audience engaged.
In the world of social media, great audio helps your videos stand out from the noise (literally). And while crafting a broader social media content marketing strategy is important, audio quality is a key piece of the puzzle that you can’t afford to ignore.
The good news is you don’t need to be an audio engineer to get noticeably better sound. In this guide, we’ll cover seven practical tips from recording hacks to editing magic to level up your audio. We’ll also highlight common recording mistakes to avoid and best practices for repurposing your audio across platforms.
Let’s dive in and make your videos sound as awesome as they look!
1. Use a High-Quality External Microphone
Built-in mics on phones or cameras often pick up too much background noise, like echo or traffic. This can make your voice sound far away or unclear.
An external mic focuses on your voice and blocks out unwanted sounds. For example:
- A clip-on mic (lapel mic) is great for talking videos.
- A USB mic is perfect for recording at a desk or on your computer.
- A shotgun mic works well with DSLR cameras for clear sound from one direction.
Tip: Keep the mic close to your mouth (about 6–8 inches). Use a pop filter to reduce sharp sounds and a wind cover if you’re outdoors. Small accessories like these make a big difference.
Using a good mic the right way can instantly boost your audio quality and make your videos sound much more professional.
2. Optimize Your Recording Environment
You don’t need a studio to get great audio just a quiet, well-chosen space. Turn off noisy appliances, close windows, and avoid hard, empty rooms that cause echo. Soft furnishings like carpets, curtains, and cushions help absorb sound.

A closet full of clothes? Surprisingly great for voice-overs — it’s quiet and naturally soundproofed. Recording outdoors? Pick a calm time, use a windscreen, and shelter your mic from the breeze.
Always listen before you record. Clean audio at the source saves hours in editing — and your viewers will notice the difference.
3. Do a Sound Check and Monitor Your Audio
It’s frustrating to finish recording a video only to find out later that the audio was too quiet or had background noise. Avoid this by doing a quick sound check first.

Wear headphones while recording so you can hear exactly what the mic is picking up. You’ll spot problems like buzzing, echo, or rustling sounds before it’s too late.
Watch your audio levels. Most devices have a meter that shows how loud the sound is. Aim for the peaks to hit around -12 dB. If the levels are too high and turning red, lower the mic’s input. If they’re too low, raise it or move the mic closer.
Record a short test clip, listen to it in headphones, and fix any issues before you film the full video.
Just a few extra minutes of checking can save you hours of frustration later. Always monitor your sound as you go for the best results.
4. Edit and Enhance Your Audio in Post-Production
Once you finish recording, make your audio sound even better with a little editing.
Start by removing background noise like fan sounds or low hums. Most editing apps (like Audioenhancer.ai or Noiseremover.net) have a Noise Reducer feature that helps with this. Just don’t overdo it too much and it can make your voice sound strange or unnatural.
Next, use EQ (equalizer) to adjust the tone of your voice. You can lower the deep bass to remove rumbles and slightly boost the mid-range to make your voice clearer.

Add compression to keep your volume even. This makes loud parts quieter and soft parts louder, so your voice stays consistent throughout the video. A light compression setting (like 2:1 ratio) usually works well.
You can also normalize your audio at the end to raise the overall volume without causing distortion. This keeps your sound loud enough for social media.
Finally, trim out long pauses, clicks, or strange sounds. A few simple edits can make your audio sound clean and professional.
With practice, editing your audio will become a quick and easy step that makes a big difference.
5. Balance Your Music and Sound Effects with Voice
Music and sound effects can make your videos more exciting, but they should never overpower your voice. Viewers want to hear what you’re saying, so keep background music low and clear.
Starting by turning the music volume way down when someone is speaking — about 20–30% of its full volume is a good place to start. You can also use an editing tool with ducking, which automatically lowers the music when your voice comes in.
Sound effects should match the video and be used carefully. A small sound like a “pop” or “whoosh” can be fun, but if it’s too loud, it can distract people.
Keep your audio levels consistent across your whole video. Don’t let one scene be loud and the next be quiet. If switching between clips, use a soft fade to make the change smooth.
Before posting, listen to your video on different devices like headphones or a phone speaker. This helps you catch issues that your editing software might not show.
In short: music and sound effects should support your message, not fight with it. If your voice is clear and your background audio is balanced, your video will sound more professional and enjoyable.
6. Improve Audio with AI Tools
Technology to the rescue! In recent years, AI-powered audio tools have made it easier than ever to fix or enhance your sound with minimal effort.
Audioenhancer.ai
The first tool to put on your radar is AudioEnhancer.ai, an online Audio Enhancer platform that uses advanced algorithms to reduce noise and boost clarity in one click. Simply upload your video or audio file, and it will automatically remove background hiss, hum, and echo, giving you a cleaner sound.
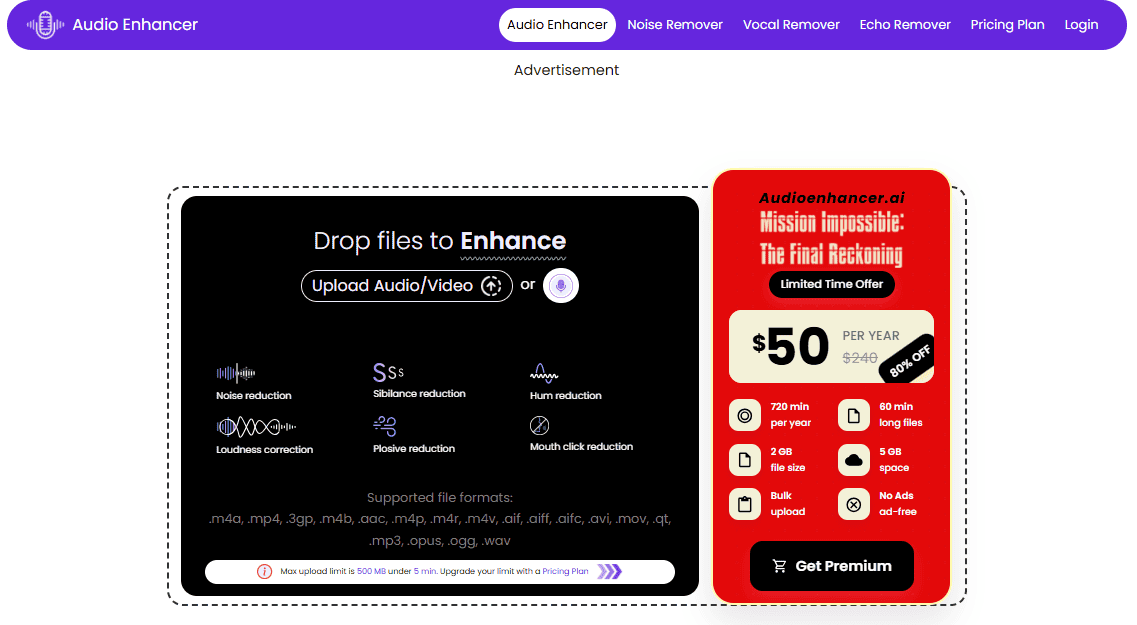
This can be a lifesaver if you recorded something in a noisy setting. For instance, it can turn a clip with mild traffic noise into a clear voice recording by stripping away that background sound. Another impressive (and free!) tool is Noiseremovernet’s Reduce noise..
It’s basically an AI filter that makes your voice recording sound as if it were recorded in a professional studio. People have used it on muffled audio and been amazed to hear a rich, broadcast-quality voice after the AI processing. Keep in mind these tools can sometimes introduce a slightly “processed” tone (or robotic sound) if overdone, so use them judiciously. But for moderate issues, they work like magic.
Descript
AI tools make it easy to fix noisy audio without needing expert skills. For example, Descript’s Studio Sound removes background noise and echo, making your voice sound like it was recorded in a quiet studio.
Another great tool is Krisp, which cancels out background noise like barking dogs or traffic during live calls or recordings. If you’re editing videos, platforms like Kapwing or Canva Video offer one-click noise removal powered by AI.
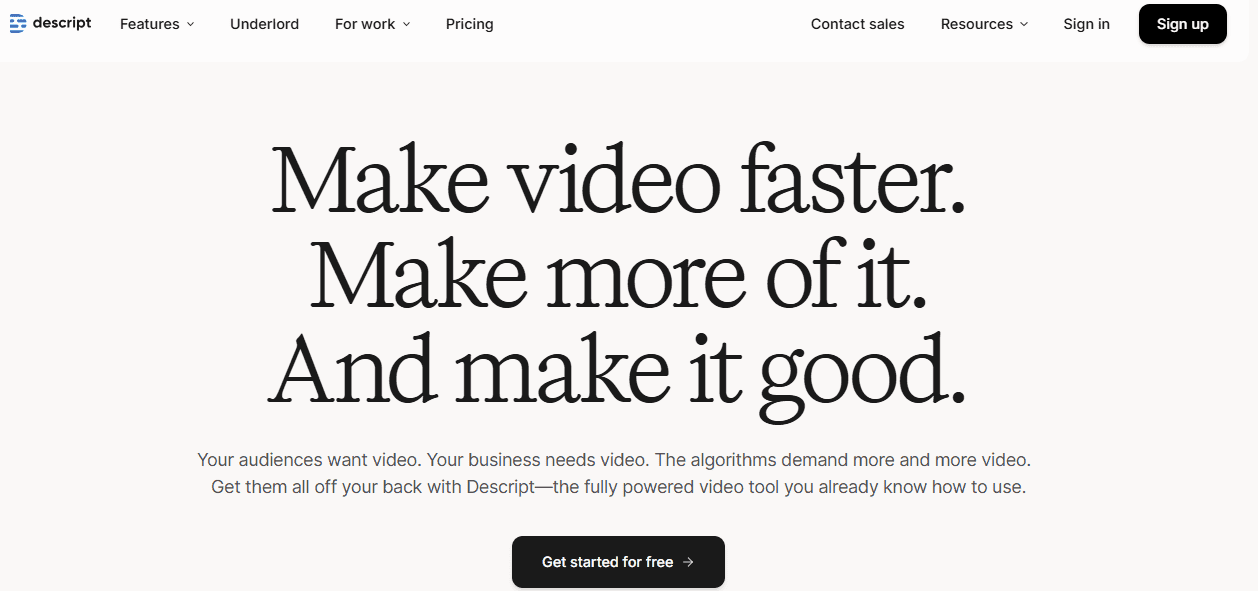
These tools work automatically and save time, but always listen to the final result. Sometimes, the audio can sound too processed. If that happens, you can mix in a little of the original sound to make it feel more natural.
AI tools are a huge help if you’re not an audio expert. Think of them as your personal audio assistant making your videos sound cleaner and more professional with just a few clicks.
7. Keep Your Audio Consistent Across Clips and Platforms
When you combine multiple clips in one video, try to keep the sound quality and volume even throughout. If one part is recorded with a high-quality mic in a quiet room, and the next part is from a noisy café using your phone, the difference will distract viewers. Try to record in similar conditions, or use tools like noise reduction and EQ to fix the noisy clips so they sound closer to the clean ones.
Also, check your audio levels. One part of the video shouldn’t be much louder or quieter than the rest. Use compression and normalization during editing to balance everything out. Before posting, listen to your whole video from start to finish. If you need to change the volume while watching, your audience will too so make adjustments as needed.
Now think about the platform where your video will be uploaded. Some platforms, like YouTube, support better audio quality. Others, like Instagram or TikTok, compress the audio. This means your clear voice might sound a little dull after uploading. The solution? Always upload the best quality audio you can. Starting strong gives you the best final result, even after compression.
Each platform has its own style too. A quick drop in audio might be fine for TikTok if it fits a trend, but it could seem like a mistake on Facebook. Some creators even make TikTok videos louder since many people watch on phones in noisy places. Always preview your video on the platform where you plan to post. Make sure the voice is clear, and music or sound effects aren’t too loud or too soft.
Also, when reposting content, adjust it for the new platform. For example, if you reuse an Instagram video on TikTok, consider adding trending TikTok music through the app to help it reach more viewers.
Good sound should be part of your brand. Keep your audio quality consistent across all your platforms so your audience knows what to expect clear, clean, and professional audio every time.
Common Mistakes to Avoid in Audio Recording
Even seasoned creators slip up on audio. Here are some common mistakes that you should steer clear of (we’ve all been there, but now you know better!):

- Relying on the Built-In Mic (or Placing the Mic Too Far): Recording with your camera or phone’s internal microphone, especially when it’s far from your mouth, results in distant, hollow sound with tons of ambient noise. Always use the best mic available and keep it close to the sound source.
- Ignoring Background Noise: Don’t assume a little background noise is no big deal. AC units, street noise, or fridge buzz can ruin an otherwise great take – and such constant noises are very hard to completely remove later.. Take a moment to secure a quiet setting (or turn off that appliance) before recording.
- Not Monitoring or Testing First: This is a biggie. If you fail to do a quick test recording and monitor with headphones, you might miss problems until editing – when it’s too late. Skipping the sound check could leave you with footage that has glitches, mic rustle, or other issues you can’t fix. Test, test, test!
- Recording Levels Too Hot (Clipping): It’s easy to get in the zone and speak up, only to have your audio distorted because the input level was set too high. Clipped audio (where the waveforms hit the max and “flat line”) sounds bad and cannot be truly fixed in post. Aim for safe levels when recording (peaks around -12 dB), and avoid the red overload zone.
- Overdoing the Filters and Effects: Yes, we just told you about noise reduction and compression but using these tools aggressively can backfire. For example, cranking noise reduction to the max might introduce underwater-like artifacts in your sound. Over-compression can make audio sound lifeless. Use enhancements sparingly and listen critically so you maintain a natural sound.
- Letting Music Drown Out Your Voice: This often happens in edits – you add a cool music track but leave it too loud. If viewers can’t hear you clearly because the music or sound effects are blaring, the message is lost. Always mix background audio to support your voice, not compete with it.
- Not Using Captions When Needed: This isn’t a recording mistake per se, but it’s related to audio usability. Many people watch videos on mute (up to 75% of mobile viewers often keep videos muted). If your video heavily relies on audio, not adding captions or on-screen text can alienate those viewers. Don’t assume everyone will hear your awesome audio make your content accessible. (This is more of a distribution mistake, but an important one to note).
Avoiding these pitfalls will set you well on your way to consistently good audio. As the saying goes, “an ounce of prevention is worth a pound of cure” , spend a bit of effort to record it right and you won’t find yourself tearing your hair out trying to fix audio disasters later.
Best Practices for Repurposing Audio Content Across Platforms
- 1. Match the Platform’s Format
Each platform handles audio differently. Instagram Stories often play muted, so add captions. TikTok favors in-app sounds, so use their music library when re-uploading. Always check how your audio sounds after uploading and adjust volume or edits if needed. - 2. Use the Highest Quality Source
Never reuse audio by ripping it from a compressed video. Go back to the original file for the cleanest sound. Export using high-bitrate formats like AAC or MP3 to keep your content sounding professional on every platform. - 3. Add Captions for Accessibility
Many users scroll with the sound off. Use captions or text overlays to highlight your key message. Captions boost engagement, improve accessibility, and make sure your content is understood with or without audio. - 4. Avoid Watermarks and Use Native Audio
Platforms prefer original content. Remove watermarks and replace outside music with native tracks to avoid getting buried by the algorithm. Always tailor your content to fit the audience and style of each platform. - 5. Monitor Performance and Adjust
Use scheduling tools to post across platforms but check audio after publishing. Watch for sync issues or volume problems. Track which styles perform best on each app and refine your strategy accordingly.
By following these practices, you’ll ensure that when you give your content a second (or third) life on a new platform, it continues to sound top-notch and is optimized for the audience and algorithms in play.
Repurposing is smart. You get more mileage from your content but it works best when done thoughtfully. Good audio quality should persist across every platform, and slight adjustments in presentation will help your message hit the mark whether it’s heard on a podcast, watched in a feed, or encountered in a TikTok swipe session.
FAQ (Frequently Asked Questions)
Q: Why is audio quality so important if many people watch videos on mute?
A: It’s true, a large chunk of social media videos are watched on mute (up to 75% on mobile). But those viewers who do listen will judge your content heavily on sound. Great audio also boosts the professionalism of your brand – even on mute, clear audio tends to mean clear auto-captions (and caption accuracy improves). Plus, if you ever repurpose that video into a format where audio is required (like a YouTube video or podcast), you’ll be glad you recorded high-quality sound. In short, you want the best of both worlds: a video that can captivate on mute (with captions), and one that sounds awesome with audio on.
Q: How can I improve my audio if I only have my smartphone and no fancy equipment?
You can still get decent audio with a smartphone! First, use what you have wisely – the earbuds that came with your phone often have a built-in mic, which, when held close, can be better than the phone’s internal mic. More importantly, follow Tip #2: find the quietest, least echoey space you can (closets, cars, or rooms with lots of upholstery are great). Speak close to the phone’s mic (but avoid blowing air into it). Do a test recording and listen back on headphones to gauge quality. You can also leverage free apps and AI tools: record via an app like Dolby On (which automatically enhances audio) or use Adobe Enhance Speech online by uploading your recording for a quick quality boost. While an external mic is ideal, good technique and environment can make your phone recordings sound surprisingly clear.
Q: My audio has a constant hiss in the background. Can I fix that after recording?
A constant hiss (often from things like HVAC systems or electronics) can often be reduced with post-production tools. Most audio editing software has a Noise Reduction or Noise Removal effect. You typically sample a portion of audio that has only the hiss (no speech) as a “noise print,” then the software subtracts that from the whole clip. This works well for steady noise like hiss or hum. Just be careful not to overdo it – otherwise your audio might start to sound muffled or distorted. Another trick: use an equalizer to attenuate the specific frequency band of the hiss (many hiss noises are in the higher frequency range). Reducing the highs a bit can help. And for future recordings, try to eliminate the source of hiss (turn off noisy devices, check cable connections) and record with proper gain levels. But yes, with the right tools, that pesky hiss can be tamed after the fact in many cases.
Q: What level should I set my audio to when exporting videos for social media?
Every platform will compress and normalize your audio to some extent, but a good guideline is to ensure your video’s audio peaks around -1 dBFS (just below 0 dB, which is the digital clipping point) when exporting. This ensures you’re using the full loudness range without distortion. In terms of loudness units (LUFS), aiming for about -14 LUFS integrated is a common target for online video loudness, since platforms like YouTube normalize to around that level. In practice, if you don’t want to get too technical, simply make sure your dialogue is clearly audible, your music is balanced (as discussed), and nothing is unintentionally too quiet. Export using high quality audio settings (48 kHz sample rate, AAC 128 kbps or higher for most social platforms). If you notice a platform makes your audio too quiet or loud, you can adjust your master volume slightly on the next export. But sticking to industry norms (-1 dB peak, around -14 LUFS) will generally yield good results across most major social media platforms.
Q: Can I use copyright music in the background since it’s quiet? Will that affect audio quality?
From an audio quality standpoint, using a high-fidelity music track at a low volume won’t hurt the technical quality of your sound. However, the bigger concern is legal and platform policies. Even if background music is quiet, if it’s a copyrighted song that you don’t have rights to, social platforms’ algorithms will likely detect it. This can lead to your video being muted, taken down, or demonetized, depending on the platform and the rights holders. There are plenty of royalty-free or licensed music options (including libraries on YouTube, Facebook, and Instagram) – it’s best to use those. They’ll keep your audio quality high and keep you out of trouble. If you must use a popular song, look into the platform’s rules; for example, Instagram Reels and TikTok provide a library of popular music explicitly for use in personal/non-commercial posts. Always ensure you have the rights or that the usage falls under the platform’s allowed use. In short, sneaking a copyrighted track in low is not a good idea. Choose legal music – it will maintain your audio quality and your video’s reach without risk of removal.
By following these tips and tricks, you’ll be well on your way to producing social media videos with audio that impresses. Remember, people might forgive a video that’s slightly grainy, but they won’t stick around for one that’s painful to listen to. Invest a little effort into your audio setup and editing workflow your viewers (and your future self repurposing that content) will be glad you did. Happy recording, and may your sound always be on point!

