Now that we’ve covered what information you should include in your influencer media kit, it’s time to talk about designing your media kit!
When it comes to design, it’s important that your influencer media kit looks and feels like an extension of your blog or Instagram aesthetic.
Think about maintaining the same style, tone, fonts, color palette and make sure you only share the very best photography and imagery.
You have a lot of information to share, so try to make your media kit as clean and easy to read as possible — even if that means adding another page to your design!
Ultimately, it’s easier to digest 4-5 well laid-out pages, than 1 super-cramped page that’s overloaded with information!
To help you get started with designing your first influencer media kit, here are some suggestions on how to do it:
Step #1: Create an Influencer Media Kit in Canva
We’re big fans of Canva here at ! From graphics, blog post images, Instagram Stories, and much more, Canva is a really intuitive tool for graphic design newbies.
When it comes to creating a media kit, you can start a new project from scratch with Canva and use their various tools and features like images, shapes, graphic elements, fonts, and color palettes to design pages that represent you and your brand.
Or you can choose from some of the many media kit templates that Canva’s designers have created to help get you started.
The only downside to making a media kit from scratch, or even playing around and testing out some of the templates in Canva, is that it can be time-consuming! It can be all too easy to spend hours fine-tuning your design when you could be pitching to prospective brands!
If you’re looking for a simple and super-quick template to get your media kit created in record time, try out our free template!
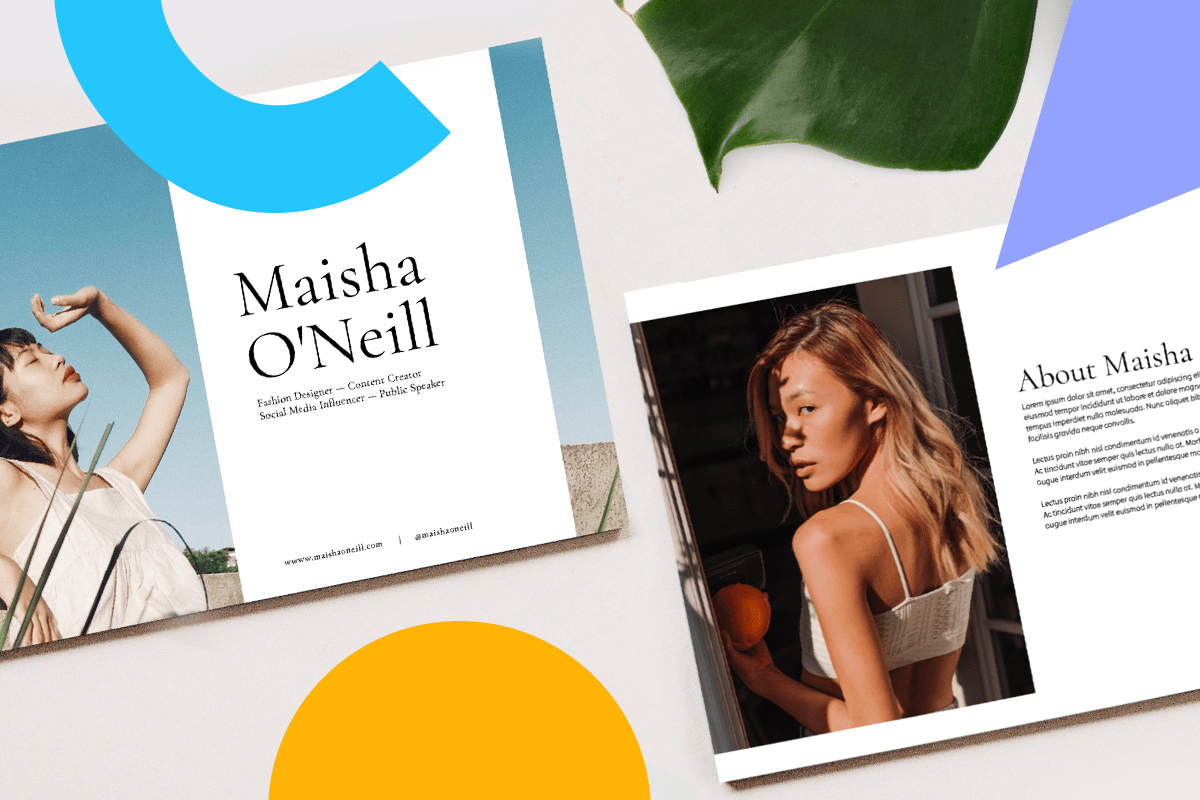
Step #2: Use ’s Free Influencer Media Kit Template
Created by our lovely in-house designer Chin Tan, we kept our influencer media kit design simple, modern, and super-easy to customize!
All you need to do is download the files (you can use the sign-up box below!) and have Adobe Photoshop installed on your desktop. Don’t worry if you don’t have a Photoshop subscription, you can get a 7-day free trial here.
When you receive your template files in your inbox, you’ll also have step-by-step instructions on how to update and customize your template to match your aesthetic and style.
Here are some things to keep in mind while customizing your template:
Use Branded Fonts
If you use specific fonts for your social media or your blog, and they’re installed on your laptop, you can use them in the Photoshop template. Looking for some font inspo? Check out the free to use Google Fonts!
To install the template font to your desktop, simply open the font provided and click “Install Font.”
Photography & Images
Your images make a really big impact, so it’s important to only use your best photography for your media kit — no pixelated mobile shots here, please! Check out how well fashion influencer and stylist Asiyami Gold uses her photography to show off her own personal brand and style!
@asiyami_gold
We’ve provided image boxes to suit landscape, portrait, and even square photos, so you have every opportunity to show off your best shots!
To change the images in your template, simply drag and drop one of your own image files from your desktop to replace it.
Content
Keep content short, sweet and to the point. Remember your media kit will tell a story about you and your brand, so there’s no need to write a novel! Let your images, stats, and most succinct paragraphs do the talking for you.
Color Palette
Don’t forget you can change up the colors in the template to match your own brand style.
Just double-click the layer to change the color. Note: The color is set at 20% opacity.
Once you’re happy with your updated design, all you have to do is export it as a PDF so it’s easy to share via email, or you can embed it into your website!
To save your template as a PDF, you need to export it to your desktop. Click Export > Artboard to PDF.
Step #3: Create an Influencer Media Kit with Adobe Photoshop or Illustrator
If you know your way around Photoshop with your eyes closed or have graphic design experience, then Adobe’s design tools are always a great option.
Of course, creating a new design in Adobe Photoshop or Illustrator does require a high level of knowledge to navigate and pull off, but if you feel confident, the results are very professional and you have free rein on how you’d like your media kit to look.
How to Approach Brands with Your Influencer Media Kit
Congratulations! You’ve created your influencer media kit and now it’s time to start reaching out to prospective brands and businesses you’d like to partner with.
If you’ve ever sat down at your computer to write a pitch email, you can understand how daunting and tough it is to get started.
Even though a pitch should only be 2-3 paragraphs in length, there are a few important key elements you shouldn’t miss!
Here are a few things to keep in mind when pitching to brands:
#1. Be professional
Regardless of what your tone of voice is on your blog, you’re working on a business project together. So while you don’t have to be formal, you do have to be professional.
#2. Research your brands
Spend some time reviewing what kind of content they produce online, their social media platforms, and is it something that you can replicate, or bring a new skill set to the team.
Perhaps you can offer video content if you see they don’t post video that often, or maybe you’ve got amazing product flat lays!
Also, think about their previous brand partnerships — who have they collaborated with in the past, and was it a successful campaign? Knowing as much about the brand and their approach to collaboration projects as possible will help you come up with some creative ideas.
Take a look at how Daniel Wellington has a dedicated page to influencers who want to work with their brand. If a brand outlines requirements or information to submit as part of their partnership opportunities, make sure you provide that information, as well as your media kit in your intro email!
#3. Content ideas
Now that you’ve done your research, you should have plenty of ideas on how you can creatively collaborate. Think about ways that serve both your audiences and business goals.
Your creative ideas should serve a purpose, and the more clearly defined, and creative your pitches, the more likely a brand will jump at the chance to work with you!
#4. Know your worth
Finally, it’s important to know what your feeds are for collaboration projects. While you don’t have to mention this in your opening pitch email, having a clear understanding of what your billing structure and project fees are will help you not only pitch the right-sized project but also get fair pay for the work you will be providing.
To help you successfully send an email pitch to brands, we asked our PR and Influencer Marketing Manager, Chrissy Abram, to share her tips to help you land your dream collaboration! Check out her top tips in this blog post.
Don’t forget that some brands may approach you and ask to see your media kit, so always aim to have an up-to-date file ready to share.
And that’s it! You now have everything you need to create a killer Instagram influencer media kit and start approaching brands and businesses for partnerships.
Influencer marketing shows no sign of slowing down, so now that you’re armed with your media kit, you’ll soon be working on opportunities and collaboration projects for the brands that you love.
Don’t forget! Our media kit template is completely free and can be sent to your inbox in minutes!