
How to schedule Reels on Facebook: 3 easy ways
As Mike Stelzner puts it, video tells stories better. So you should not miss the chance to tell your story through Facebook Reels.
You can schedule Facebook Reels in a few different ways, depending on what’s easiest for you. Whether you’re on your phone or computer, Meta gives you built-in tools to plan ahead, and social media management platforms like SocialBee make it even simpler to stay consistent.
Here are three easy ways to schedule Reels on Facebook:
- Schedule Facebook Reels via Meta Business Suite on desktop
- Schedule Facebook Reels using the Meta Business Suite mobile app
- Schedule Facebook Reels in SocialBee
How to schedule Facebook Reels via Meta Business Suite desktop
- Go to Meta Business Suite on your desktop.
- Click “Content” or “Planner” from the sidebar.
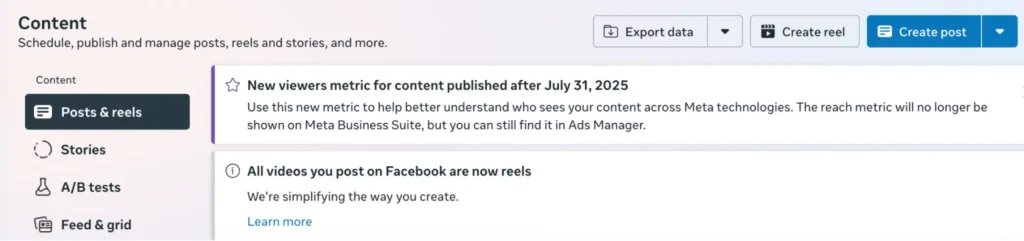
- Select “Create reel”.
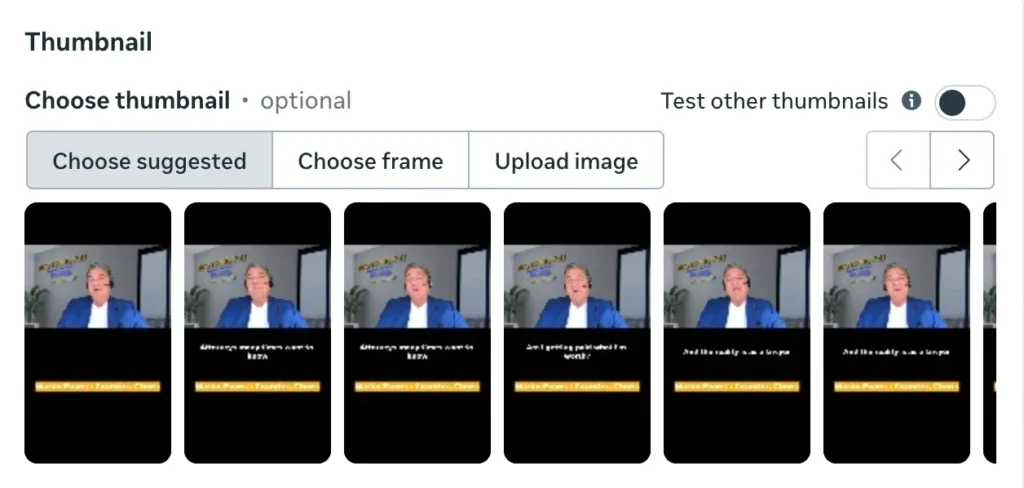
- Upload your video and add your caption, text, and thumbnail.
- Choose where you want to share it: on your Facebook Page, or both Facebook and Instagram if your accounts are connected.
- If this is your first time scheduling, you may need to sign in and reconnect your Instagram account.
- Once your post is ready, click “Schedule”, then pick your date and time.
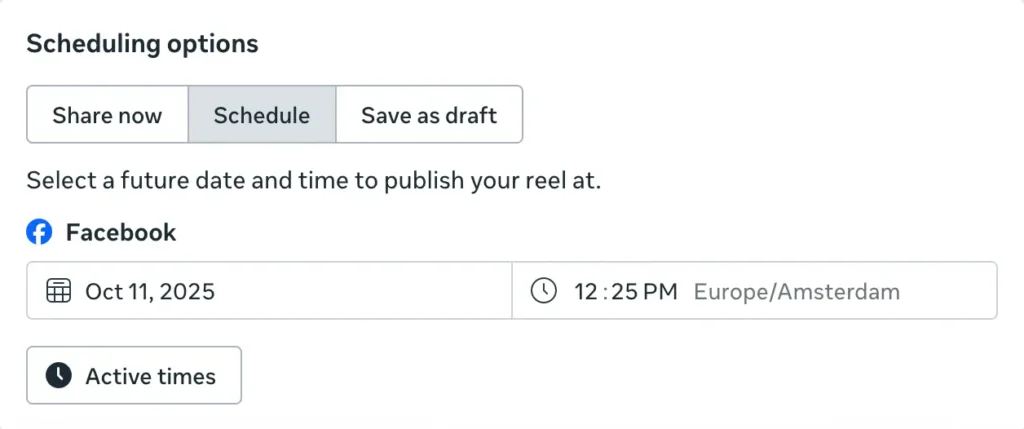
- Preview your post on the right to see how it’ll appear in the feed.
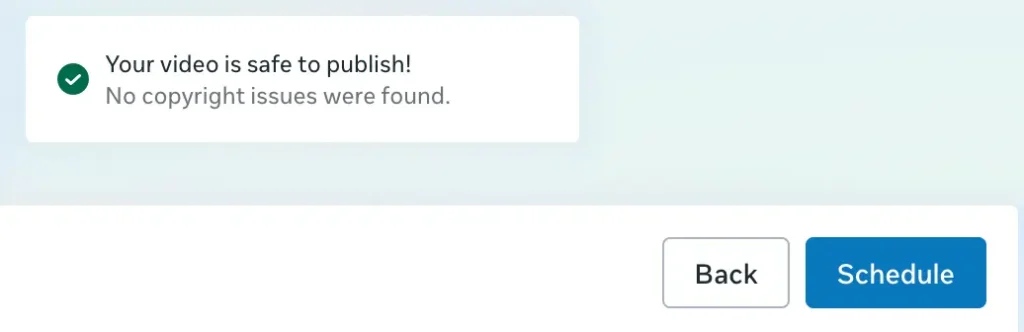
- When you’re done, click “Schedule” to confirm.
Your Reel will now appear under Scheduled posts in your Planner tab, where you can edit, delete, or enhance it before it’s automatically published.
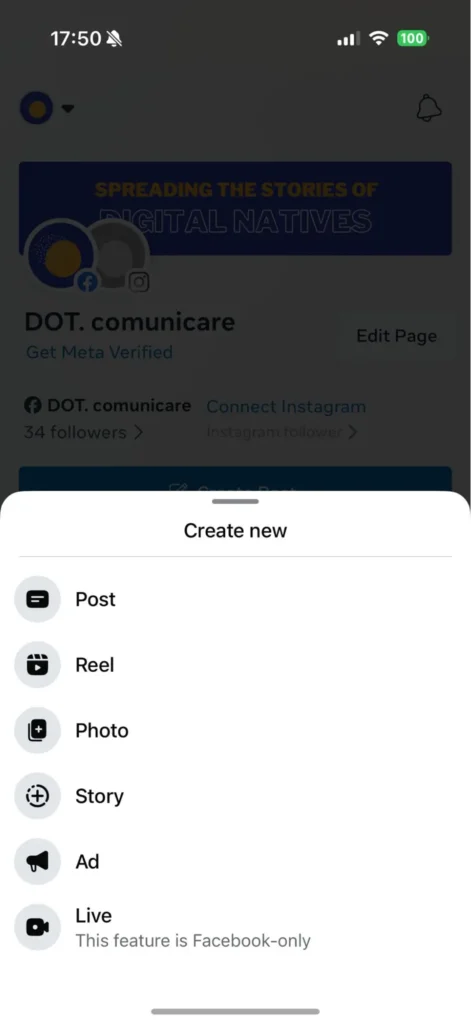
How to schedule Facebook Reels via Meta Business Suite mobile app
- Open the Meta Business Suite app.
- Tap “+” from the bottom menu.
- Tap “Create” to start a new post.
- Select “Reel”.
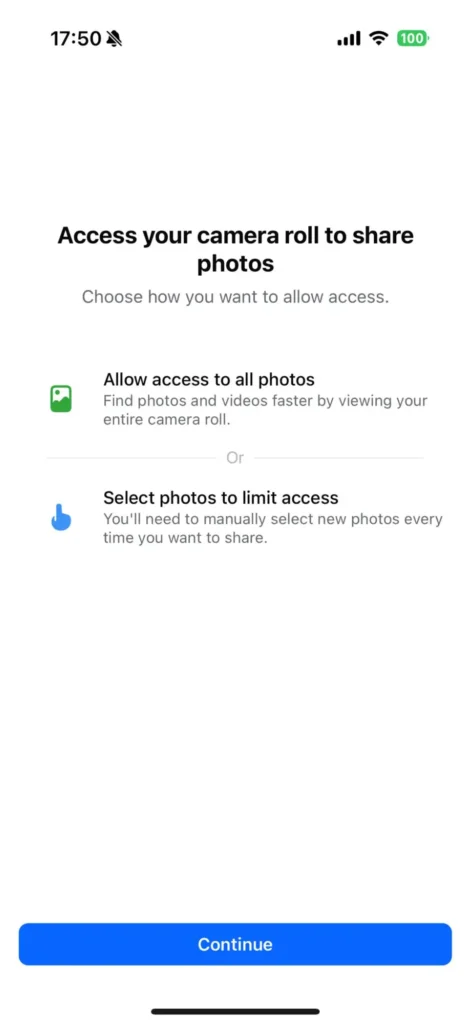
- If it’s your first time, allow the app to access your photos and videos, then tap “Continue”.
- Add your text, caption, and video.
- Tap “Next”, then choose “Schedule for later”.
- Select the date and time you want your Reel to go live, and tap “Schedule” to confirm.
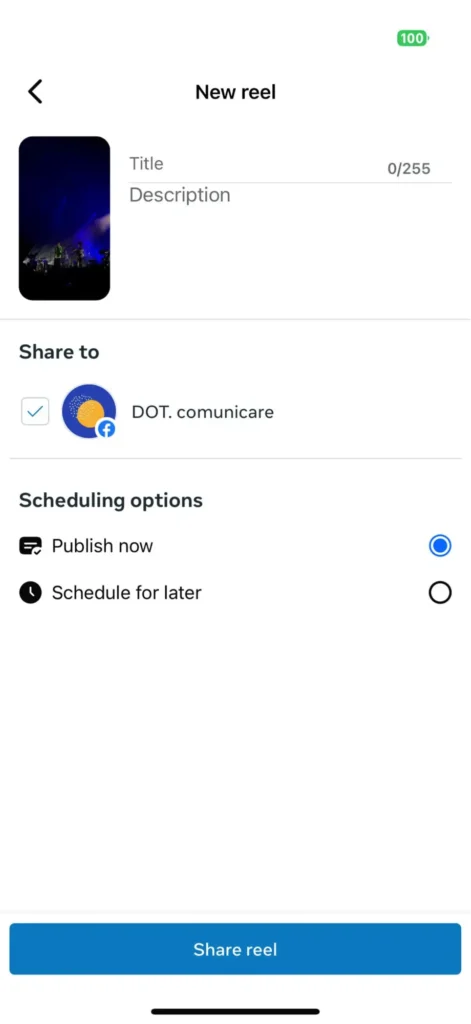
Once scheduled, you can see your Reel in the Scheduled tab, where you can edit, review, or delete it before it’s published.
How to schedule Facebook Reels with SocialBee
If you’ve used Meta Business Suite before, you know it can get a bit clunky: limited flexibility, fewer scheduling options, and no easy way to manage multiple platforms. That’s where using a social media management like SocialBee makes a difference. You can schedule Reels and other content types (Stories and Facebook posts) from one dashboard, plan ahead using content categories, and even handle approvals and analytics in the same place.
Plus, SocialBee lets you post to Facebook Pages, personal profiles, and groups, all while managing other platforms like Instagram, LinkedIn, X, TikTok, and YouTube from one tool.
Here’s how to schedule Facebook Reels with SocialBee:
Step 1: In SocialBee, open the Post Editor and make sure your Facebook Page is selected.
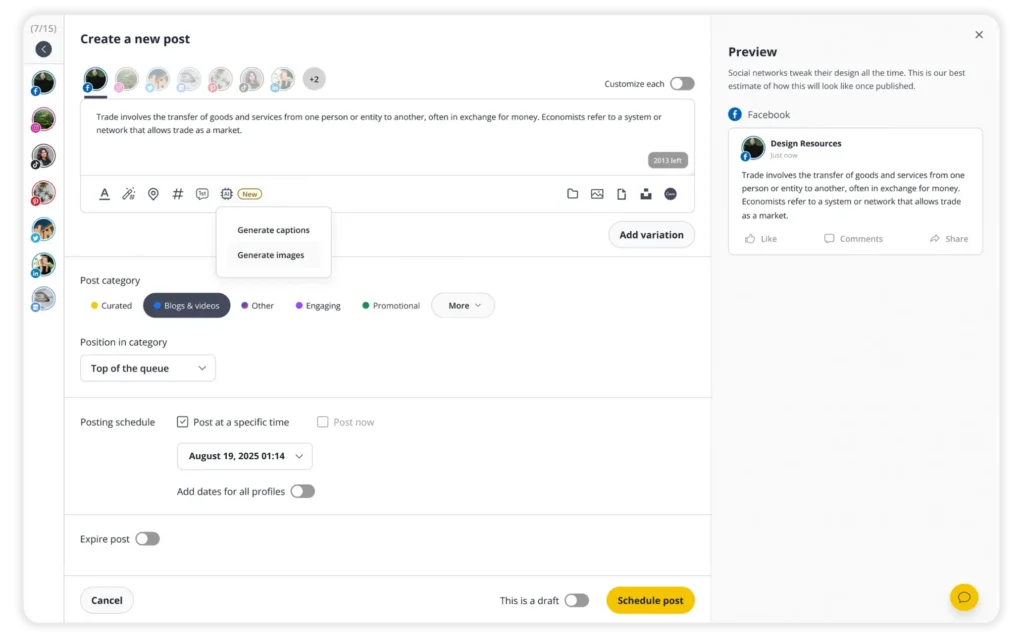
Step 2: From the left sidebar, select the Facebook Page or Profile you want to post to.
Step 3: If you’re posting to multiple platforms, turn on “Customize each” to tailor your caption, visuals, or hashtags for each one.
Step 4: Choose the type of Facebook post you want to share: Reel, Story, or Feed post.
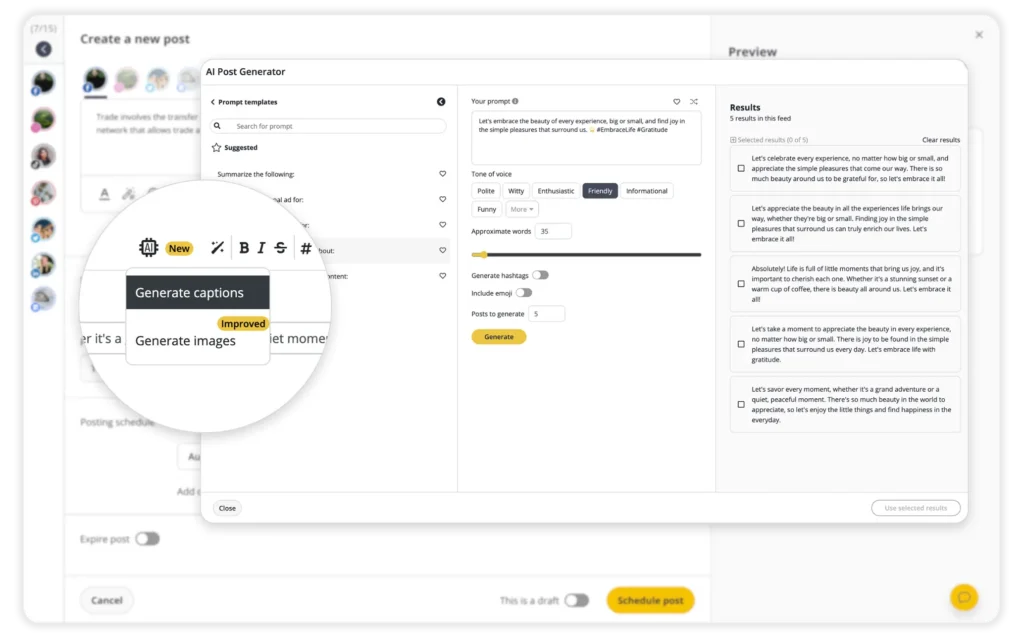
Step 5: Type your caption directly in the text box, or click the AI to generate ideas, captions, or image suggestions.
Step 6: Upload your video or image and add alt text for accessibility. You can also edit your media: crop, flip, or resize to fit the right format.
Step 7: Tag accounts by typing “@” followed by their handle, or use the Hashtag Generator (the wand + hashtag icon) to find trending and relevant hashtags. Save your favorite sets for future use.
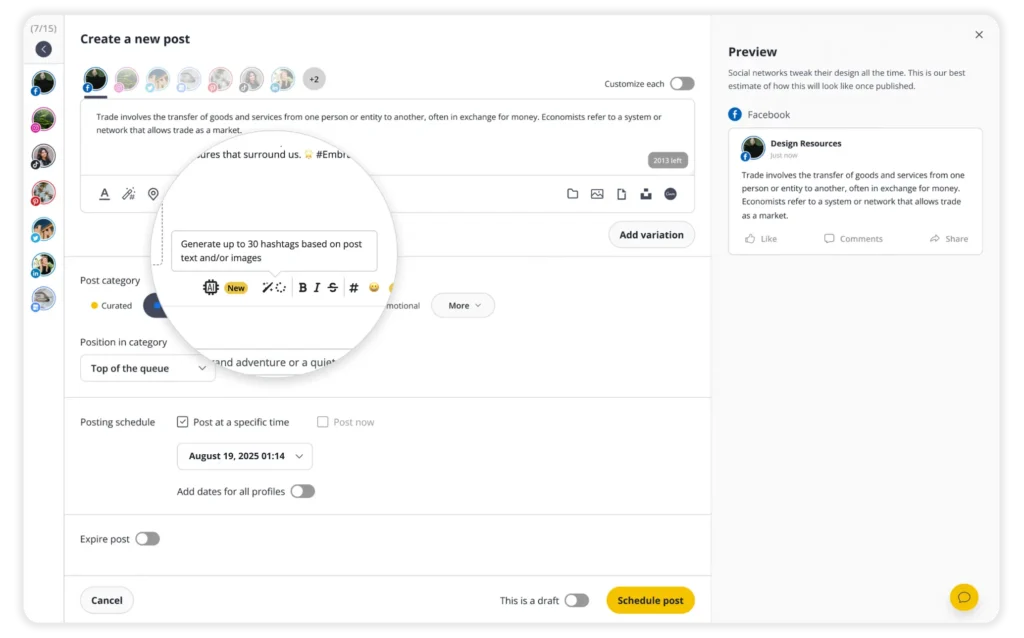
Step 8: Format your caption with bold, italic, or strikethrough, and add emojis to make your post more engaging.
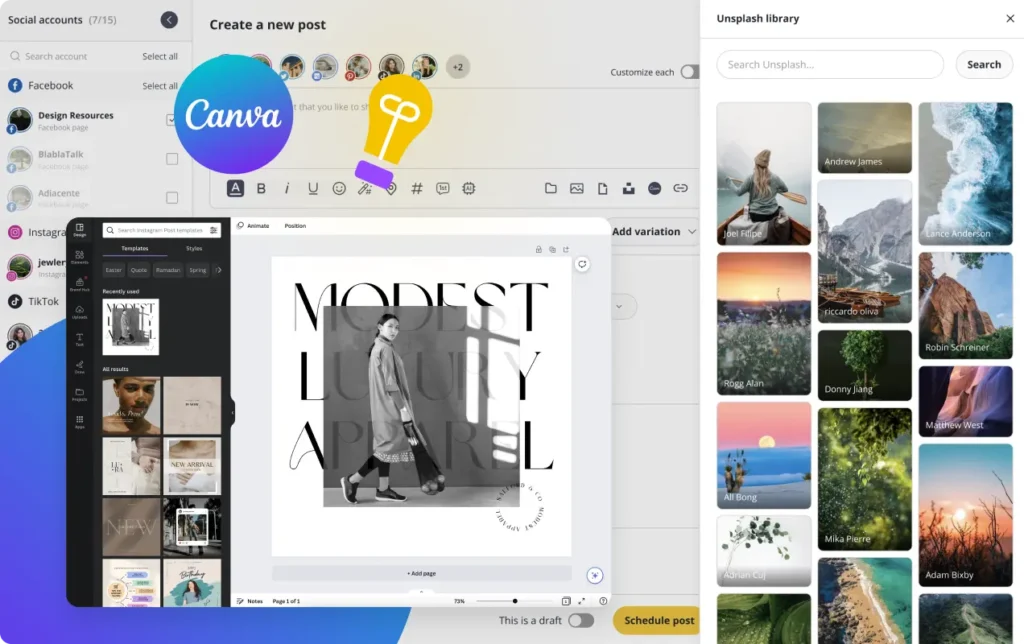
Step 9: Use GIPHY, Unsplash, or Canva integrations to design visuals or add creative elements without leaving the app.
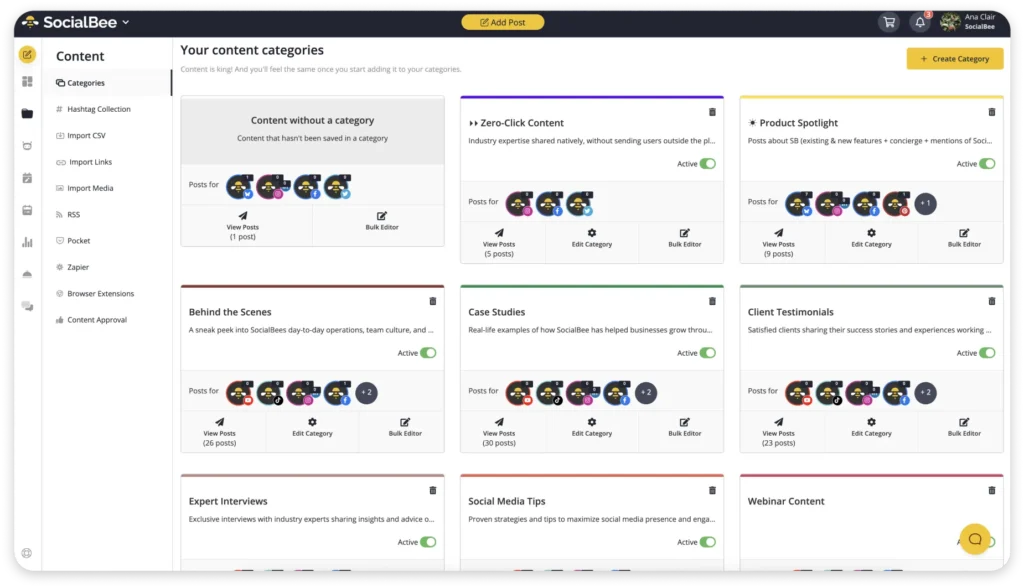
Step 10: Add your post to a Post Category (your content folder). This helps you stay organized and automate your posting schedule.
Step 11: Choose whether to “Post now” or “Schedule for later”. When scheduling, you’ll see best time suggestions based on your past engagement.
Step 12: Turn on “Re-queue after posting” to automatically repost evergreen content or enable “Expire post” to remove it after a certain date.
Step 13: Toggle “Approved” to publish right away, or keep it as a draft if you’re still editing or waiting for team approval.
Step 14: Click “Save Post” in the bottom-right corner to finalize your Facebook post or Reel.
Once it’s saved, your Reel will appear in your SocialBee calendar where you can preview, edit, or delete it before it’s automatically published.
Top tips for scheduling Facebook Reels
Want your Reels to reach more people without constantly being online? Scheduling helps you stay consistent, post at the right times, and keep your feed active even on busy days.
Here are five simple ways to get better results when you schedule Reels on Facebook:
- Schedule Reels when your audience is most active
- Record and edit multiple Reels at once
- Alternate between content types
- Mix short Reels with slightly longer ones
- Track analytics and adjust posting times
1. Schedule Reels when your audience is most active
If you want your Reels to get noticed, timing matters. Open your Meta Business Suite and check when your followers are most active during the day or week. Maybe it’s during lunch breaks, maybe it’s late at night, every audience has its rhythm.
Once you know the pattern, start planning your Reels around those times. You can schedule posts in advance so they go live automatically, even if you’re busy or offline. If your audience spans multiple time zones, take that into account too: a morning post for you might hit perfectly in the evening somewhere else.


