Google’s Pixel 10 series is official. Featuring a familiar design, an all-new Tensor G5 chip, camera upgrades, AI smarts, and some new features like Pixelsnap, the phones are appealing options for anyone seeking a near-stock Android experience.
While the setup wizard guides you through the basics, there are many nifty options nestled in the Settings app that require manual tweaking. From making the display smoother and improving battery lifespan to unlocking sharper photos and offering access to missed notifications, these options can significantly improve your Pixel 10 experience.
Enable Smooth display
Offers smoother scrolling and animations
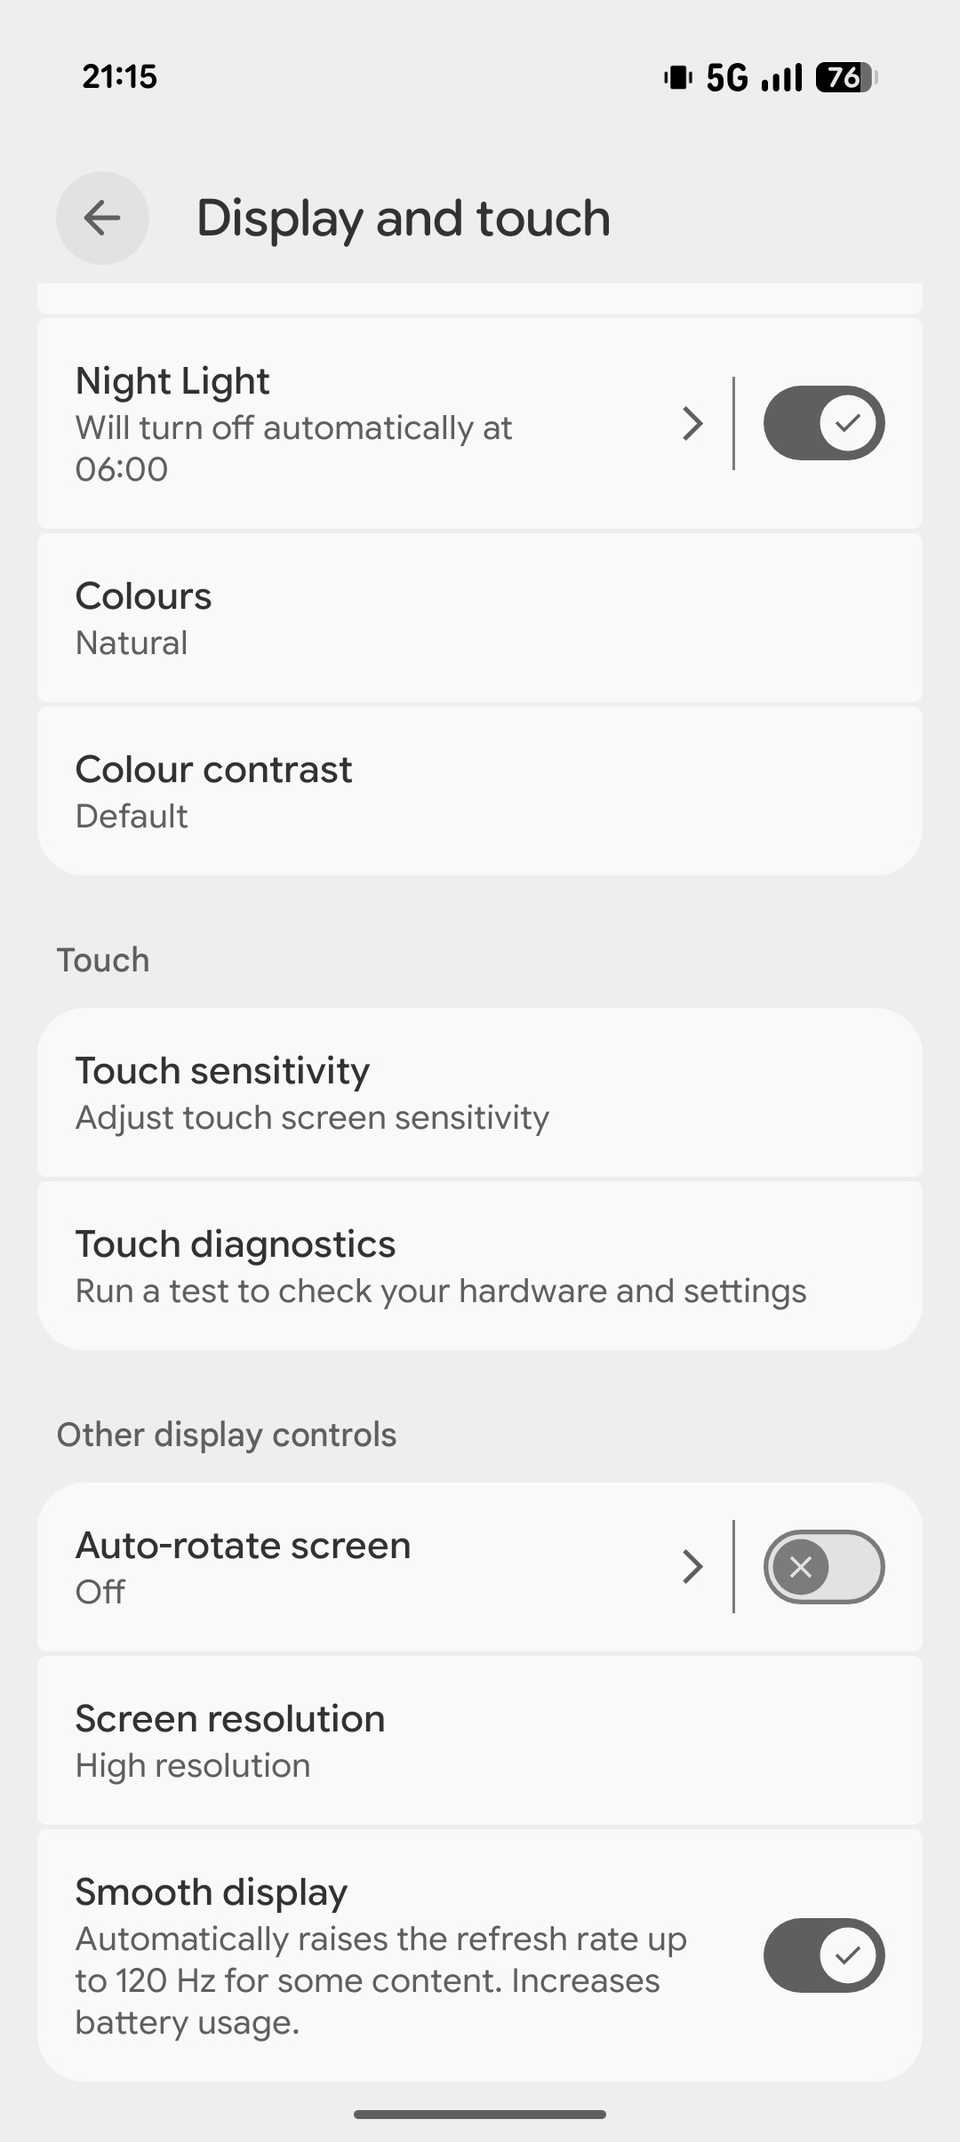
All Pixel 10 models support a 120Hz refresh rate. However, it’s only the Pixel 10 Pro and 10 Pro XL that have their displays set to 120Hz by default. The standard Pixel 10 is set at 60Hz, which makes scrolling feel jittery and animations appear sluggish.
You can fix this by enabling the Smooth display feature on your Pixel 10. Navigate to Settings -> Display and touch, scroll down to the Other display controls section, and flip the Smooth display toggle on. The screen will now refresh content at a higher rate, making your interactions feel more responsive.
Turn on Adaptive tone
Create a comfortable viewing in different lighting conditions
Your Pixel 10’s screen uses a fixed white balance at all times. Due to this, the screen can feel unnatural or less comfortable to look at under different lighting conditions. For instance, it may appear too warm or yellowish under direct sunlight, or if you’re in a warmer indoor light, it might look overly blue or harsh.
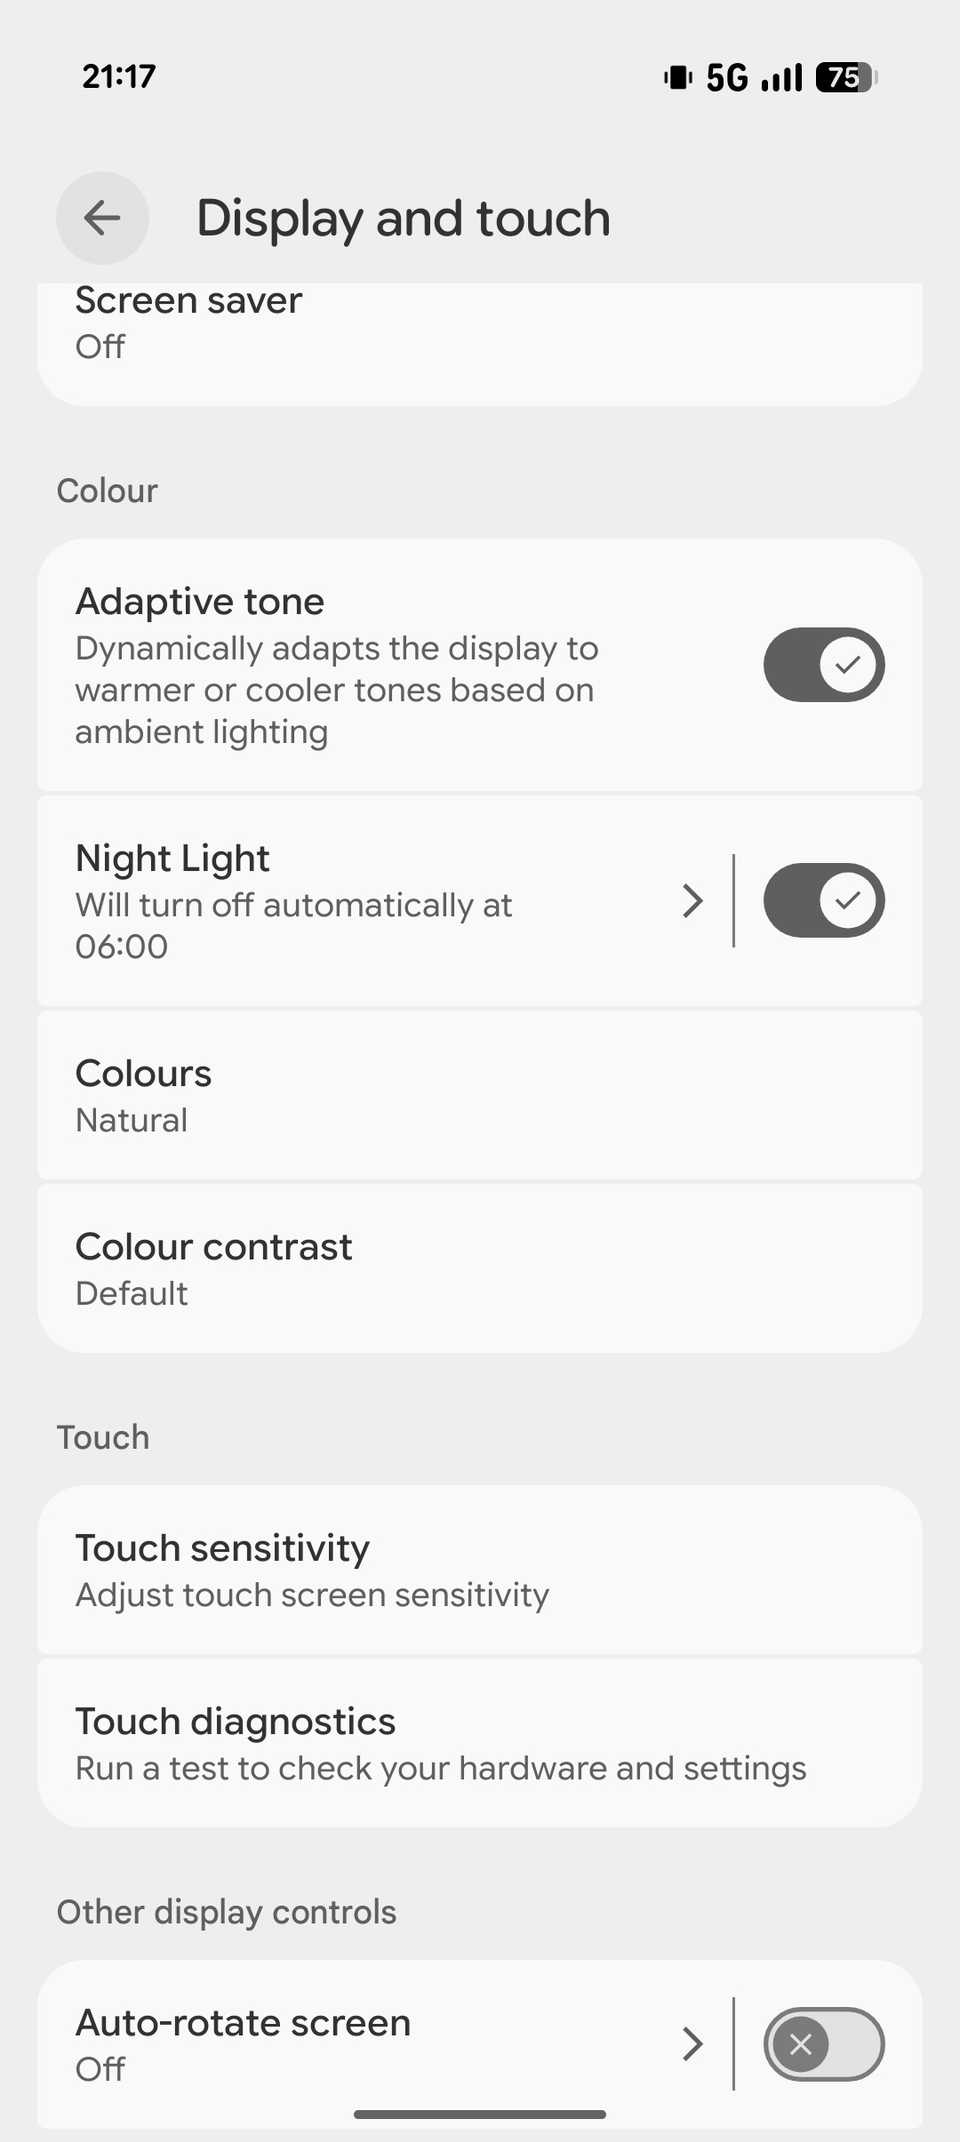
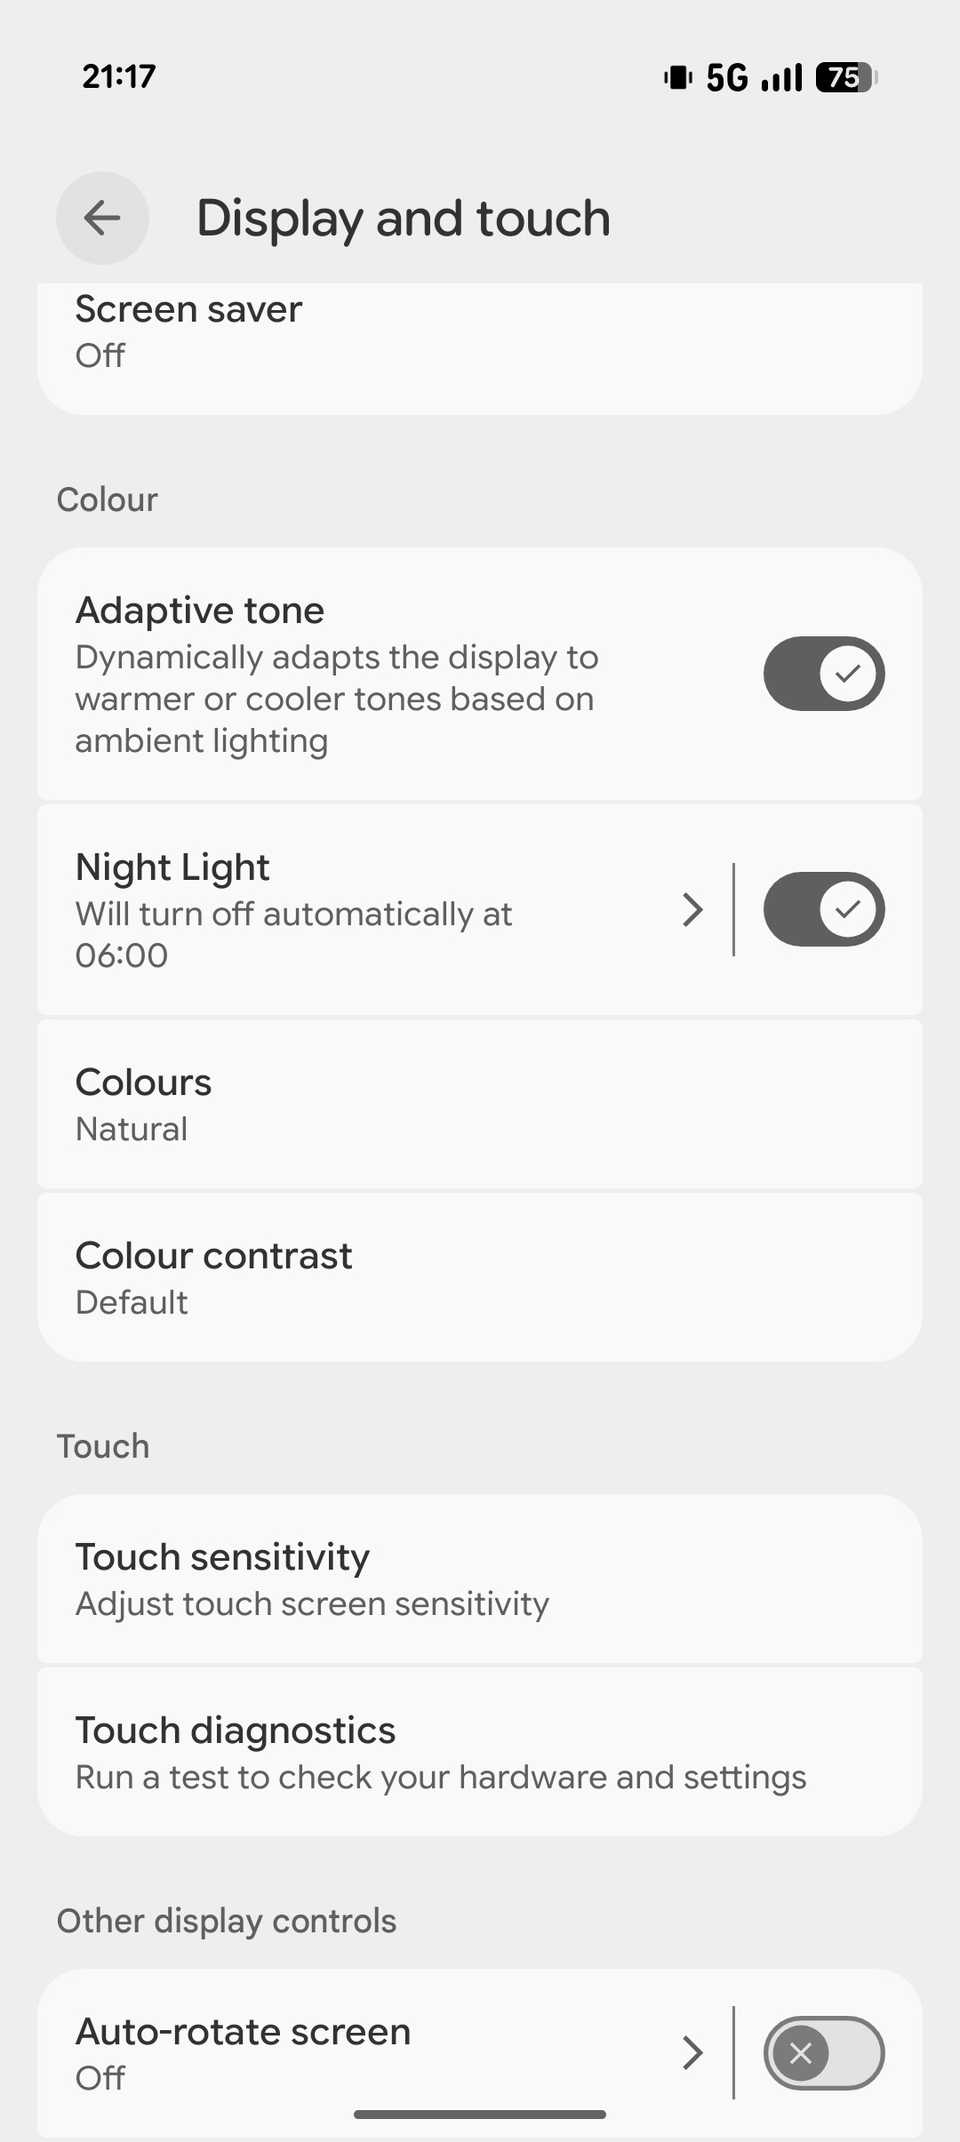
Enabling the Adaptive tone feature fixes this. It uses the phone’s integrated ambient light and color sensor to measure the surrounding color temperature and then adjusts the screen’s white balance accordingly to match it. To turn it on, open Settings and go to Display and touch. Scroll to the Color section and toggle on the Adaptive tone option.
Schedule Night Light
Limit exposure to blue light
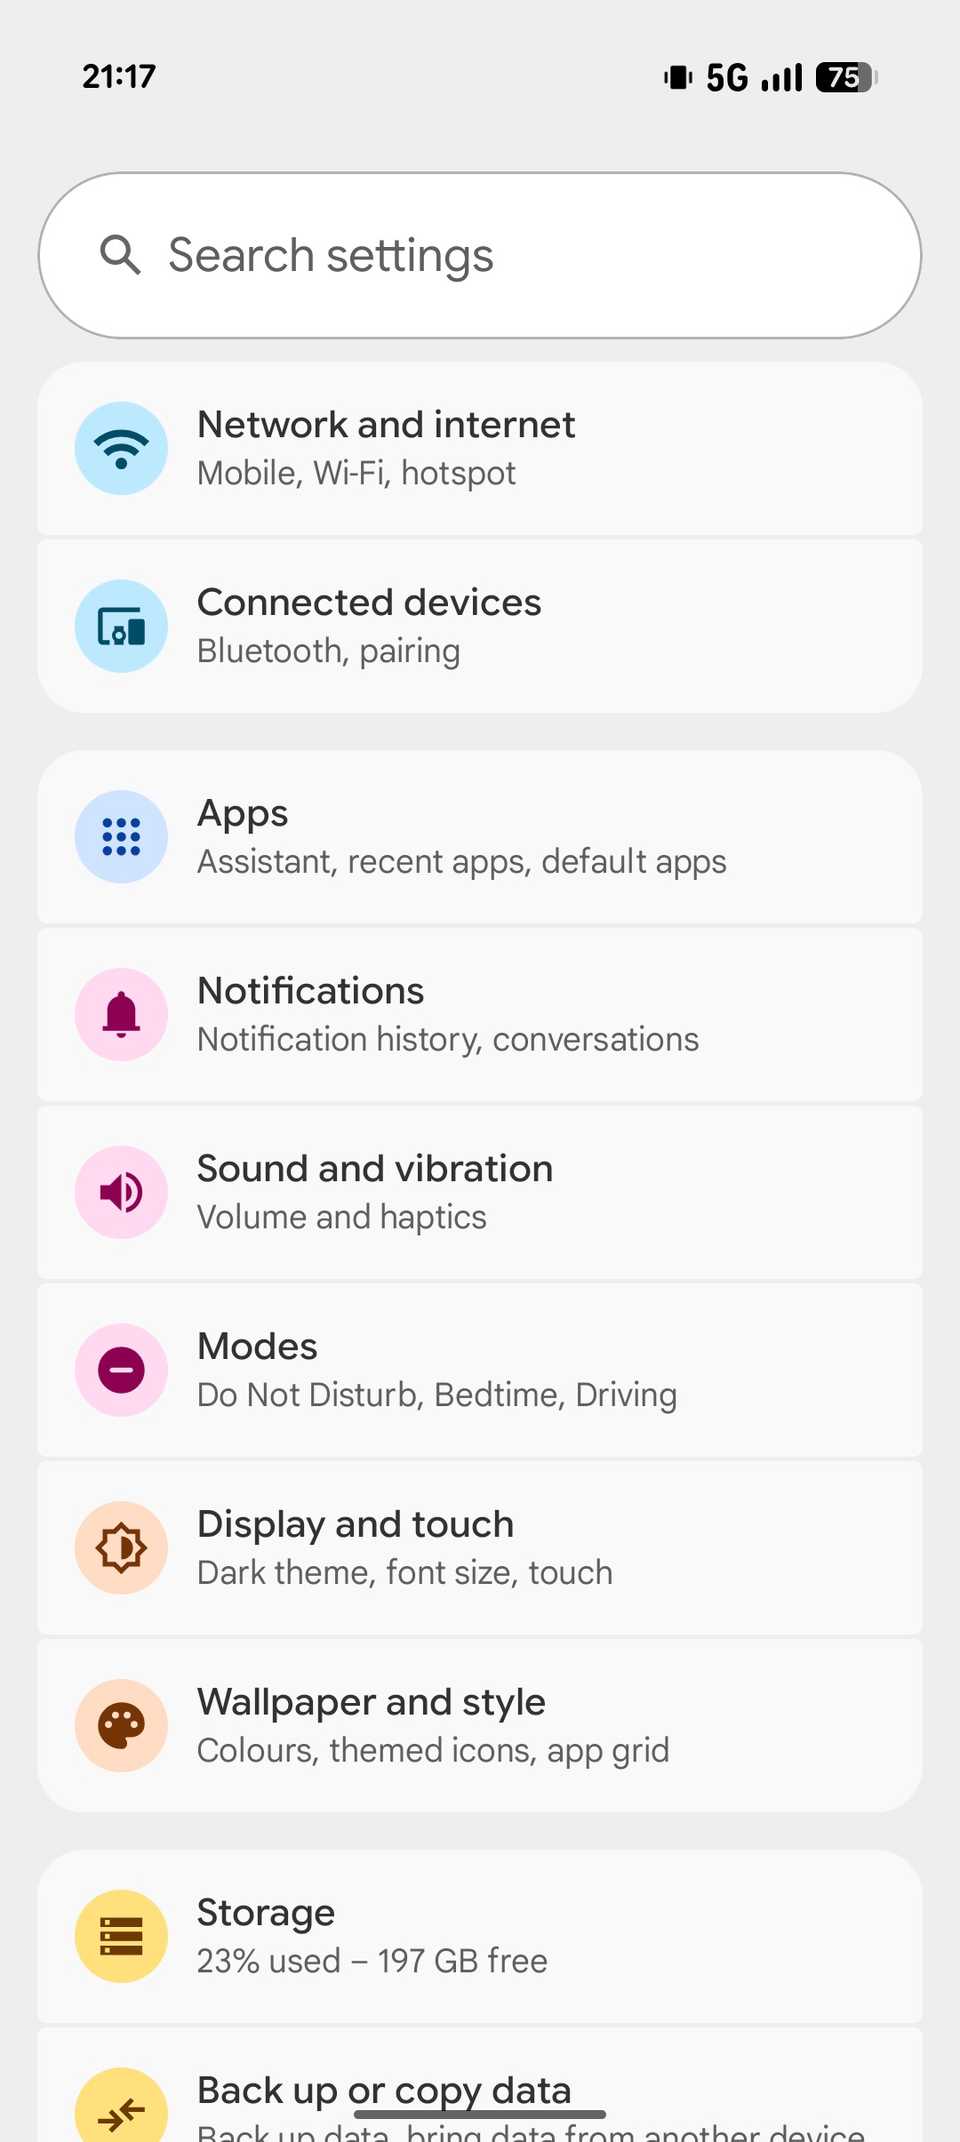
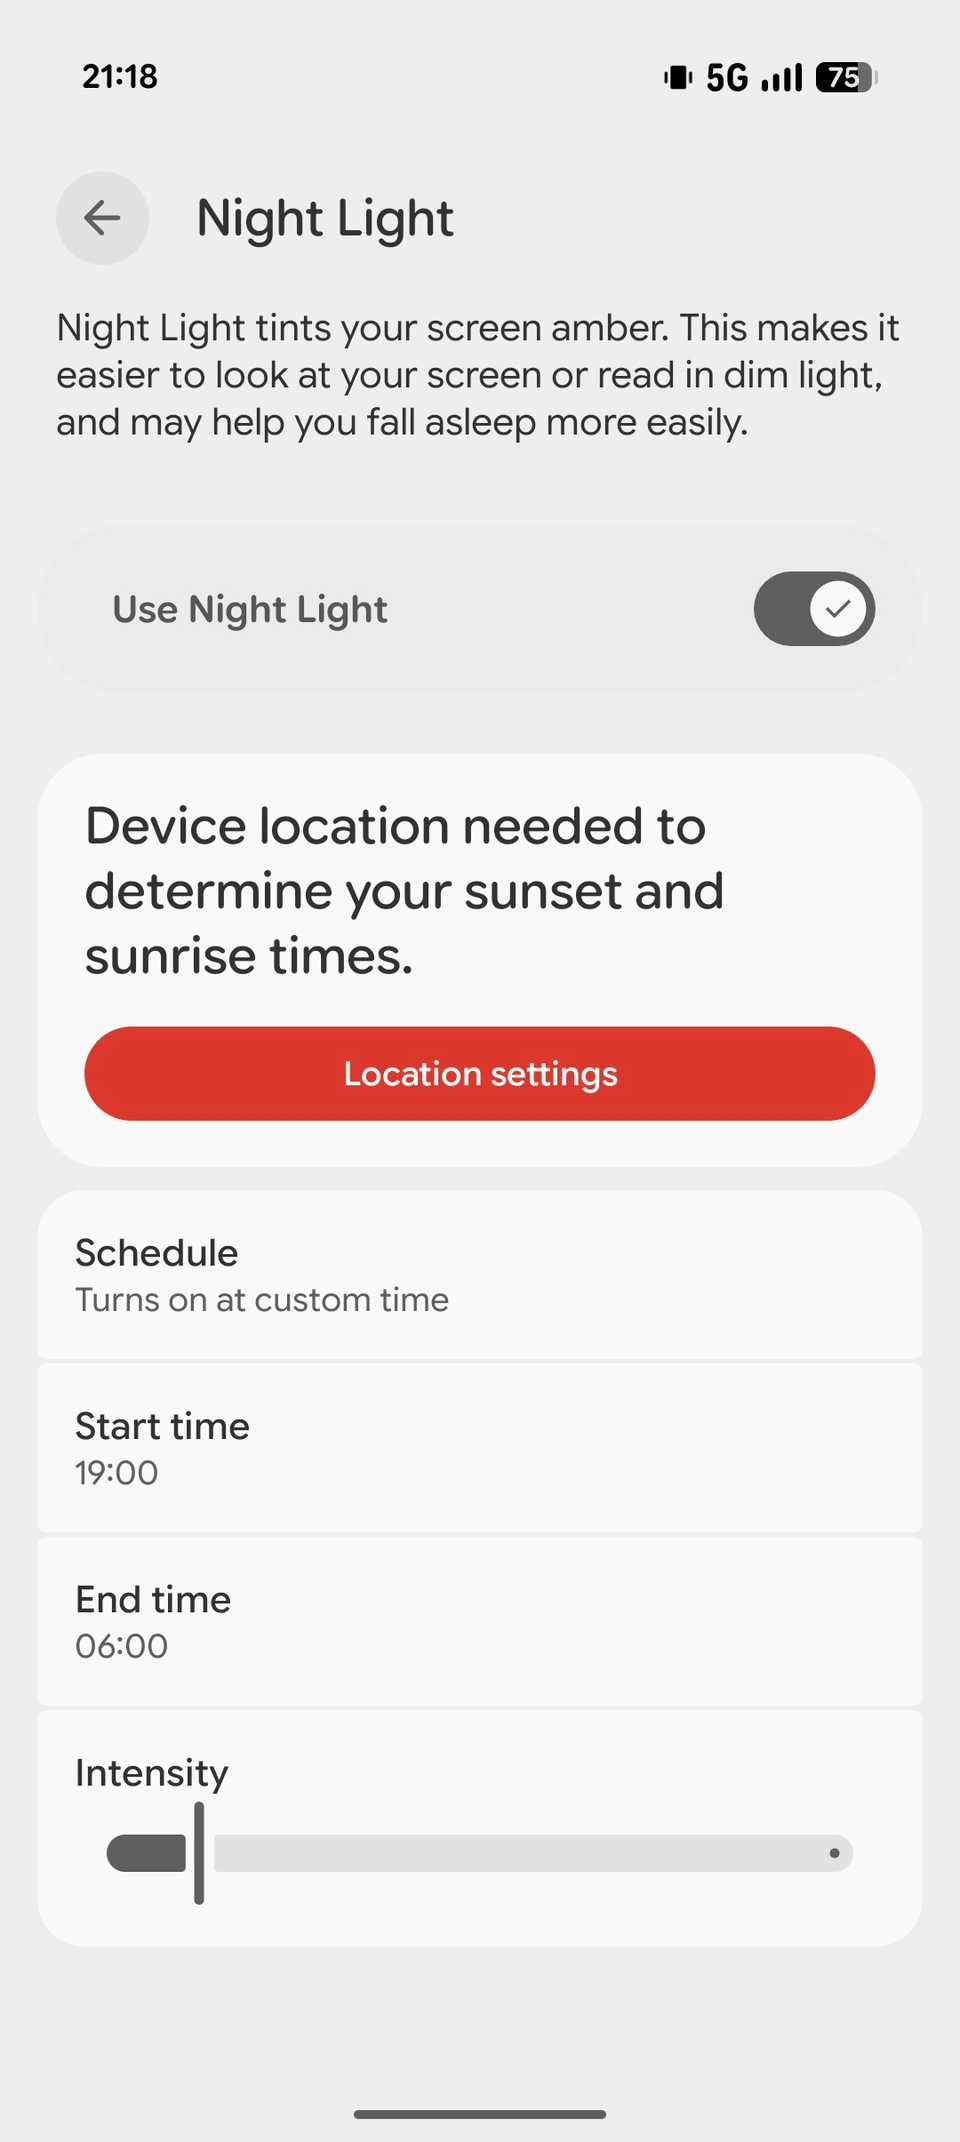
Excessive exposure to blue light, especially in low-light conditions, can disrupt your sleep cycle and increase eye strain. Although the Adaptive tone feature does make the screen warmer in dark conditions to some degree, it doesn’t completely block it. This is where the Night Light feature comes in handy.
Turning on Night Light reduces the amount of blue light emitted by your screen during evening and nighttime hours. To enable it, go to Settings -> Display and touch, scroll to the Color section, and turn the Night Light toggle on. This will enable the Night Light mode immediately.
Alternatively, you can schedule Night Light to automatically toggle at your specified times. Instead of toggling the Night Light toggle on, tap Night Light, and set a schedule on the following screen.
Turn on adaptive vibration
Avoid being startled in quiet environments
The default vibration strength on the Pixel 10 phones can sometimes feel overly strong, particularly at night when it’s kept on a table. Thankfully, you don’t have to bear with the jarring vibration, as Google offers a way to automatically adjust the phone’s vibration based on the environment.
It’s called Adaptive vibration, and it uses the phone’s microphone along with other sensors to determine nearby sound levels and environment, and adjusts the vibration strength accordingly. To enable it, go to Settings -> Sound & vibration -> Vibration & haptics. Tap on Adaptive vibration under Notifications and alarms and, on the next screen, flip the Use adaptive vibration toggle on.
Configure Charging Optimization
Increase your battery’s lifespan
Excessive charging can degrade a phone’s battery and reduce its lifespan. To prevent this, Google offers the Charging optimization feature on the Pixel 10. It’s set to Adaptive Charging by default, which learns from your usage habits and, based on that, slows the charging speed and pauses charging past 80% until just before you usually unplug the phone.
However, this option is only partially useful. To take things up a notch, you can prevent the battery from charging to 100% capacity, as doing so regularly puts cells under greater stress and leads to overheating, which can significantly reduce the battery’s longevity.
To change the charging optimization setting, go to Settings –> Battery -> Battery health -> Charging optimization. Flip the Use charging optimization toggle on if it isn’t already, and choose the Limit to 80% option below it.
Enable vibration for outgoing call accepted
Allows hands-free call confirmation
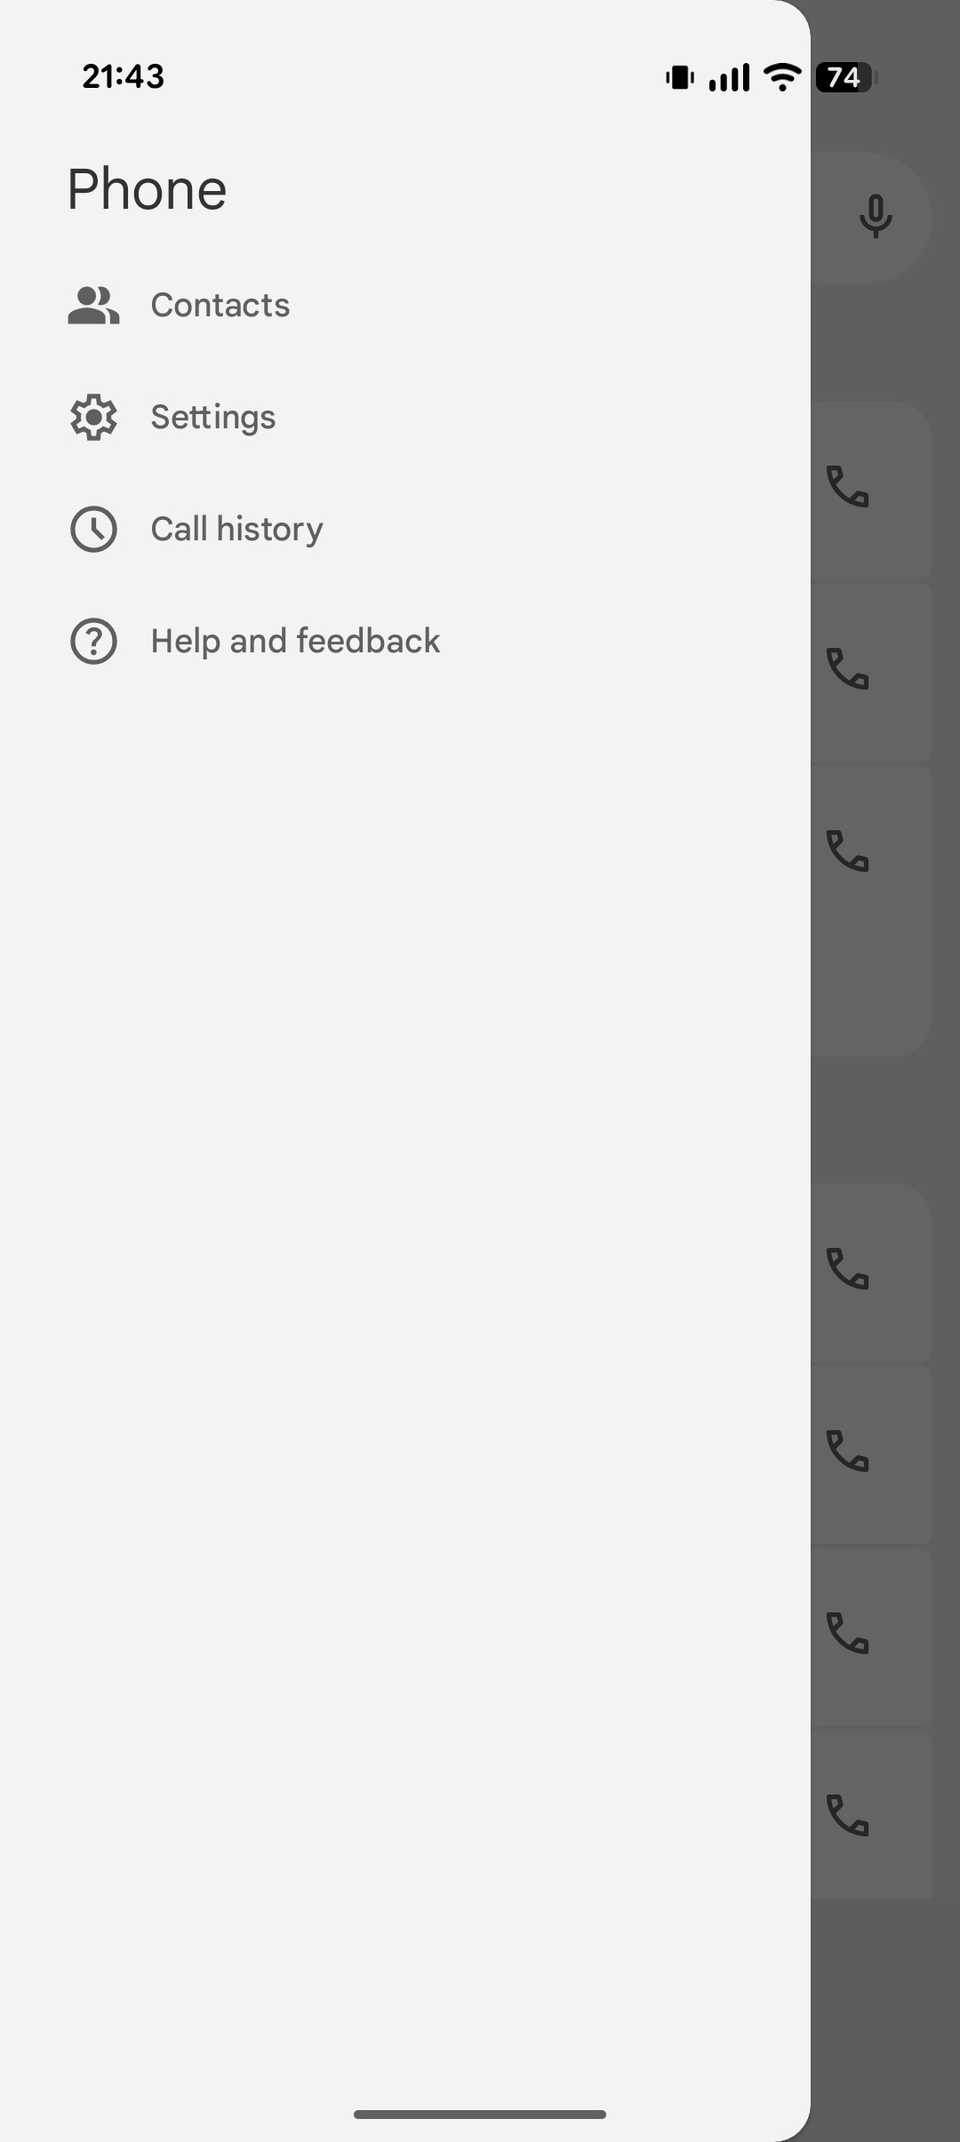
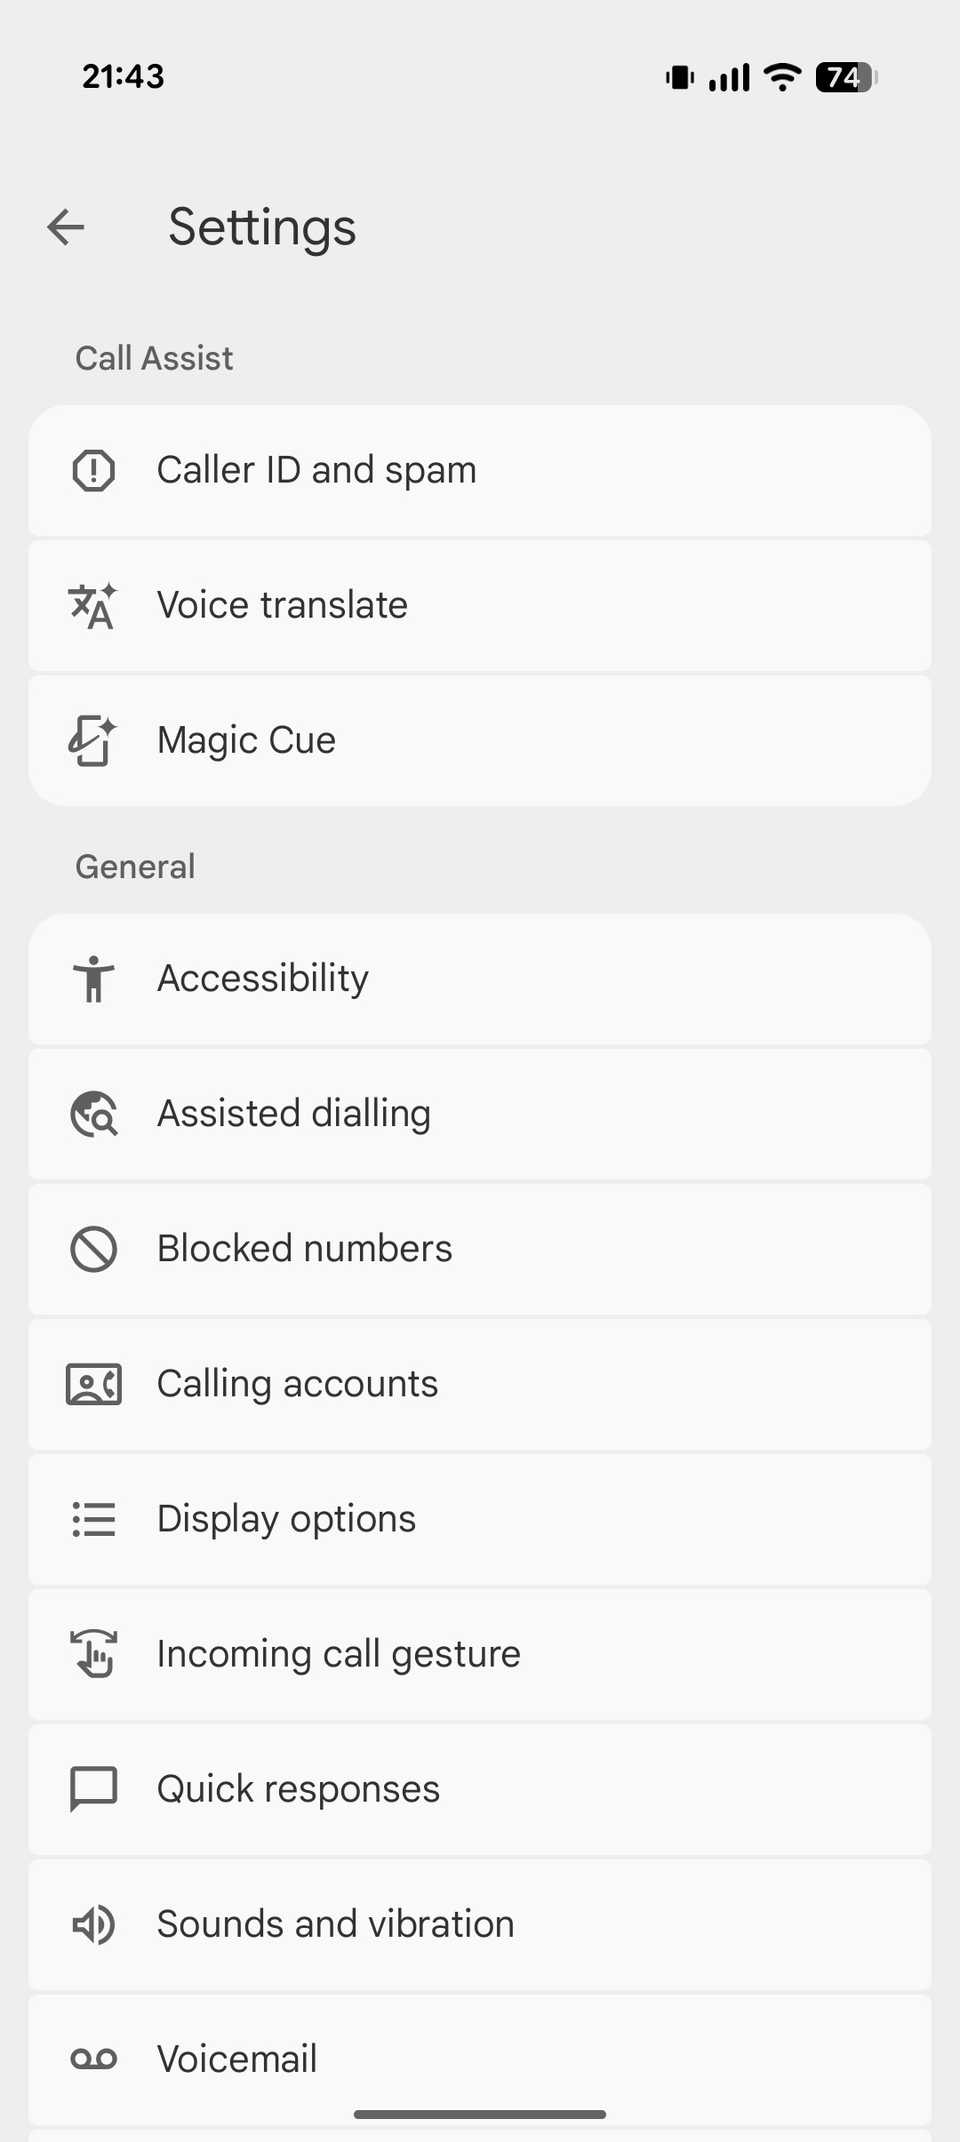
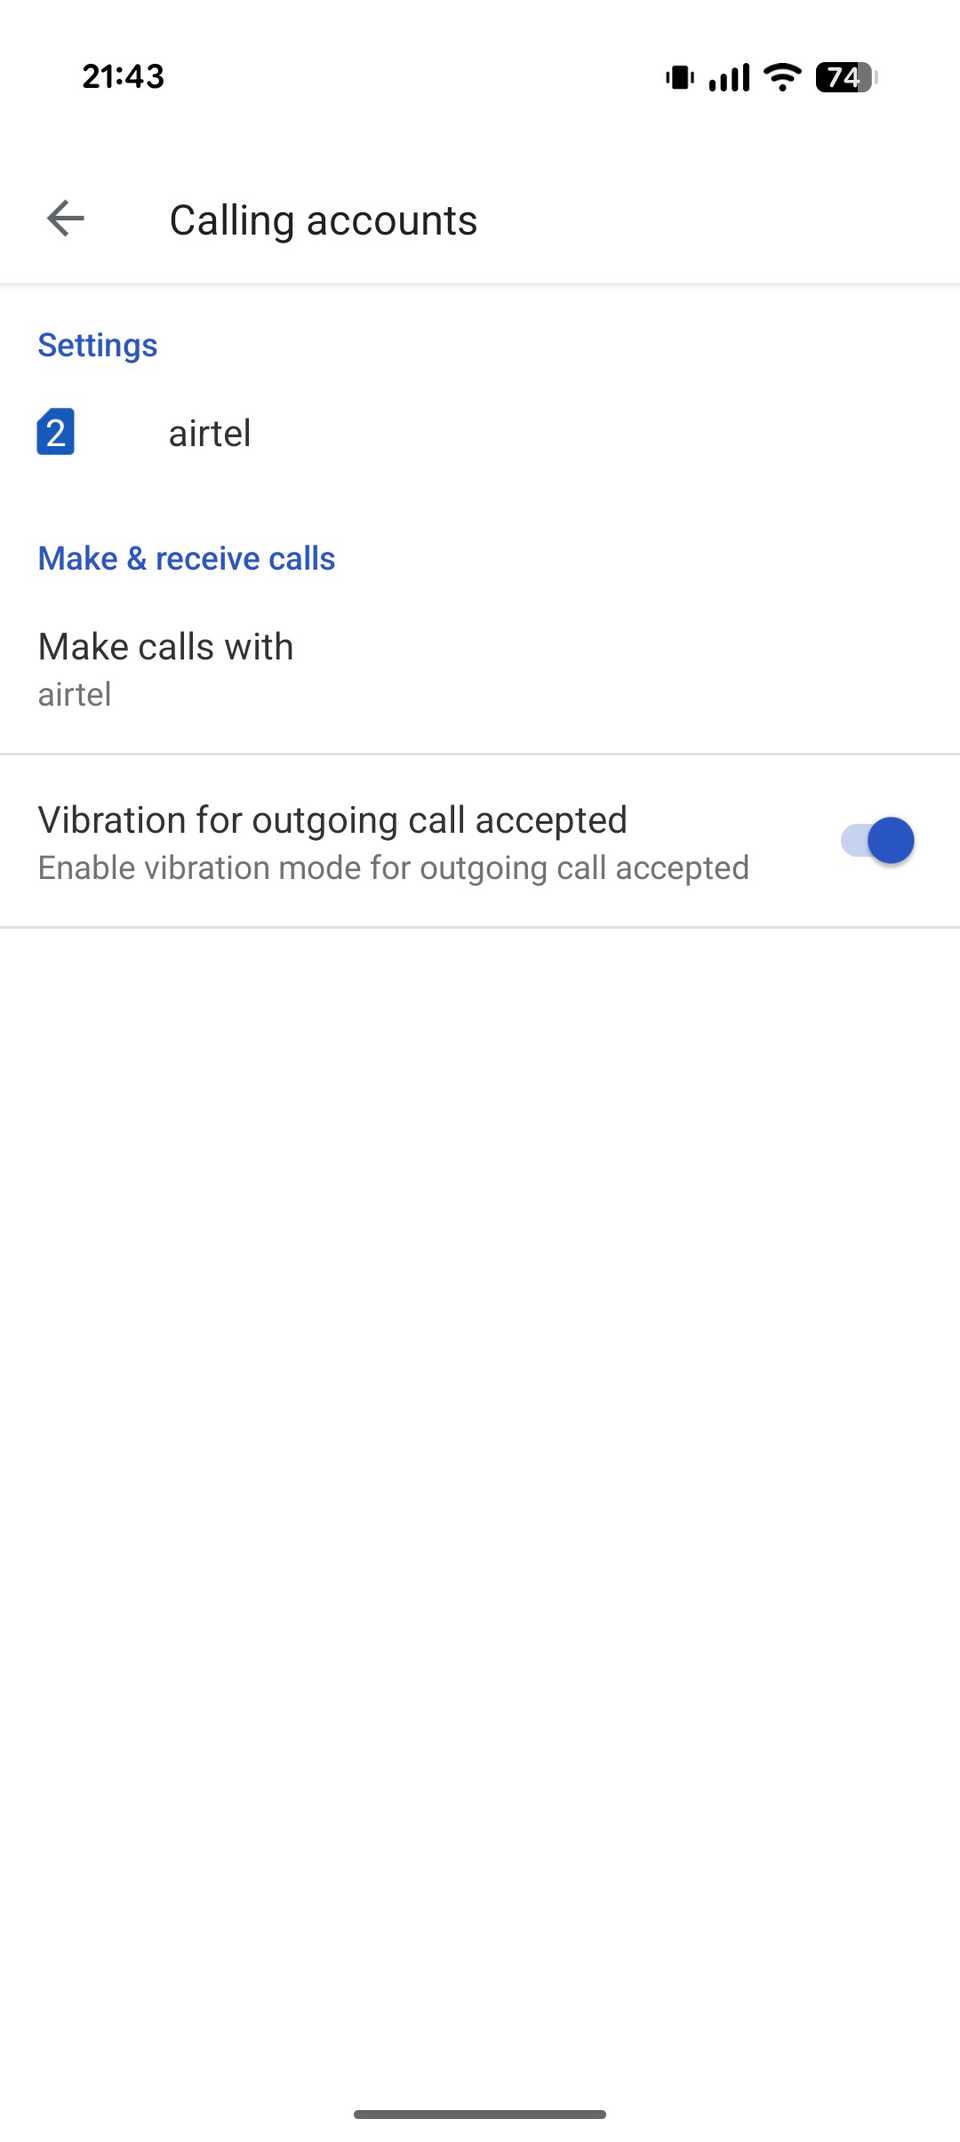
After placing a call on your Pixel phone, you need to either bring the phone to your ear or put it on speaker to know when the call is connected. However, the Phone app on the Pixel 10 offers a nifty feature that can save you this trouble, offering a vibration alert as soon as your call is answered.
Enabling this feature is easy. Open the Phone app, tap the three-dot menu in the top-left corner, and select Settings. Select Calling accounts under General and flip the Vibration for outgoing call accepted toggle on.
Switch to 50MP mode
Capture sharper and more detailed photos
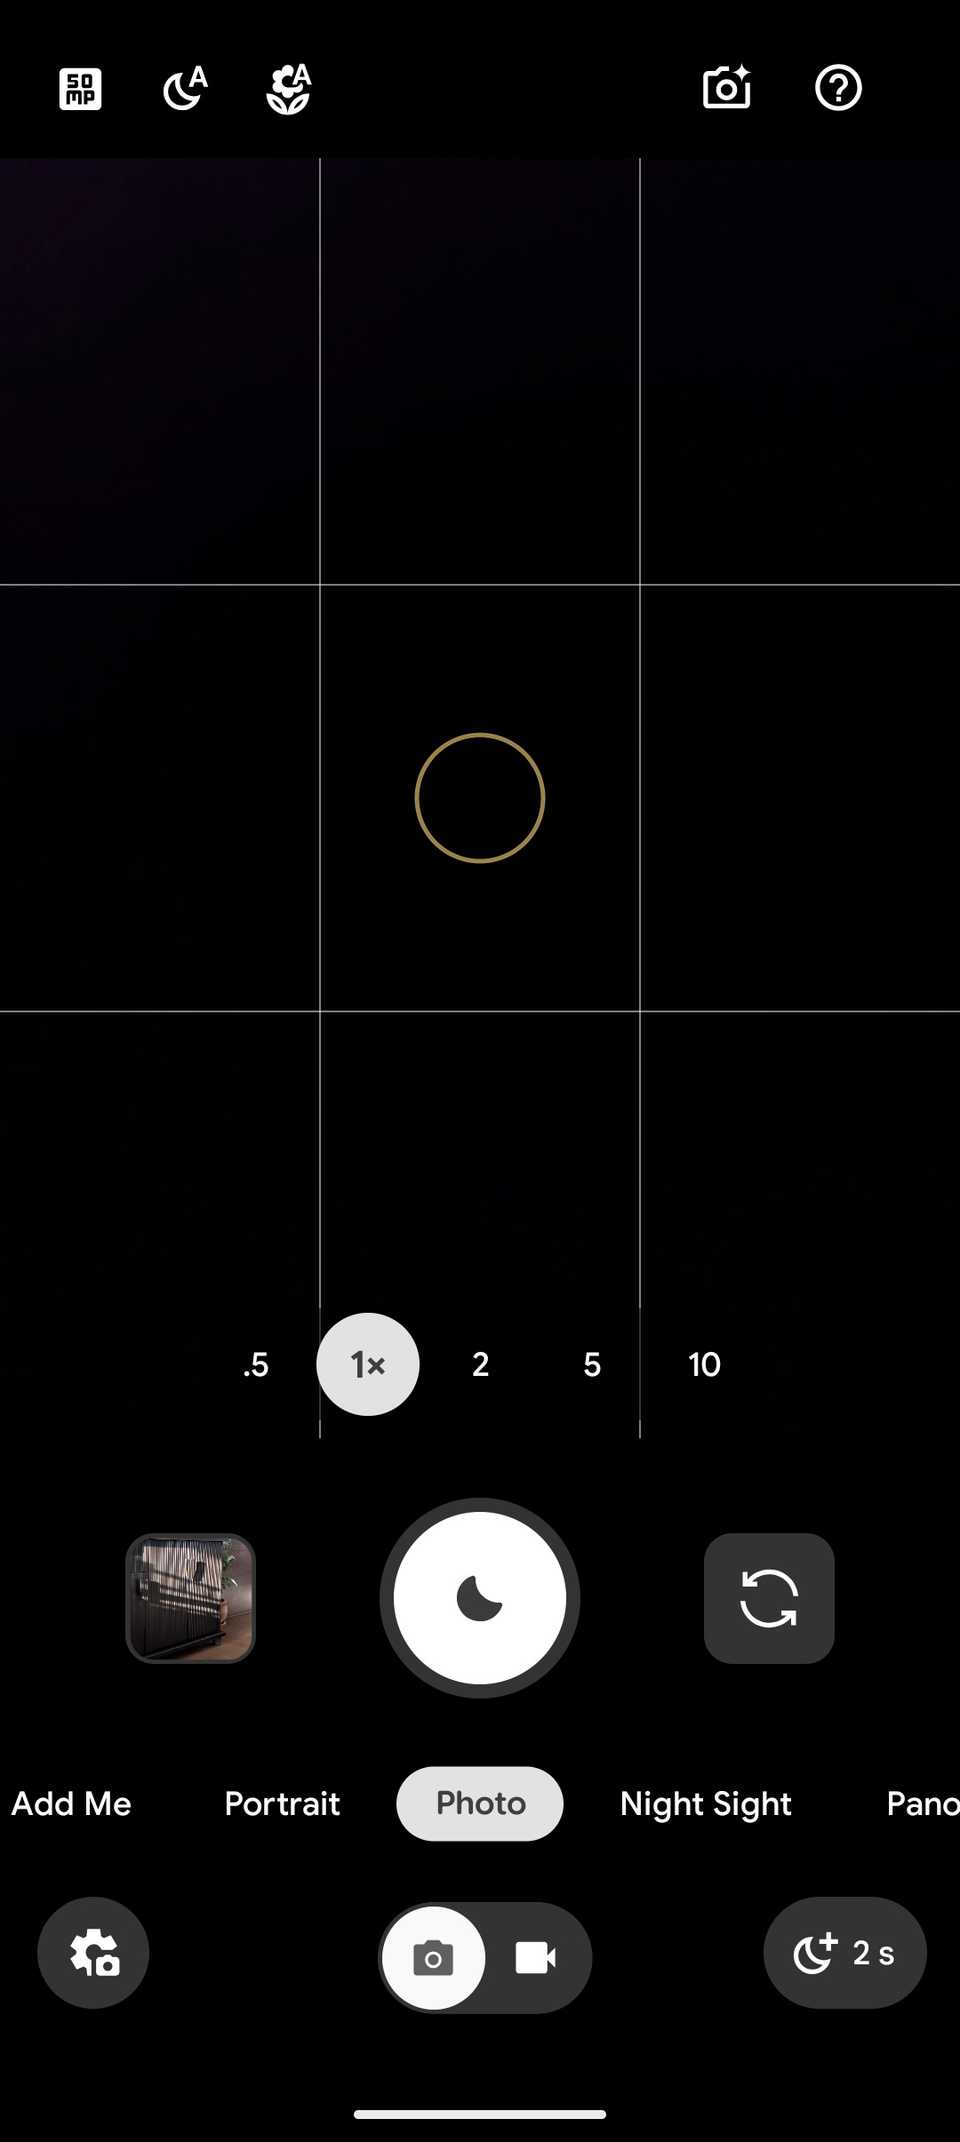
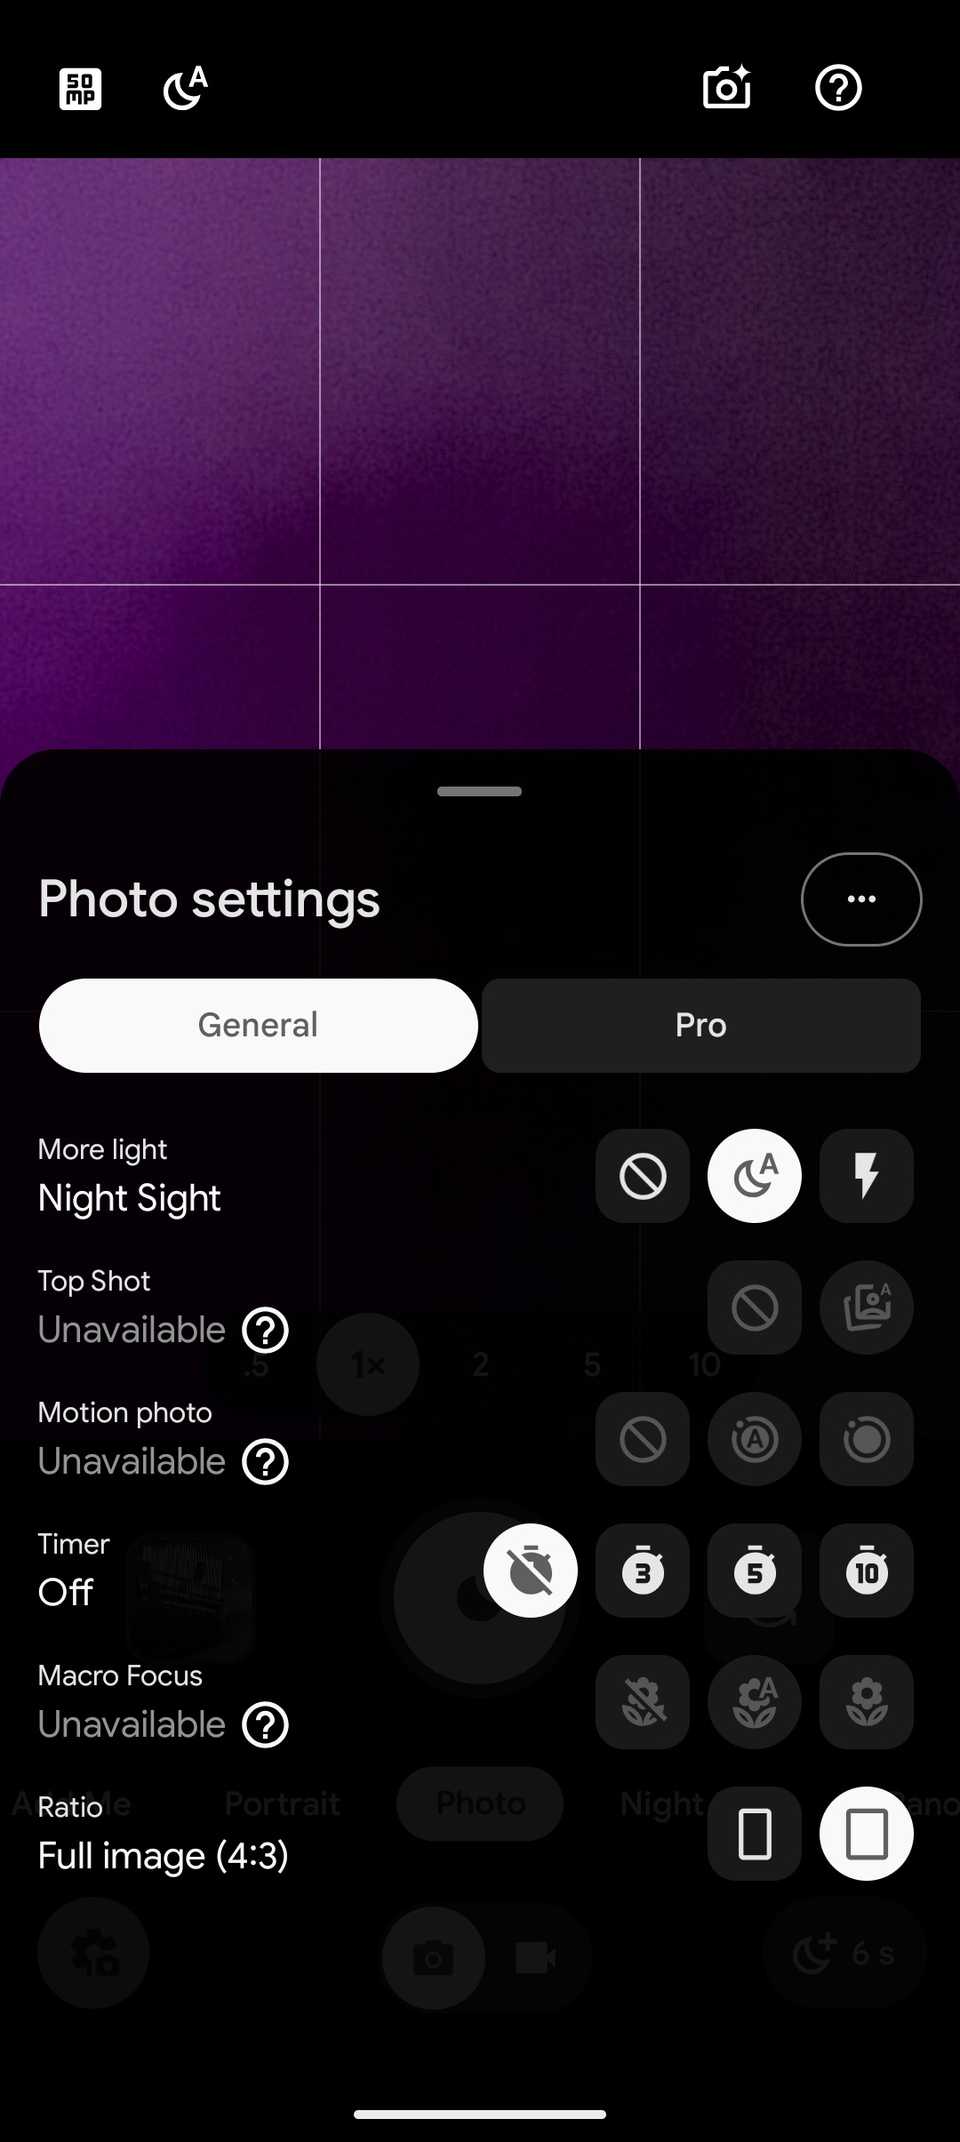
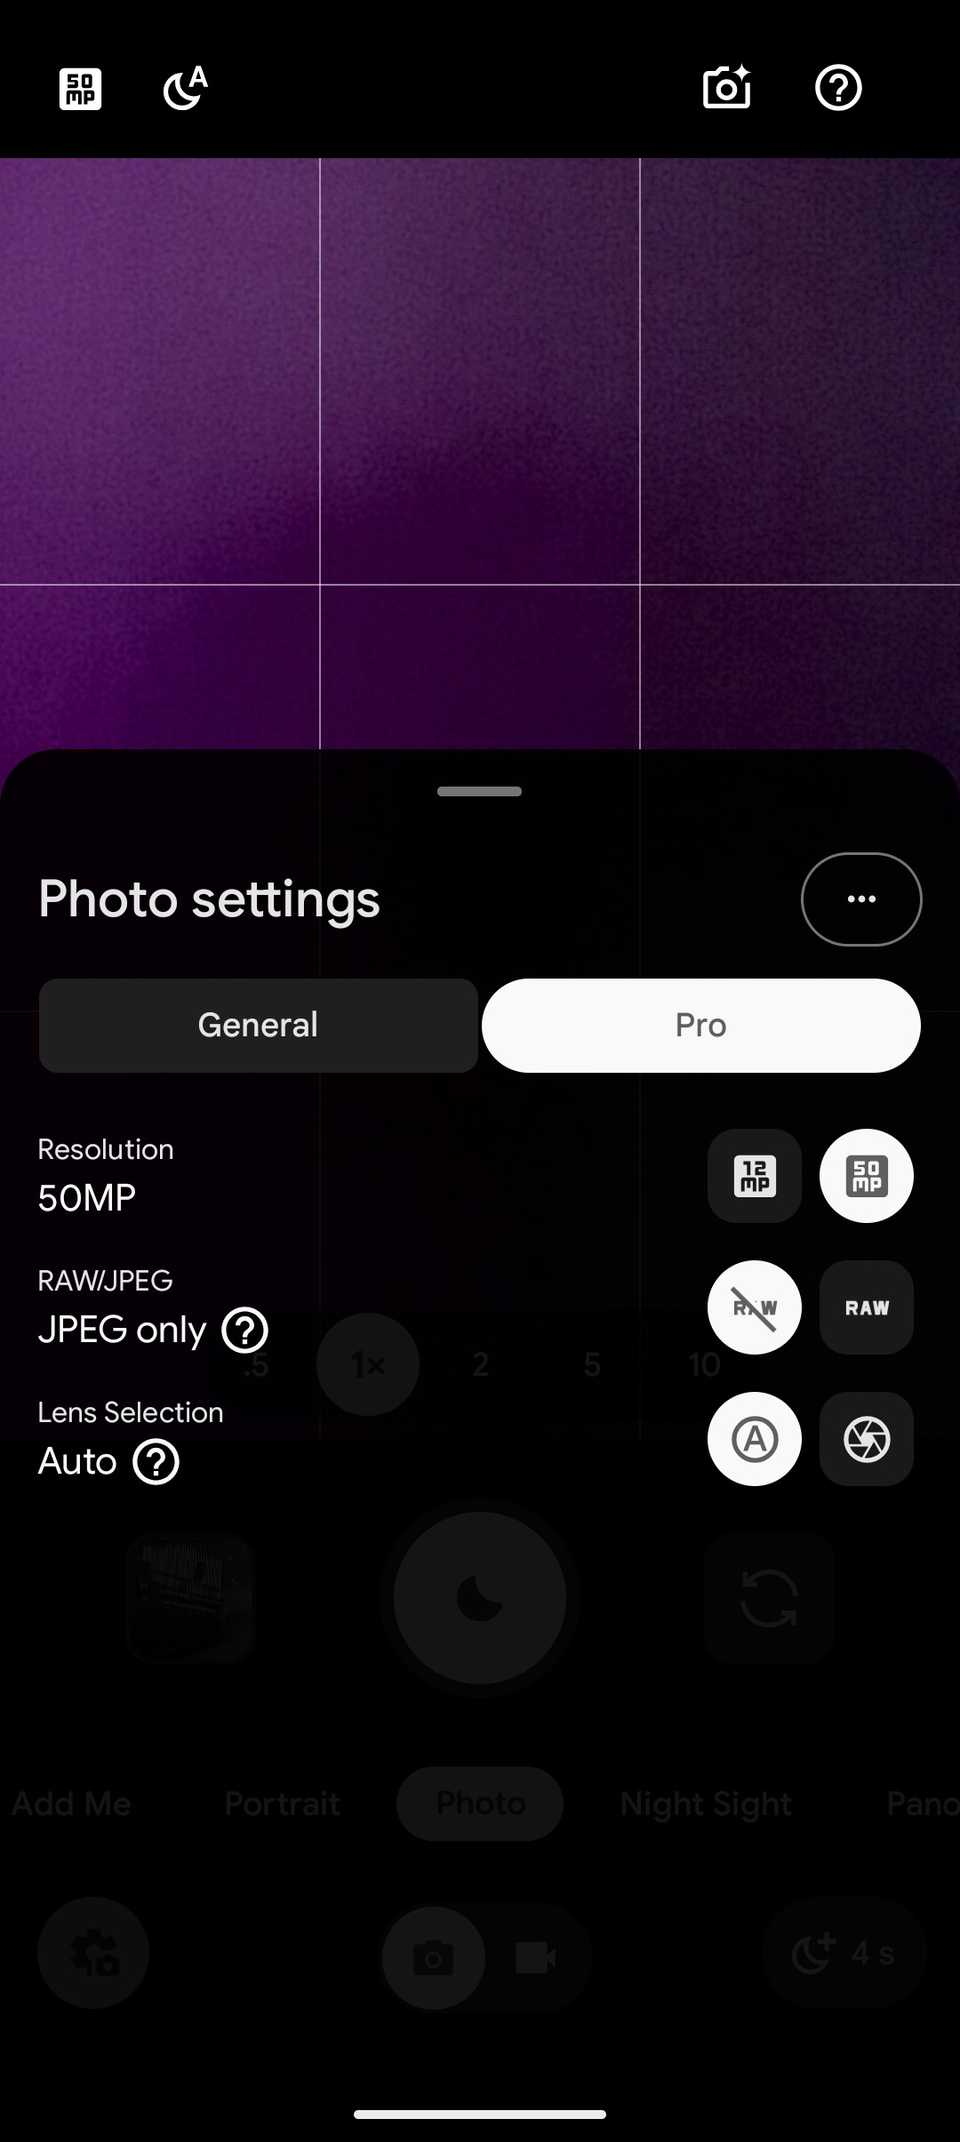
If you’ve got one of the Pixel 10 Pro models, you get superior camera hardware than the regular Pixel 10. Alongside a more capable telephoto and ultrawide camera, this also includes a larger 50MP main sensor, which supports high-res 50MP shots.
Unfortunately, the 50MP mode is turned off on both Pixel 10 Pro models. Instead, they use pixel binning to produce 12MP photos, combining data from multiple pixels into one to generate cleaner and brighter photos, especially in low-light conditions. This is also done to allow faster processing for computational photography.
Thankfully, you can switch to the 50MP mode for times when you want more detailed photos. Open the Camera app, tap the gear icon in the lower-left corner, and switch to the Pro tab. Tap the 50MP option next to Resolution.
Turn off App suggestions on home screen
Put the bottom app row to better use
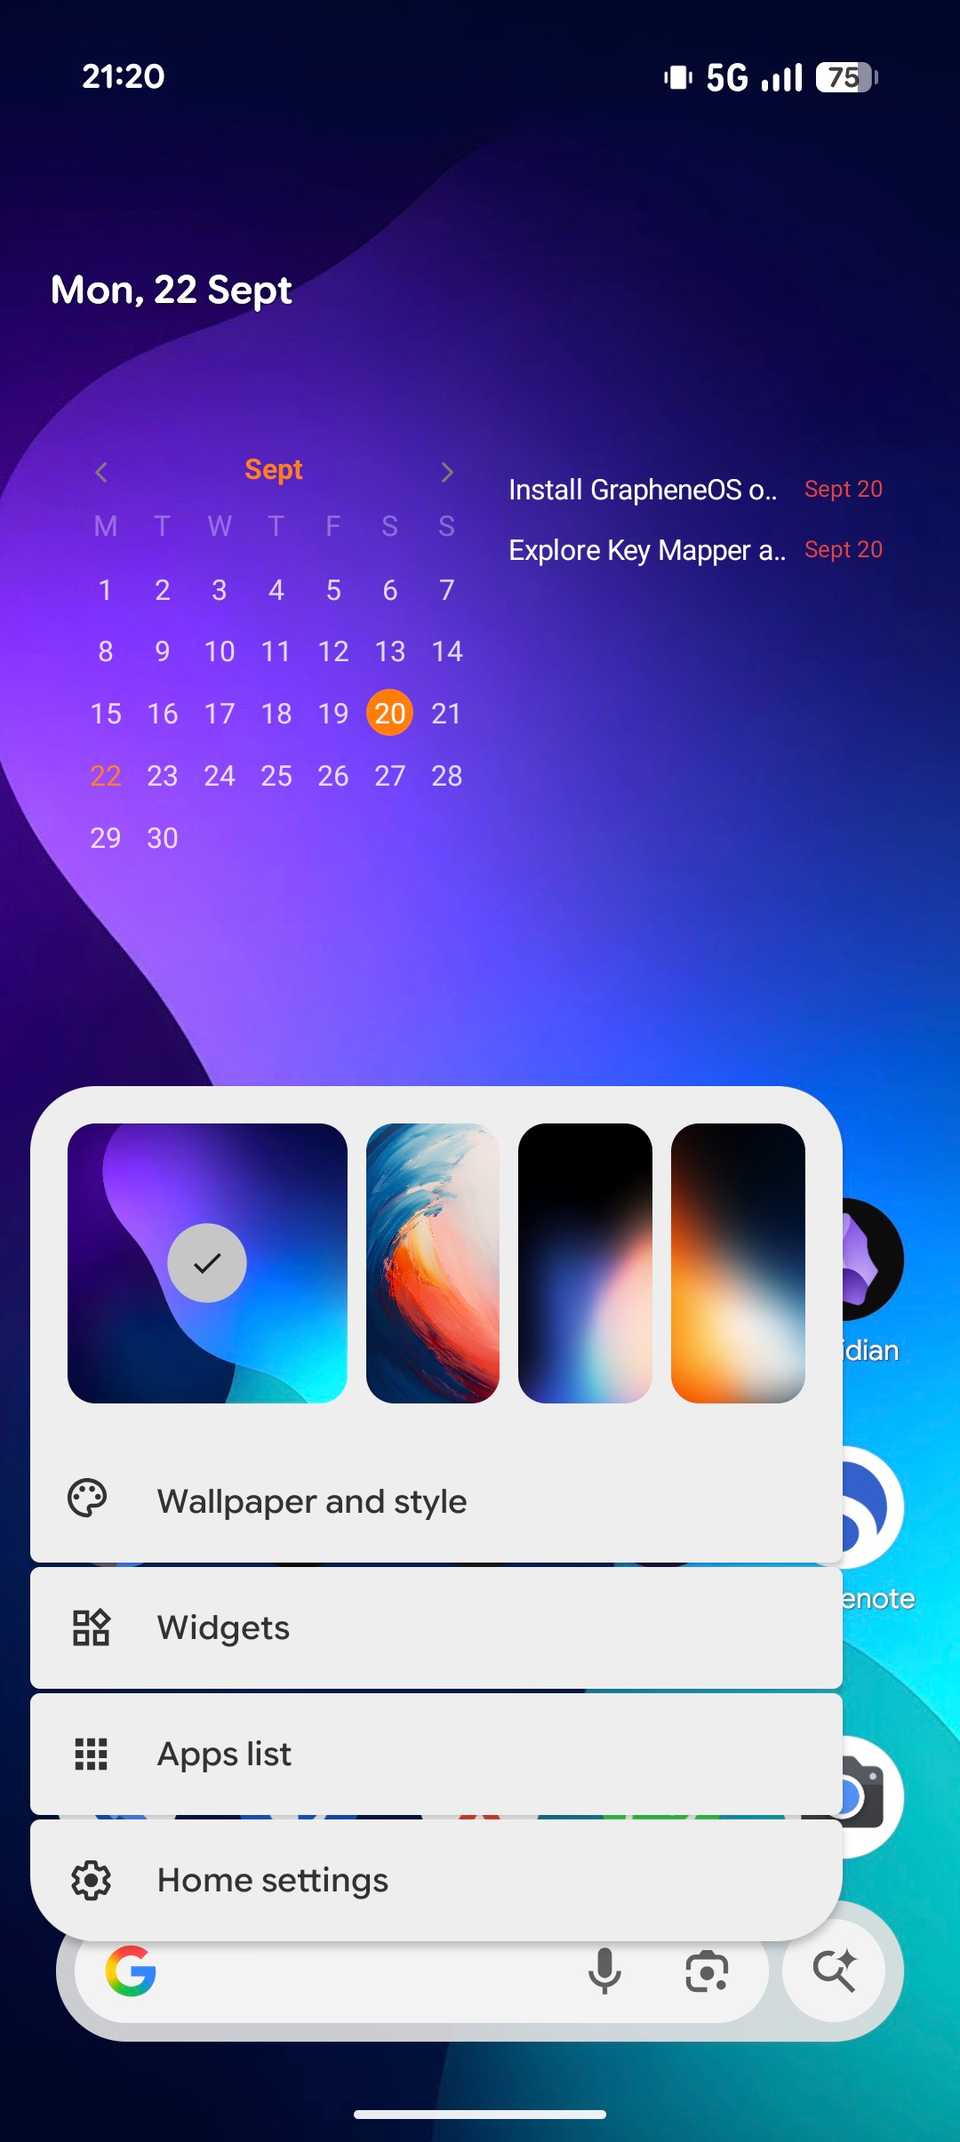
By default, your Pixel 10 shows dynamic app suggestions on the home screen based on your recent activity or daily usage habits. You’ll see them in the bottom row, and they’re marked with a colored shadow around their icons to distinguish them from other apps.
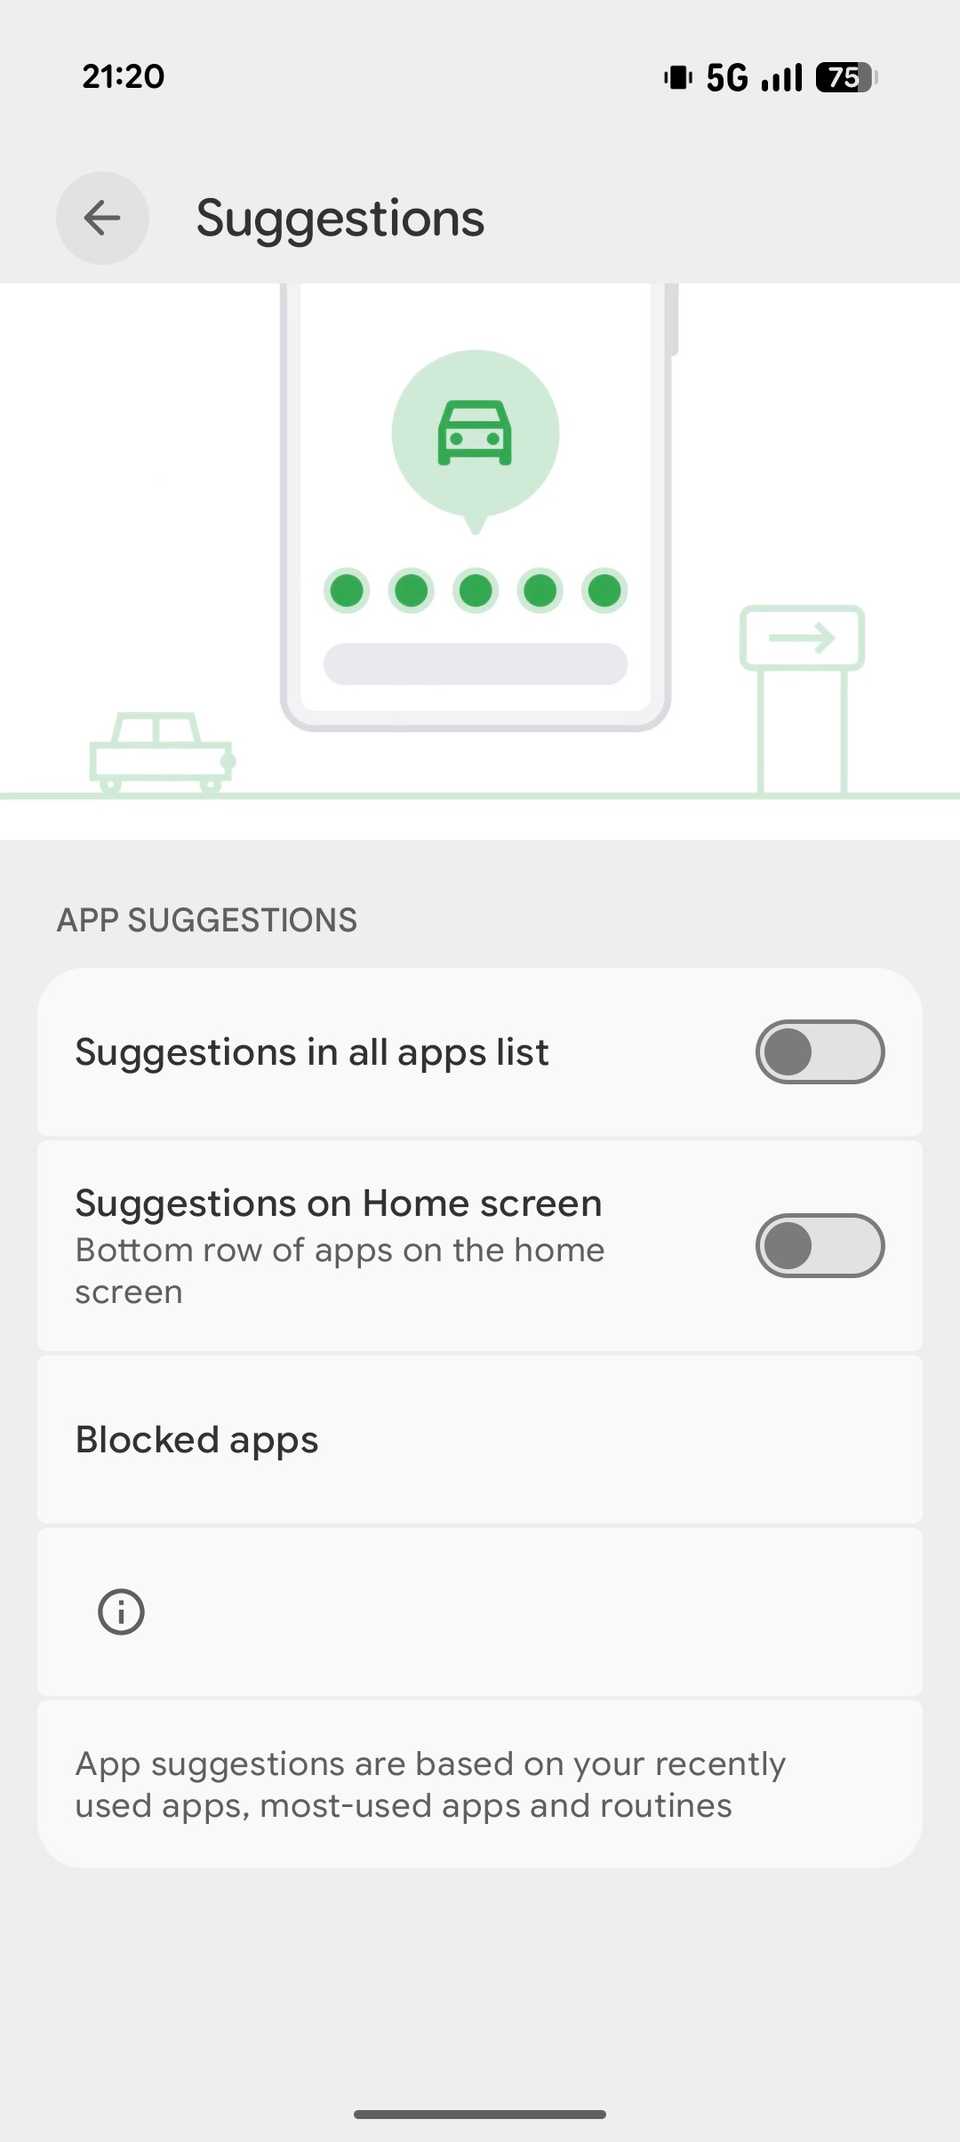
While designed to improve convenience, the app suggestions aren’t always accurate. Additionally, they occupy valuable space at the bottom of the screen, which could be better utilized by placing the apps you need more frequently. Hence, it’s best to turn it off.
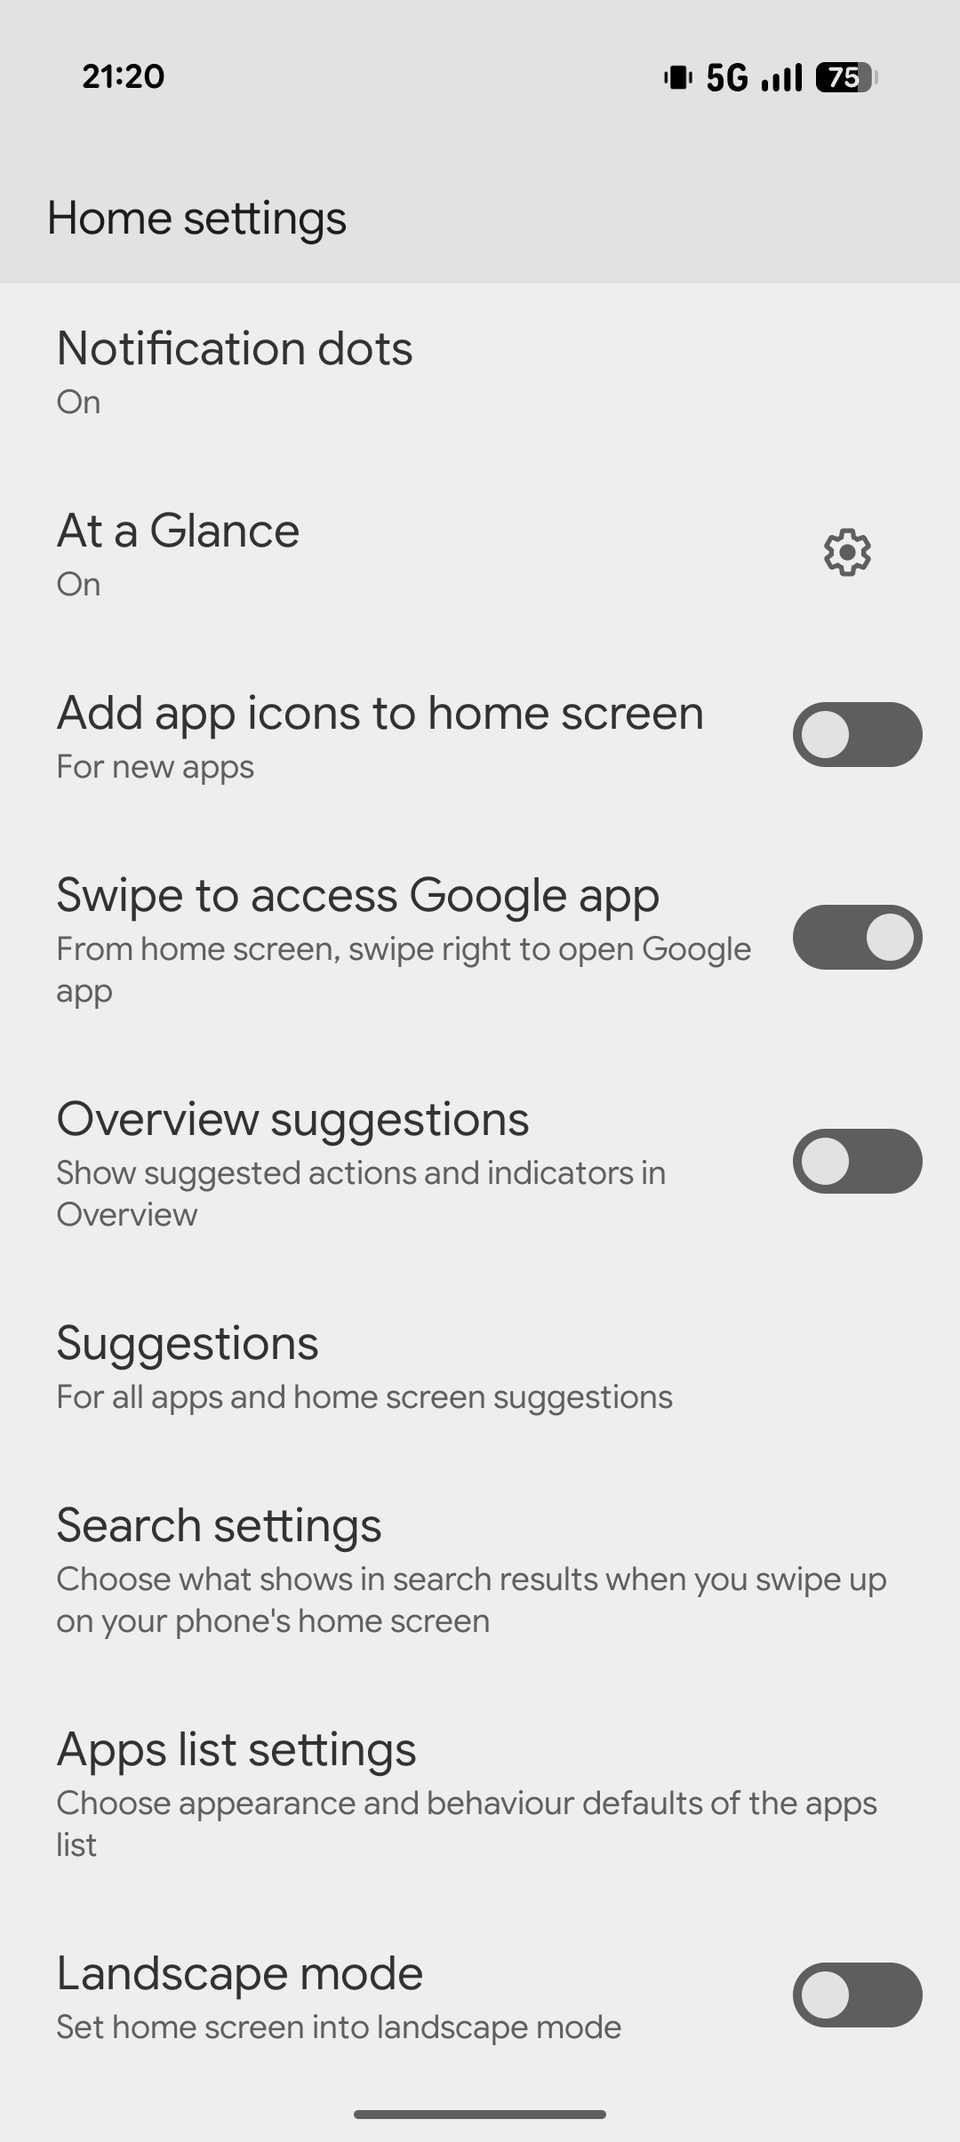
To do this, long-press any empty space on the home screen and select Home settings. Tap Suggestions and, on the following screen, toggle off the Suggestions on Home screen option. You can also disable Suggestions in all Apps list to hide suggestions in the apps list.
Enable Notification history
Never miss an important notification again
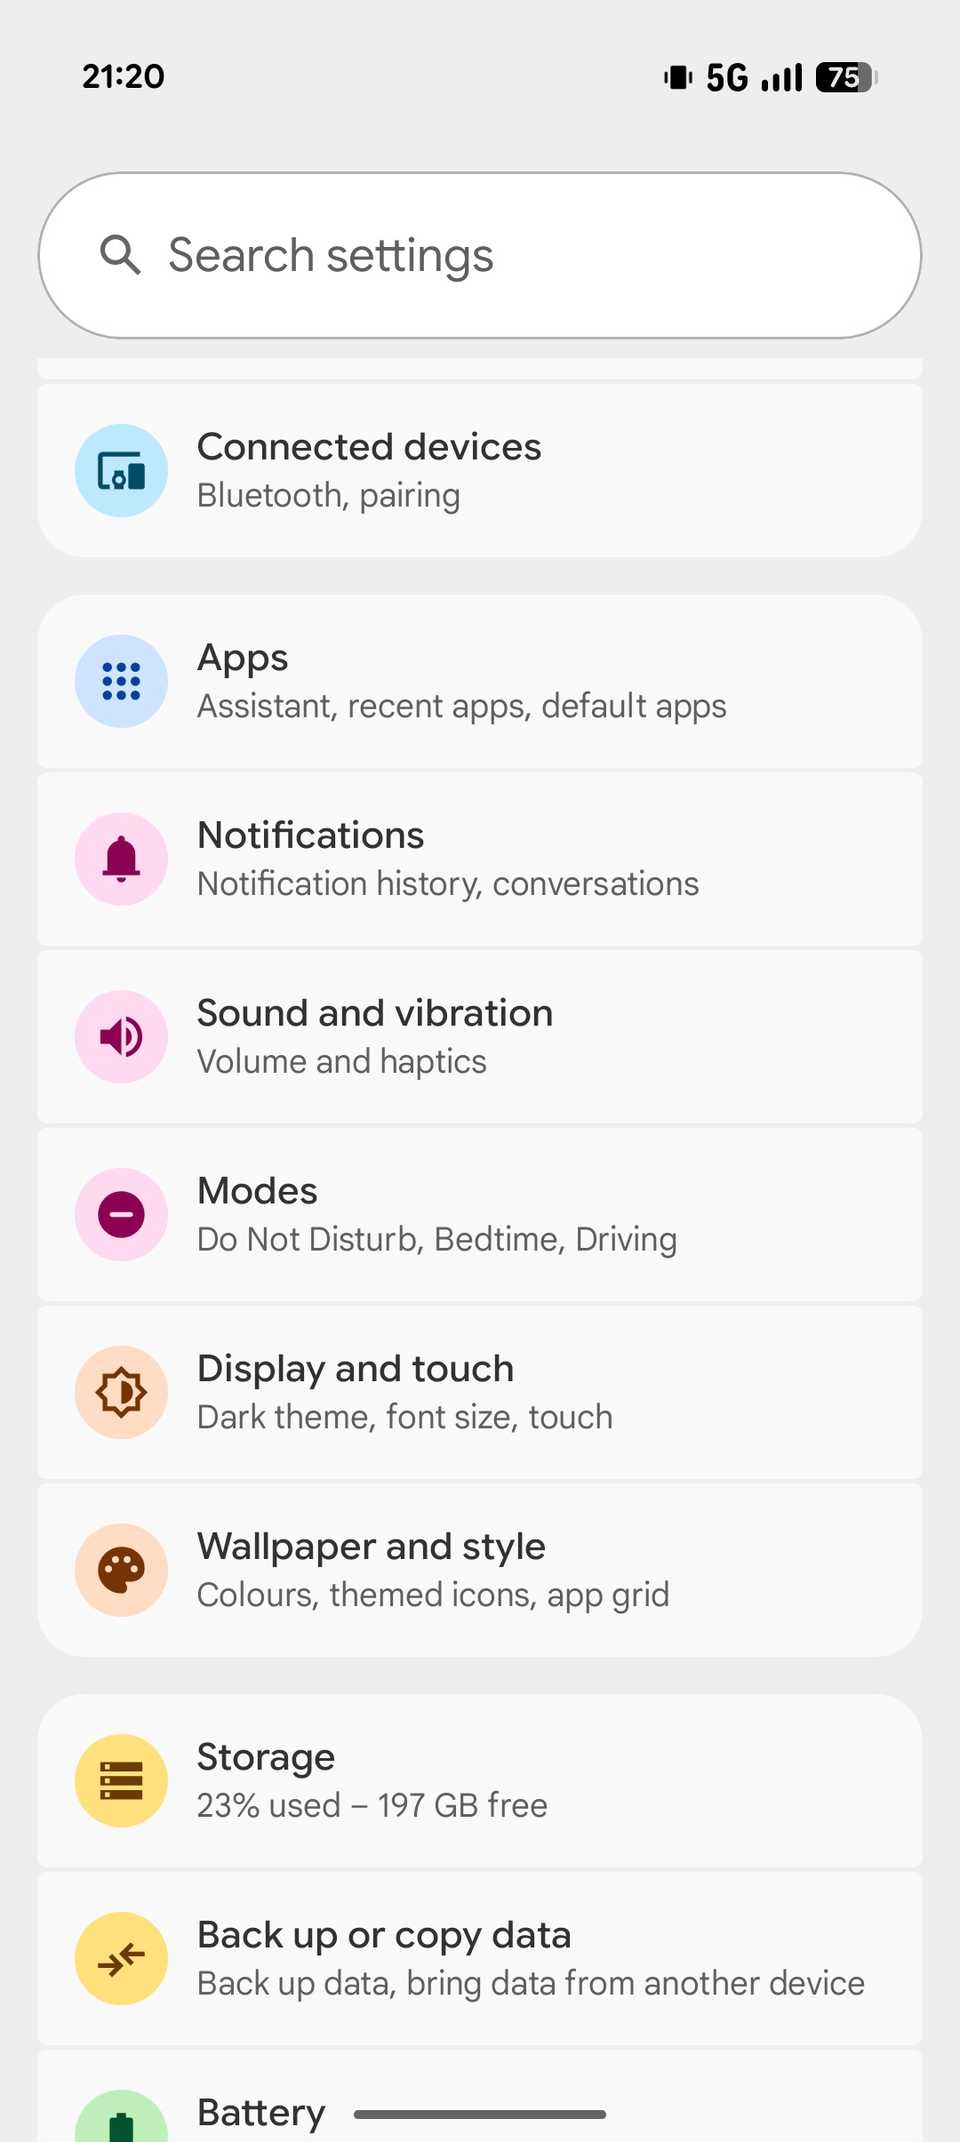
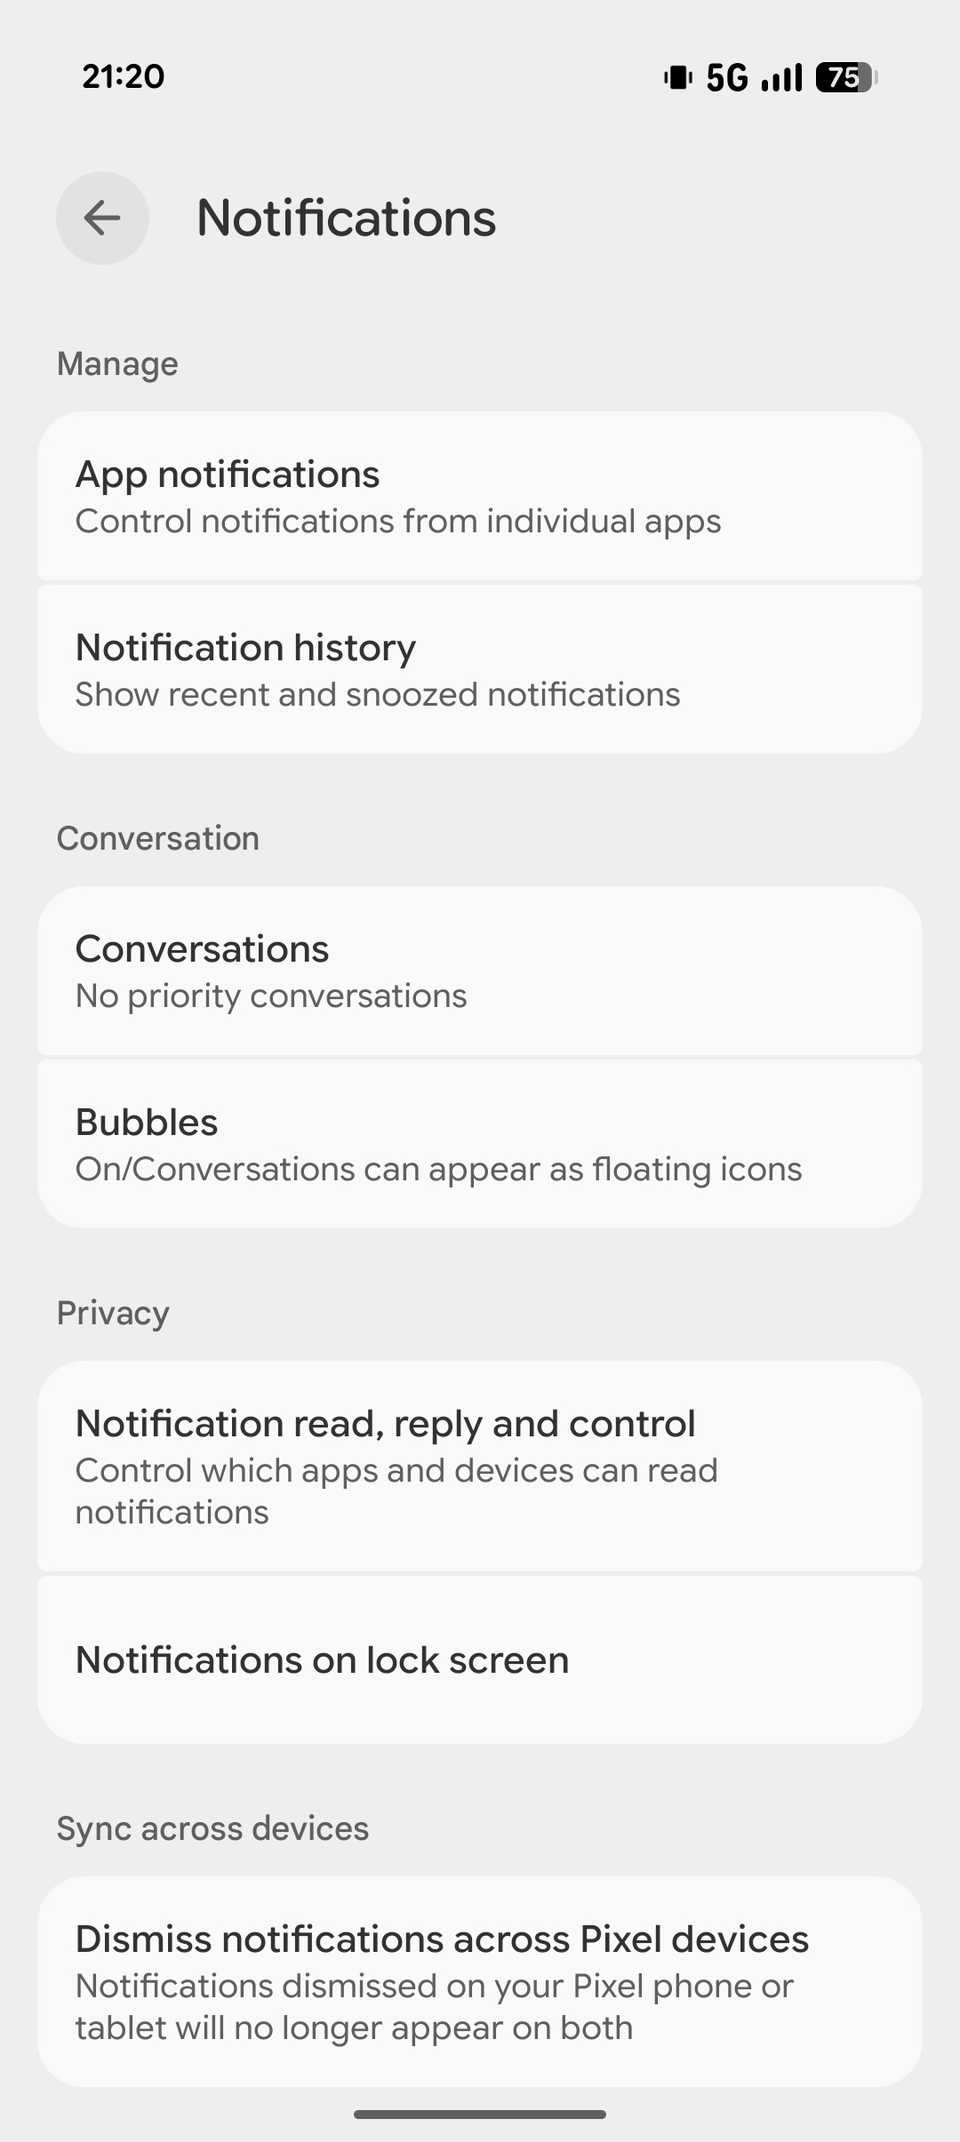
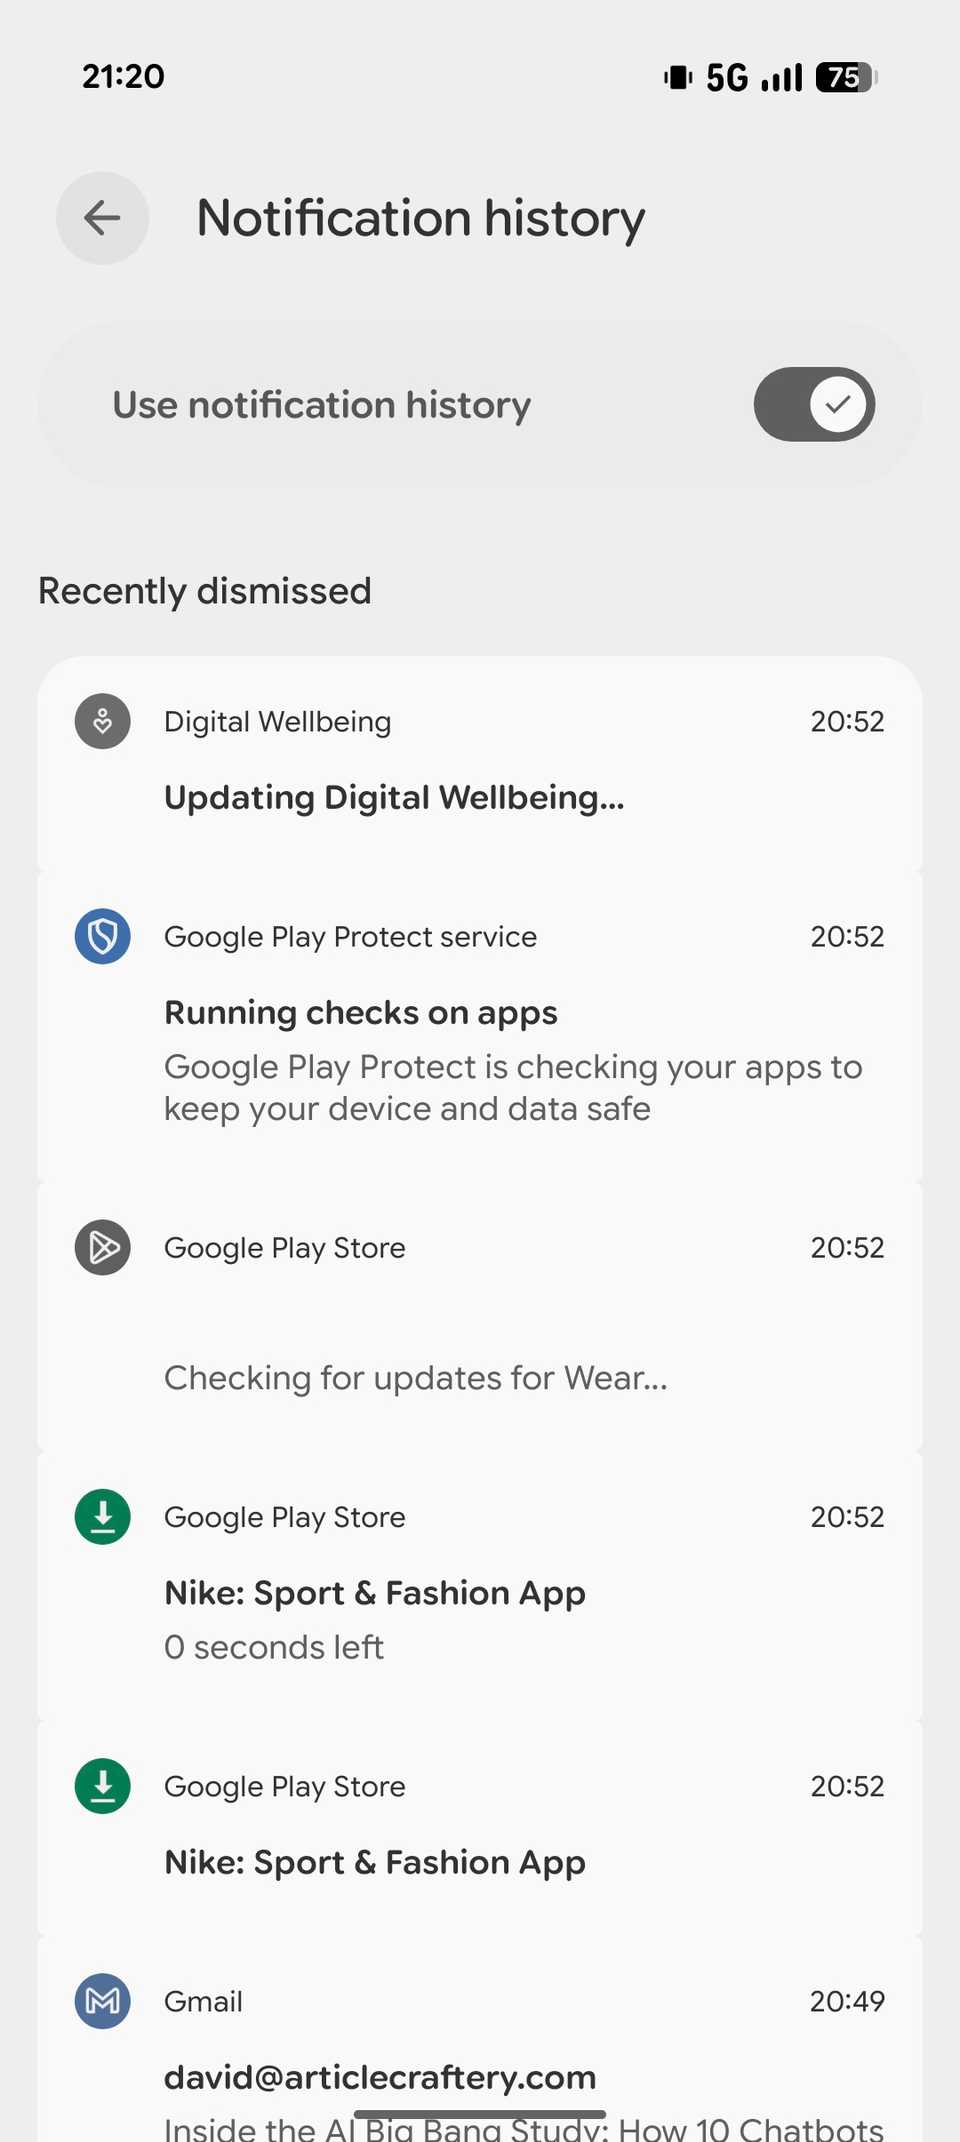
It’s easy to miss important notifications when you have apps sending dozens of notifications every day. Thankfully, Pixel phones have long offered Notification history, which records and stores a history of all the incoming notifications. That way, if you’ve missed an important notification or cleared it accidentally, you can look for it in history.
To enable Notification history, open Settings and select Notifications. Under Manage, tap on Notification history and toggle on the Use notification history button.
Notification history can also help identify which apps send you the most notifications, so you can decide their usefulness and take appropriate action.
Set up Quick Tap
Turn your phone’s back into a virtual button
Quick Tap is Google’s equivalent of the Back Tap feature available on iPhones. It essentially turns the back of your phone into a virtual button, which you can double-tap to take a screenshot or toggle the flashlight, among other things.
Setting up Quick Tap is easy. Open Settings and head to System -> Gestures -> Quick Tap to start actions. Flip the Use Quick Tap toggle on. Then, select your preferred action under Tap back of your phone twice to.
You can also launch apps with Quick Tap. Select the Open app action, tap the gear icon next to it, and choose the app you want to assign to the gesture on the following screen. You can open certain apps in a specific menu. Tap the gear icon next to their name to reveal the available options and select one on the following screen.
If you experience accidental triggers while using your phone, perhaps because you don’t have a case on, you can increase the tap strength. Go back to the Quick Tap settings page and toggle on the Require stronger taps option under Quick Tap strength.
A good experience starts with small changes
Those are just a handful of settings you should consider changing on your Pixel 10. Google packs these phones with plenty of other features worth checking out, too, such as Call Screen, Magic Cue, Private Space, and Extend Unlock. So, spend a few minutes exploring the device and configuring its settings to get the most out of it.

