Staring at lines of code just to test if your website’s signup form works properly is exhausting.
If you’re a marketer, product manager, or QA specialist without deep programming skills, you’ve probably thought of an easier way to test your or your client’s website.
Good news is there is.
Codeless automation testing lets you verify your website or app works correctly without writing a single line of code. According to testRigor’s Heather Brooks, you can build automated tests 15x faster than QA engineers, which saves time and resources and is easy to replicate.
Instead of programming, you use:
- Visual drag-and-drop interfaces for building tests.
- Recording tools that watch what you do and turn it into test scripts.
- Pre-built components for common scenarios across applications.
This helps non-dev and developer teams to reproduce and verify bugs, run
In this article, I’ll share four practical ways to use codeless testing tools for your website or application, even if you’ve never written a line of code before.
4 Ways To Use Codeless Automation Testing in Different Q&A Scenarios
You need zero programming experience to create and manage automated tests without coding knowledge. Here’s how:
1. Use Codeless Automation to Test for UI Regression.
When you make front-end changes to your website or web application, visual elements, like layouts and navigation menus, can break off and appear differently on all browsers. This happens because browsers interpret HTML, CSS, and JavaScript differently, which can cause inconsistencies in these elemeunts.
For example, after updating your CSS styling or a new checkout flow, you’ll need to verify that users can still click the buttons, the forms still display correctly, and they can still navigate menu functions regardless of the browser they use.
If you do this traditionally, you’d need to write test scripts for each browser to know and track how well the app works on each.
This can be time-consuming and error-prone.
But with codeless automation, you can record the action once, and configure it to run the same on every browser and device, so it appears the same to users on all browsers and devices.
To do this;
- Record the actions you want to test (login, navigation, form submission, anything) in a codeless automation tool.
- The tool will capture each click, form input, and validation points you navigate, and you can stop recording once you’ve completed the test flow.
- Then, you can select the browsers you want to run the test through.
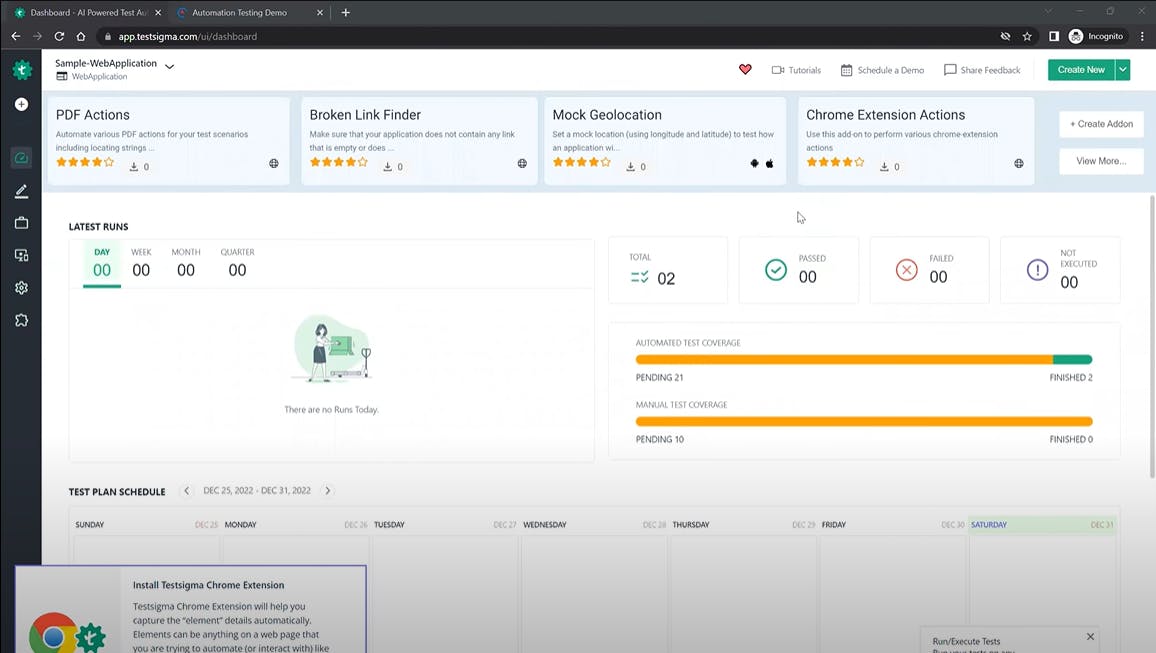
- You can then review results through a dashboard that shows how the app interacts with every browser.
Here’s an example from Testsigma:
2. Testing for API Data Validation
When you integrate third-party payment gateways or add your REST API endpoints to your application, you need to validate that the API responses return the expected HTTP status codes, JSON formats, and data structures.
For example, if you run an e-commerce store with an inventory management API. You can create APIs that other parts of your software can use to check stock levels, and update quantities, etc…
The API has an endpoint like “
With codeless testing tools like Testim or Katalon, you can configure API tests through visual interfaces. For instance,
- You can enter the URL of the endpoint you need to test,
- Select the action you want to take from the drop-down menu (GET to retrieve your data, POST to create new data, and PUT to update existing data).
- Add your authorization token to show that you have permission to access the API.
- Select your content type and verify that everything is as it should be. (In this case, the product ID starts with “PRD” or the stock quantity field is a number.
3. Testing for Data-driven Forms to Find Boundary/Edge Cases/
If you build a product registration form on your e-commerce website, you need to test it with different kinds of input to make sure it works properly no matter what customers type in.
For instance, if your registration form has an “Age” field that should only accept values between 18 and 99, you need to test for:
- Exactly 17 (just below minimum) – should be rejected.
- Exactly 18 (minimum) – should be accepted.
- Exactly 99 (maximum) – should be accepted.
- Exactly 100 (just above maximum) – should be rejected.
This is called boundary testing. For edge cases, you would also test unusual scenarios like entering text instead of numbers or leaving the field empty to ensure your validation works properly.
With traditional coding, you’d need to write a series of code to test these boundaries. You’d write a lengthy code like this:
test('Age field validation', () => {
enterValue('age', 17);
expect(getErrorMessage()).toBe('Age must be at least 18');
enterValue('age', 18);
expect(getErrorMessage()).toBe('');
And then repeat it for all test cases.
With a codeless approach, all you need to do is:
- Create a simple Excel spreadsheet with the test data, like this:
|
Age |
Expected Result |
|---|---|
|
17 |
Error |
|
18 |
Success |
|
99 |
Success |
|
100 |
Error |
|
abc |
Error |
|
“” |
Error |
- Use a codeless tool, like TestGrid, to record yourself filling out the form once.
- Make your spreadsheet the data source.
- Map the Age column to the Age field in your form.
- And configure the validation to check for error messages.
These tools will automatically run everything in your spreadsheet. They’ll run each value and report which tests pass or fail, and you wouldn’t even need to do anything.
Easy Peasy.
4. Testing for End-to-End Business Process
E-commerce websites have multiple customer journey processes that pass through several systems before they end.
Rather than testing just the check-out form or the product page alone, you should check that the entire purchasing flow works correctly from start to finish.
For example, a complete e-commerce purchase process includes:
- A customer creating an account with their shipping address.
- Searching for “wireless headphones” in your product catalog.
- Filtering results by price range and customer ratings.
- Adding items to their shopping cart.
- Applying a discount code at checkout.
- Entering payment information through your payment gateway.
- Receiving an order confirmation email.
- Checking their order status in their account dashboard.
Traditional testing would need separate scripts for each of these steps, and these scripts are manually maintained and coordinated.
On the other hand, codeless lets you build a visual workflow that represents the entire customer journey.
Here’s how:
- You’d create a visual map of the complete buying process from account creation to order confirmation.
- Connect test actions (like clicking the “Add to Cart” button) without writing code.
- Define checkpoints at each stage (verifying the cart total updates correctly).
Most codeless platforms let you arrange these test steps as connected blocks.
For instance, in TestCraft or Rainforest QA, you first record basic interactions, like searching for products and clicking the checkout button, then arrange them in sequence.
You can also add verification points throughout the flow to check if products appear in the cart or if the order confirmation displays the right information.
Conclusion
Codeless test automation is beneficial, but it’s not a complete replacement for all testing. Start with the basics and focus on important areas like your checkout processes, but don’t abandon manual testing entirely. The most successful team combines codeless tools with traditional coding so everyone on the team can contribute to the testing process – even those who cannot code.


