Building the server side of an application, there are different programming languages to use, and one of them is JavaScript. Originally, JavaScript was built to focus on the client side of web applications. on, JavaScript became useful in server-side development. Some companies, to this day, use JavaScript for their server-side development.
Introduction
Node.js is an open-source JavaScript runtime that uses the V8 JavaScript engine for developing server-side and networking apps/APIs. It allows the use of JavaScript to write code outside the browser like other server-side programming languages like Python, C#, PHP, etc.
In this article, we will cover how to set up node.js to kickstart your project. Assuming you are a backend developer tasked with a project to log a message— “Hello World”. This is where this tutorial will come in handy. Let’s get started!
Prerequisite
- Install
VS Code Editor - Download Node.js from
nodejs.org and install the latest LTS version**.** - Fundamentals of JavaScript
Table of Content
- Basic Setup
- Initialize npm
- Install Dependencies
- Managing Dependencies in Node.js
- Begin Project
- Conclusion
Basic Setup
To check if node.js is installed on your computer;
- Open the command line terminal on your computer. To do this on Windows, use the keyboard shortcut Windows key + R and type cmd. On Mac, go to Applications > Utilities > Terminal or use Spotlight search (Command + Space) and type “Terminal”. On Linux, press Ctrl + Alt + T on your keyboard.
- Next, type
node -vornode - - version. This will show you the version of Node.js that is installed on your computer.
Here is an example:
node -v
Here is the output:
v23.6.0


This tells you that version 23.6.0 of node.js is successfully installed on your computer.
Create A New Folder
Before working on your project, you need a folder. This is where your project is stored locally on your computer. It helps to keep your files organized when you are working on different projects. You have installed node.js. The next is creating a folder.
- Open the command line terminal
- Type the prompt
mkdir - Name the folder with a name you prefer and click Enter
Example
mkdir my-project
In this example, you are using the prompt mkdir to tell your computer that you want to create a folder. And, you followed it with the name you chose to name the folder— test-project
Note: You may name the folder any name you prefer.
After clicking the Enter key, your folder is created and stored locally on your computer.
Navigate To The Folder
After creating a new folder, it doesn’t end there. You have to tell your computer to open the folder. To do this**;**
- Type the prompt
cd - Type the name of your new folder (the one you created).
- Click Enter
Example
cd my-project
This shows the file path and the new folder is open and ready for use.
Here is the detailed code:
mkdir my-project

cd my-project


The same method applies to Mac and Linux.
Initialize npm
npm, also known as Node Package Manager, is referred to as a library or tool that comes with Node.js. If you don’t have node.js installed on your computer, you won’t have access to it.
Npm is used for Installing, updating, and removing packages (also known as dependencies) from your project. These packages could be frameworks (express.js) and other tools like nodemon, dotenv, etc. needed for a specific project.
It simplifies adding functionality to your project without writing everything from scratch. You have installed node.js and created a folder. The next will be initializing your project;
- Open the command line terminal
- Initialize npm by typing
npm initornpm init -y
This is the prompt used to start npm in your project manually or automatically.
Note: You must do this every time you build a new project.
Start npm Manually
To start npm manually in your project, you do this;
- Open your command line terminal
- Type in
npm init - Click the Enter key to start it
After this, you are directed to respond to a few default questions and follow subsequent steps;
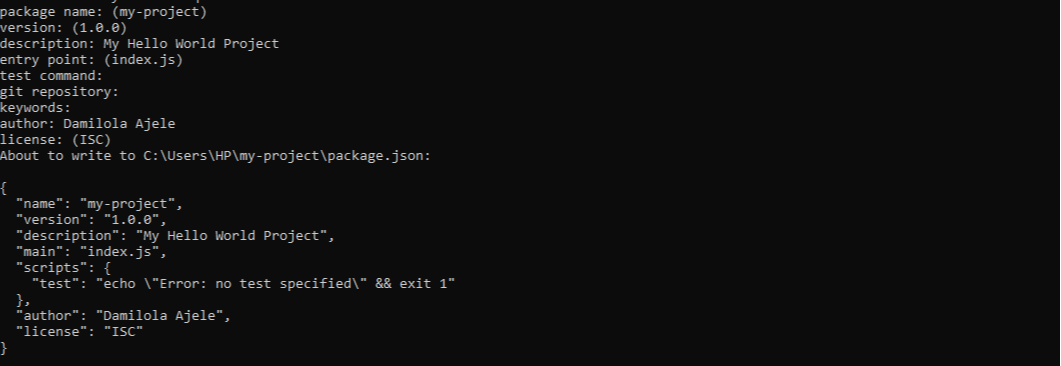
- Package name: Type any name you prefer, e.g. my-project. And, click Enter
- Version: This will show you the version of the npm installed. No editing is required for this part, click Enter to go to the next prompt.
- Description: Write a short description of your project. This is optional. For example, “My Hello World Project” and click Enter
- Entry Point: This indicates that the
index.jsfile is the main file of your project. No editing is required, click Enter - Test Command: This is optional. If you don’t have a test command, leave it empty and click Enter to move to the next prompt
- Git Repository: Provide your GitHub repository URL. If you don’t have one yet, leave it empty and click Enter to move to the next prompt
- Keywords: This part is optional. If you don’t have keywords, leave it empty and move to the next.
- Author: Type your name
- License: Type a license if you have one. If you don’t, you can skip it by clicking the Enter key.
After setting up the npm, a preview is shown to you, and you will be asked, “Is this OK?” Type YES and that’s it. After typing “yes”, a package.json file is created in the test-project folder, and you can view it in a code editor.

Start npm Automatically
If you don’t want to go through setting up npm manually, you can do it automatically by entering npm init -y in the command line terminal, and it creates a package.json file.
The only difference is, that you are not setting up the default settings yourself like you did in the manual method, and you are adding “-y” with the npm init this time. You will get the same results for both methods.
Note: You are allowed to edit the package.json file after it’s created. Go to the file on your code editor and make your edits.
Install Dependencies
Every dependency (package) you need for a project is always obtained from the npm. There are various types of dependencies:
- Direct Dependencies
- Transitive (Indirect) Dependencies
- Development (dev) Dependencies
- Peer Dependencies
- Optional Dependencies
- Bundle Dependencies
- System Dependencies
Direct Dependencies
These are explicitly installed and used in your project. Example: If your project uses Express.js, then Express is a direct dependency.
npm install express
Transitive (Indirect) Dependencies
These are dependencies of your dependencies. Example: If your project depends on Express.js, and Express internally depends on body-parser, then body-parser is a transitive dependency.
Development (Dev) Dependencies
These are only needed for development and testing, but not in production. Example: Libraries like Nodemon, Jest, or linters like ESLint.
In Node.js, these are installed using:
npm install --save-dev nodemon jest eslint
Example package.json snippet after installation
"devDependencies": {
  "jest": "^29.0.0",
  "eslint": "^8.0.0",
  "nodemon": "^3.0.0"
}
Peer Dependencies
These are dependencies that your project requires but expects the user to install. Example: Some middleware packages (e.g., express-session, cors) expect express to be installed separately.
Defined in package.json like this:
"peerDependencies": {
  "express": "^4.0.0"
}
Optional Dependencies
Dependencies that are not required but can be installed if available. Example: A project might support both SQLite and PostgreSQL, but only one is necessary.
In package.json, they look like:
"optionalDependencies": {
  "sqlite3": "^5.0.2"
}
Bundle Dependencies
Dependencies bundled with your project rather than installed separately. It is used when you want to include a dependency inside a package.
System Dependencies
These are external software required for your project, such as a database or runtime environment. Example: Node.js, MongoDB, or PostgreSQL are system dependencies.
Managing Dependencies in Node.js
npm install <package-name>
Example,
npm install express
npm install –save-dev <package-name>
Example,
npm install –save-dev nodemon
- View installed dependencies
npm list //it shows you the list of packages you installed
npm uninstall <package-name>
Example,
npm uninstall eslint
Production Dependencies
These are essential packages required for your Node.js application to run in a live environment. These dependencies provide core functionalities such as handling requests, connecting to databases, and managing authentication.
They are installed normally with:
npm install express mongoose dotenv axios
And, they are listed in the “dependencies” section of package.json:
"dependencies": {
  "express": "^4.18.2",
  "mongoose": "^7.0.0",
  "jsonwebtoken": "^9.0.0",
  "dotenv": "^16.0.0"
}

Note: Only install the necessary dependency you need for your project to reduce app size and improve performance.
Begin Project
You have installed node.js, created a folder, and set up npm. It’s time to log your first “Hello World” in a code editor. To do this;
- Open the command line terminal
- Type “code” followed by a dot. That is
code . - Click Enter
code .
This takes you to the code editor (VS Code editor) and you will see the “test-project” folder you created and the package.json file. The package.json file shows you the npm default settings you initially installed into your project.
Write Your Hello World
Before you start, you need a file to write your code. For now, you only have the package.json file, which was created after setting up your npm. If you need any framework or tool for your project, it will be installed in the package.json file. Your code is not written in this file, you have to create another file for writing your code.
During the default settings, the entry point indicated a main file called index.js. This is the main file of your project and this is where all your code should be written. It should not be written outside this file unless your code won’t work.
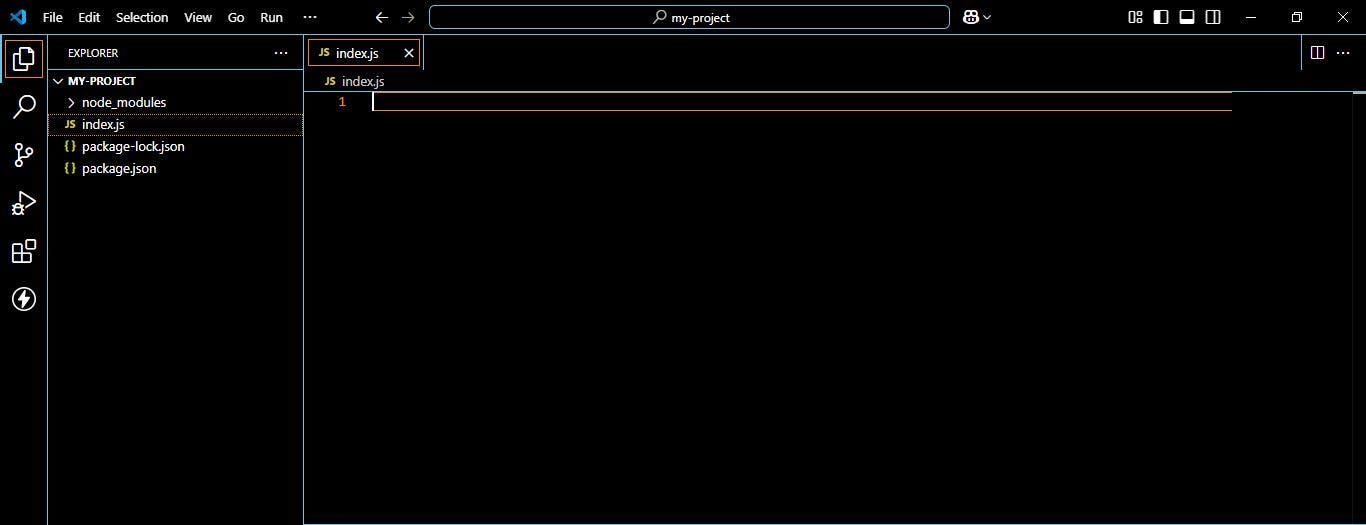
To open the main file as indicated in your package.json file, you will create a file called “index.js” first (Ensure it matches the name of the main file in the package.json file). To do this;
- Click on the New file icon next to your project name (test-project)
- Type
index.js - Click Enter
And the index.js file is created.

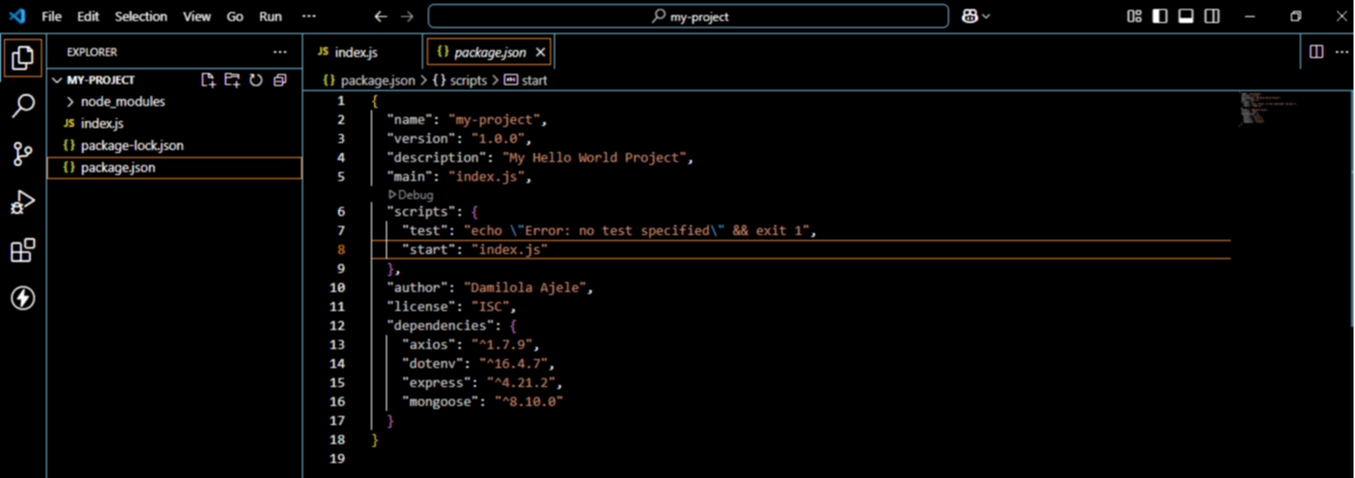
Before you proceed in writing your code, you have to set up a “start” script in the package.json file. This is important because whenever you write a code in the main file (index.js), the runtime (node.js) needs to be initiated to process your code. Without this, your code won’t work. To do this;
- Open the
package.jsonfile - In the Script section of the file, where you see
"test: echo/Error: no test specified && exit 1" - Place a comma after it and click Enter. It will take you to the next line
- In the new line, Type
"start": "index.js" - Save it— use Ctrl S (Windows) or command S (Mac) or click on File at the navigation bar at the top of your VS Code editor and click Save
The “start” script allows you to use the prompt “node index.js” in your terminal whenever you want to process your code.


For example,
console.log("Hello World")
To do this,
- Open the main file
index.js - Type
console.log("Hello World") - Save it— use Ctrl S (Windows) or command S (Mac) or click on File at the top of your VS Code editor and click Save.
- After saving your file, right-click on the
index.jsfile located at the left-hand side of the VS Code editor and click on Open integrated terminal— this opens the terminal in the main fileindex.js - In the terminal, type
node index.jsand Click Enter.


This will process your code in the terminal and show that your code is successfully run by node.js.
Conclusion
In this guide, you get a beginner-friendly and in-depth overview of how to set up your node.js projects. We discussed important steps like setting up npm and installing dependencies.
Remember, you will become a better backend developer when you keep practicing. To learn node.js for building projects,
I hope the examples provided helped you understand how to set up node.js to use for your new projects.


