Introduction
PostgreSQL (shortened as Postgres) is one of the most used databases in building software applications. Postgres is a general-purpose, open-source, object-relational database management system (RDBMS). One of the advantages of using Postgres is its support for both relational (SQL) and non-relational (NoSQL) querying.
One way of connecting a database to a web application is through the use of an ORM (Object Relational Mapper). An ORM acts as a layer of communication between your application and the database. The goal of this tutorial is to explain how you can use Postgres in your Express application through the Sequelize ORM.
The Sequelize ORM is described as:
A modern TypeScript and Node.js ORM for Oracle, Postgres, MySQL, MariaDB, SQLite, and SQL Server, and more. — Sequelize Documentation
You will build a simple task management API. The API will be able to create, list, update the completion status, and delete tasks.
This tutorial is the first in an upcoming series of tutorials focused on using relational databases in Express using Sequelize. In the upcoming tutorials, you’ll explore database seeding, migrations, and associations in Sequelize.
Prerequisites
To proceed with this tutorial, you’ll need the following:
- A text editor (e.g., VS Code)
- An API client for testing the endpoints (e.g., Postman)
- Node.js is installed on your computer
- Basic knowledge of Express
- An instance of Postgres running either locally or remotely
Project Setup
We’ll begin by setting up appropriate files and directories for creating an Express application and installing the needed packages. The commands used are only applicable to a Linux terminal.
-
Create the project directory:
mkdir tasks-manager-api -
Navigate to the project directory:
cd tasks-manager-api -
Initialize the NPM package by running the following command to create a
package.jsonfile with default settings:npm init -y -
Install Express and other core dependencies:
npm install express express-async-errors dotenv && npm install nodemon --save-dev -
Install Postgres driver for Node.js:
npm install pg -
Install Sequelize:
npm install sequelize -
In the root directory, create the
modelsandutilsfolders:mkdir models utils -
In the root directory, create a
.envfile, which will contain the server’s port number and the database URL of any Postgres instance:PORT=5000 DATABASE_URL=postgres://<user>:<password>@<host>:<port>/<database> -
In the root directory, create the
index.jsfile, which is the application entry point:touch index.js -
Set up the command to run the local development server by editing the
scriptsobject inpackage.json:{ //… "scripts": { "test": "echo "Error: no test specified" && exit 1", "dev": "nodemon index.js", "start": "node index.js" }, //… }
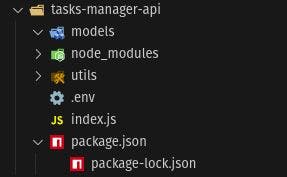
The project folder structure should look like this:

Configuring Sequelize
Create two files in the utils directory: config.js and db.js.
Loading Environment Variables
In the config.js file, load the environment variables from the .env file using the dotenv package. Then export the PORT and DATABASE_URL variables so that they can be accessed in other parts of the application.
The config.js file should have the following contents:
require('dotenv').config()

const PORT = process.env.PORT || 3000
const DATABASE_URL = process.env.DATABASE_URL

module.exports = {
    PORT,
    DATABASE_URL
}
Creating Sequelize Instance
In the db.js file, create a Sequelize instance. You can create a Sequelize instance by passing the database connection URI (stored in DATABASE_URL) to the Sequelize constructor. Then you create a function connectToDB, that will test the connection to the database by calling the authenticate function. Lastly, you export the connectToDB function and the Sequelize instance.
The utils/db.js file should have the following contents:
const Sequelize = require("sequelize");
const { DATABASE_URL } = require("./config");

const sequelize = new Sequelize(DATABASE_URL)

const connectToDB = async () => {
    try {
        await sequelize.authenticate()
        console.log("Database connection established successfully.")
    } catch (error) {
        console.log("Unable to connect to the database:", error)
        return process.exit(1)
    }
    return null
}

module.exports = {
    connectToDB,
    sequelize
}
Defining the Task Model
A Sequelize model is a representation of a table in the database. You can define the Task model by extending the Sequelize Model class and calling the Model.init(attributes, options) function.
In the models directory, create the task.js file with the following contents:
const {Model, DataTypes} = require("sequelize")
const {sequelize} = require("../utils/db")

class Task extends Model {}

Task.init({
    id: {
        type: DataTypes.INTEGER,
        autoIncrement: true,
        primaryKey: true
    },
    title: {
        type: DataTypes.STRING,
        allowNull: false
    },
    completed: {
        type: DataTypes.BOOLEAN,
        defaultValue: false
    }
}, {
    sequelize,
    modelName: "Task",
    timestamps: true,
    underscored: true,
    defaultScope: {
        attributes: {
            exclude: ["createdAt", "updatedAt"]
        }
    }
})

Task.sync()

module.exports = Task
The attributes parameter defines the structure of the Task table in the database. The Task model has three attributes:
id: An integer field which is an auto-increasing primary key used to uniquely identify each record.title: A string field that represents the name of the task.completed: Thecompletedfield has a boolean value that indicates whether the task has been done.
The options parameter configures how Sequelize handles the model. The Task model has the following options:
sequelize: The Sequelize instance created earlier inutils/db.js.modelName: The name of the table created in the database.timestamps: When set totrue, adds thecreatedAtandupdatedAtfields automatically to the model.underscored: When set totrue, converts camel Case fields to snake case in the database.defaultScope: Excludes certain attributes by default when querying.
The Task.sync() function synchronizes the model with the database by creating the table if the table does not exist. However, you should note that synchronization should be done using migrations.
Creating the Express Server
Finally, you put it all together by creating the Express server. In the index.js file, you set up the necessary middleware, define the API endpoint routes, and run the express server.
The start function is responsible for initializing the Express server. The start function first tests the connection to the database by calling the connectToDB() function. If the connection is successful, it starts the Express server, which listens on the specified port.
The index.js file has the following contents:
require("express-async-errors");
const express = require("express");
const app = express();
const { PORT } = require("./utils/config");
const { connectToDB } = require("./utils/db");
const Task = require("./models/task");

// middlewares
app.use(express.json());

// routes
app.get("/api/tasks", async (req, res) => {
  const tasks = await Task.findAll();
  res.json({
    message: "List of tasks",
    tasks: tasks,
  });
});

app.post("/api/tasks", async (req, res) => {
  const { title } = req.body;
  const task = await Task.create({ title });
  res.status(201).json({
    message: "Task created successfully",
    task,
  });
});

app.patch("/api/tasks/:id/toggle-completed", async (req, res) => {
  const { id } = req.params;
  const task = await Task.findByPk(id);
  if (!task) {
    return res.status(404).json({ message: "Task not found" });
  }
  task.completed = !task.completed;
  await task.save();
  res.json({
    message: task.completed
      ? "Task marked as completed"
      : "Task marked as not completed",
    task,
  });
});

app.delete("/api/tasks/:id", async (req, res) => {
  const { id } = req.params;
  const task = await Task.findByPk(id);
  if (!task) {
    return res.status(404).json({ message: "Task not found" });
  }
  await task.destroy();
  res.json({
    message: "Task deleted successfully",
  });
});

const start = async () => {
  try {
    await connectToDB();
    app.listen(PORT, console.log(`Server is running on port ${PORT}`));
  } catch (error) {
    console.error(error);
    process.exit(1);
  }
};

start();
Testing the API Endpoint
You can now proceed to test the API endpoints:
- Create a new task—
POST /api/tasks:


- List all tasks—
GET /api/tasks:


- Toggle completion status—
PATCH /api/tasks/:id/toggle-completed:


- Delete a Task—
DELETE /api/task:


Conclusion
You now know how to connect an Express application to a Postgres database using Sequelize. You built a simple task manager API, and in the process, you configured Sequelize, connected Sequelize to a Postgres instance, defined the Task model, and created the API endpoints.
Currently, the controller logic is written in the index.js file for simplicity. In upcoming tutorials, we’ll refactor this codebase into a more scalable structure using controllers, routers, and Sequelize migrations.
For further reading, you should go through the Sequelize documentation to learn more about model querying, validations, associations, and more.
You can find the complete source code for this tutorial on GitHub.


