For some reason, most online resources either completely omit the topic of intercepting and modifying WebSocket traffic, or cover it exclusively within the context of information security and vulnerability hunting.
However, a WebSocket is a transport protocol just like HTTP. Therefore, when testing applications, it is essential to be able to work with WebSockets in the same way as with standard requests – by intercepting, modifying, and sending custom messages.
Testing network-dependent features on client applications – especially mobile ones – requires the use of traffic sniffers like Charles, Fiddler, or Proxyman. These tools are adept at intercepting requests, allowing users to modify them on the fly and configure rules for the automatic substitution of various parameters.
However, the situation becomes significantly more complex when it comes to testing WebSocket connections on these same clients, including web applications.
Numerous tools exist for testing the WebSocket protocol itself. Postman, for example, can act as a dedicated client for this purpose. But when the goal is to test how the client application reacts to various incoming messages, the capabilities of these popular sniffers become severely limited. They generally only allow for viewing WebSocket messages, with varying levels of convenience and usability.
But what if you need to intercept a specific message and modify the response?
If your project includes a backend tool capable of injecting custom messages into the WebSocket connection or modifying them server-side, this may be sufficient for testing various client-side scenarios. Such use cases include testing custom server responses, emulating errors, or developing against a feature whose backend isn’t ready. This approach is also invaluable when a specific scenario is difficult to reproduce in production, yet you still need to verify the client’s behavior.
If such a tool isn’t available, or its capabilities are limited, you must turn to alternative solutions. These tools are designed not just to display WebSocket messages, but to actively intercept and modify them.
Below, we will explore two solutions that cover the majority of use cases involving WebSockets. They will enable you to intercept, modify, or even inject your own messages by establishing a man-in-the-middle connection between the client and the server.
This guide assumes you are already familiar with other traffic sniffers and know how to install certificates and configure a proxy.
|
Burp Suite |
ZAP Proxy |
|---|---|
|
|
|
|
The free version is sufficient for handling most core tasks. It does not, however, display Ping/Pong messages (or if it does, I was unable to find the setting to enable them). |
This is an open-source application that offers more features and is, in some respects, more convenient than Burp for working with WebSockets, though it does have its own drawbacks. |


I’ll start with ZAP proxy, since it has significantly more features compared to Burp, although its interface is a little worse.
ZAP Proxy
The main advantages of ZAP over Burp when working with WebSockets are:
- It displays Ping/Pong messages.
- When sending a WebSocket message, you can manually select the message type (Text, Binary, Ping, Pong, or Close).
As for the drawbacks, breakpoints are processed sequentially, meaning you cannot see the next intercepted message until the current one is forwarded (admittedly, I may have just missed a setting for this). The interface is also somewhat dated, but in terms of usability, it is just as cumbersome as Burp.
Settings
To open the settings, navigate to Tools > Options.
If necessary, you can change the interface language in the Language section. The change will take effect after a restart.
Next, navigate to Network.
Local Servers/Proxies
Leave the Address as 0.0.0.0 if you need to proxy all incoming connections.
Enter the Portyou intend to use.
Generate the certificate (Generate) and then save it (Save). Install it on your device using the same method you would for any other sniffer.


Viewing Messages
When a WebSocket connection is established, a WebSockets tab will automatically appear in the bottom panel. You can pin this tab by clicking the paperclip icon to keep it visible.
Similar to Burp, this tab displays all messages across all active connections. Each connection is assigned its own ID (referred to as a Channel in ZAP). The key difference from Burp is that ZAP also displays the message type, including Ping and Pong messages.
Clicking on a message displays its body in the top panel. The content can also be viewed in Hex format.


Request Interception


To set a breakpoint, right-click on a message and select Break….
This will open a dialog where you can define the rules for the breakpoint. For example, you can specify a particular channel, define a payload pattern, and choose whether to intercept incoming or outgoing messages.
The Payload Pattern field supports regular expressions.
When a message is intercepted, it appears in the top window. Here, you can modify it and then send it. To send the message, click either arrow button.


Although they are labeled differently, they do the same thing. The only difference is when you have global interception enabled (🟢): clicking the first arrow forwards the current message and intercepts the next one, while clicking the second disables global interception.
To drop the message without sending it, click the crossed-out circle icon: 🚫
❌ – Add a new breakpoint.


In the bottom part of the screen, you can manage your active breakpoints in the Breakpoints tab.
Sending WebSocket Messages
To open the message editor, right-click on a message in the history and select Open/Resend with Message Editor, or navigate to Tools > WebSocket Message Editor from the main menu.
In the editor, you can select the target WebSocket connection and the direction of the message: incoming (to the client) or outgoing (to the server).


A key difference from Burp is that you can also select the message type:


Burp Suit
Upon launching the application, you are prompted to select a project.
The free version only allows you to work with a temporary project. However, this is sufficient for working with WebSockets, as all settings can be exported to a configuration file and then applied on the next screen.
Proxy
The third screen is the main Burp Suite window. Navigate directly to the Proxy tab.


This tab contains five main sub-tabs:
Intercept – This functions like a breakpoint. When enabled, it intercepts all requests that match the rules defined in the settings (more on this below).
HTTP history – This provides a log of all HTTP requests.
WebSockets history – This shows the history of messages across all WebSocket connections. Within a session, each connection is assigned a unique numerical ID, allowing you to easily distinguish between them.
Match and Replace – This allows you to quickly enable or disable automatic substitution rules for both HTTP requests and WebSocket messages. It provides a shortcut to the same functionality found in the settings.
Proxy Settings – This is where you configure the proxy’s options.
Proxy Settings
We need to start with the settings.


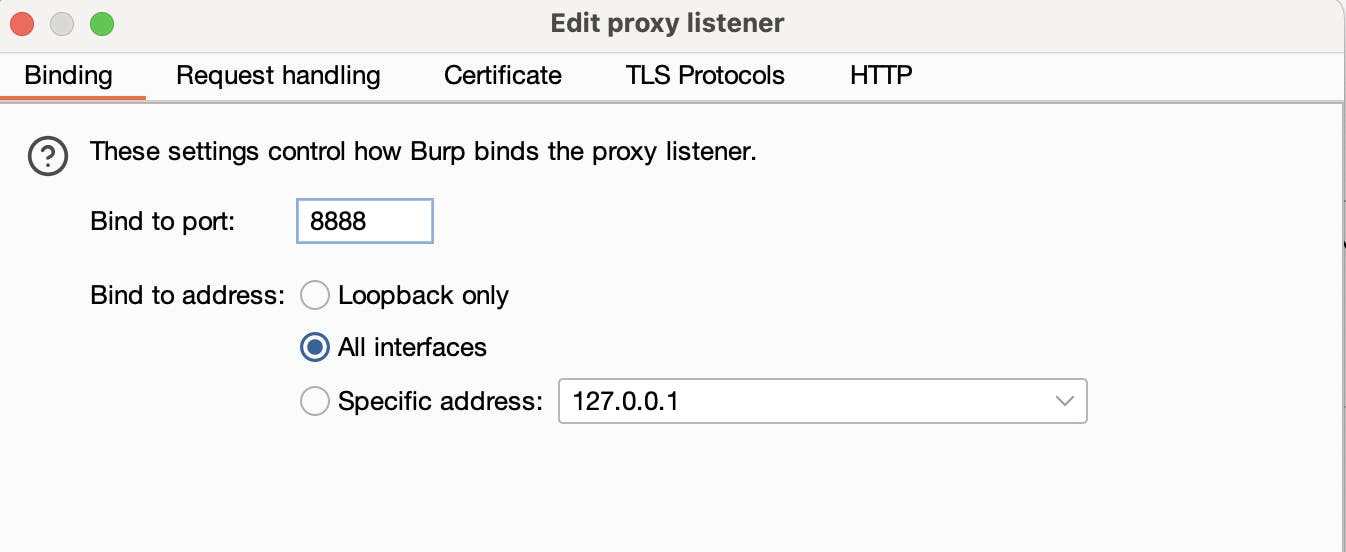
If we are proxying mobile clients, we need to allow all incoming connections. To do this, select the single entry in Proxy listeners and click Edit. There, specify your port and change Bind to address to All interfaces.

Export the certificate:
- Click import / export CA certificate at the bottom of the Proxy listeners block.
- Select Certificate in DER format.
- Click Select file and manually enter any filename with the .der extension.
- Install the certificate on your smartphone or computer (depending on what you plan to monitor), just as you would with other sniffers.
Request interception rules
This is where you define the interception rules (breakpoints). Burp automatically intercepts all traffic matching these conditions. Since our goal is to intercept only WebSocket messages, we will add a rule with the operator set to AND, the match type to URL, and the relationship to Matches. In the condition field, enter the URL of your WebSocket server.


In the top-right corner, click the ellipsis (…), navigate to Project settings, and select Save. You will need to manually enter a filename and extension (e.g., .json).
Save your settings to a file. This allows you to simply load the configuration file the next time you launch Burp, saving you from having to set everything up again.


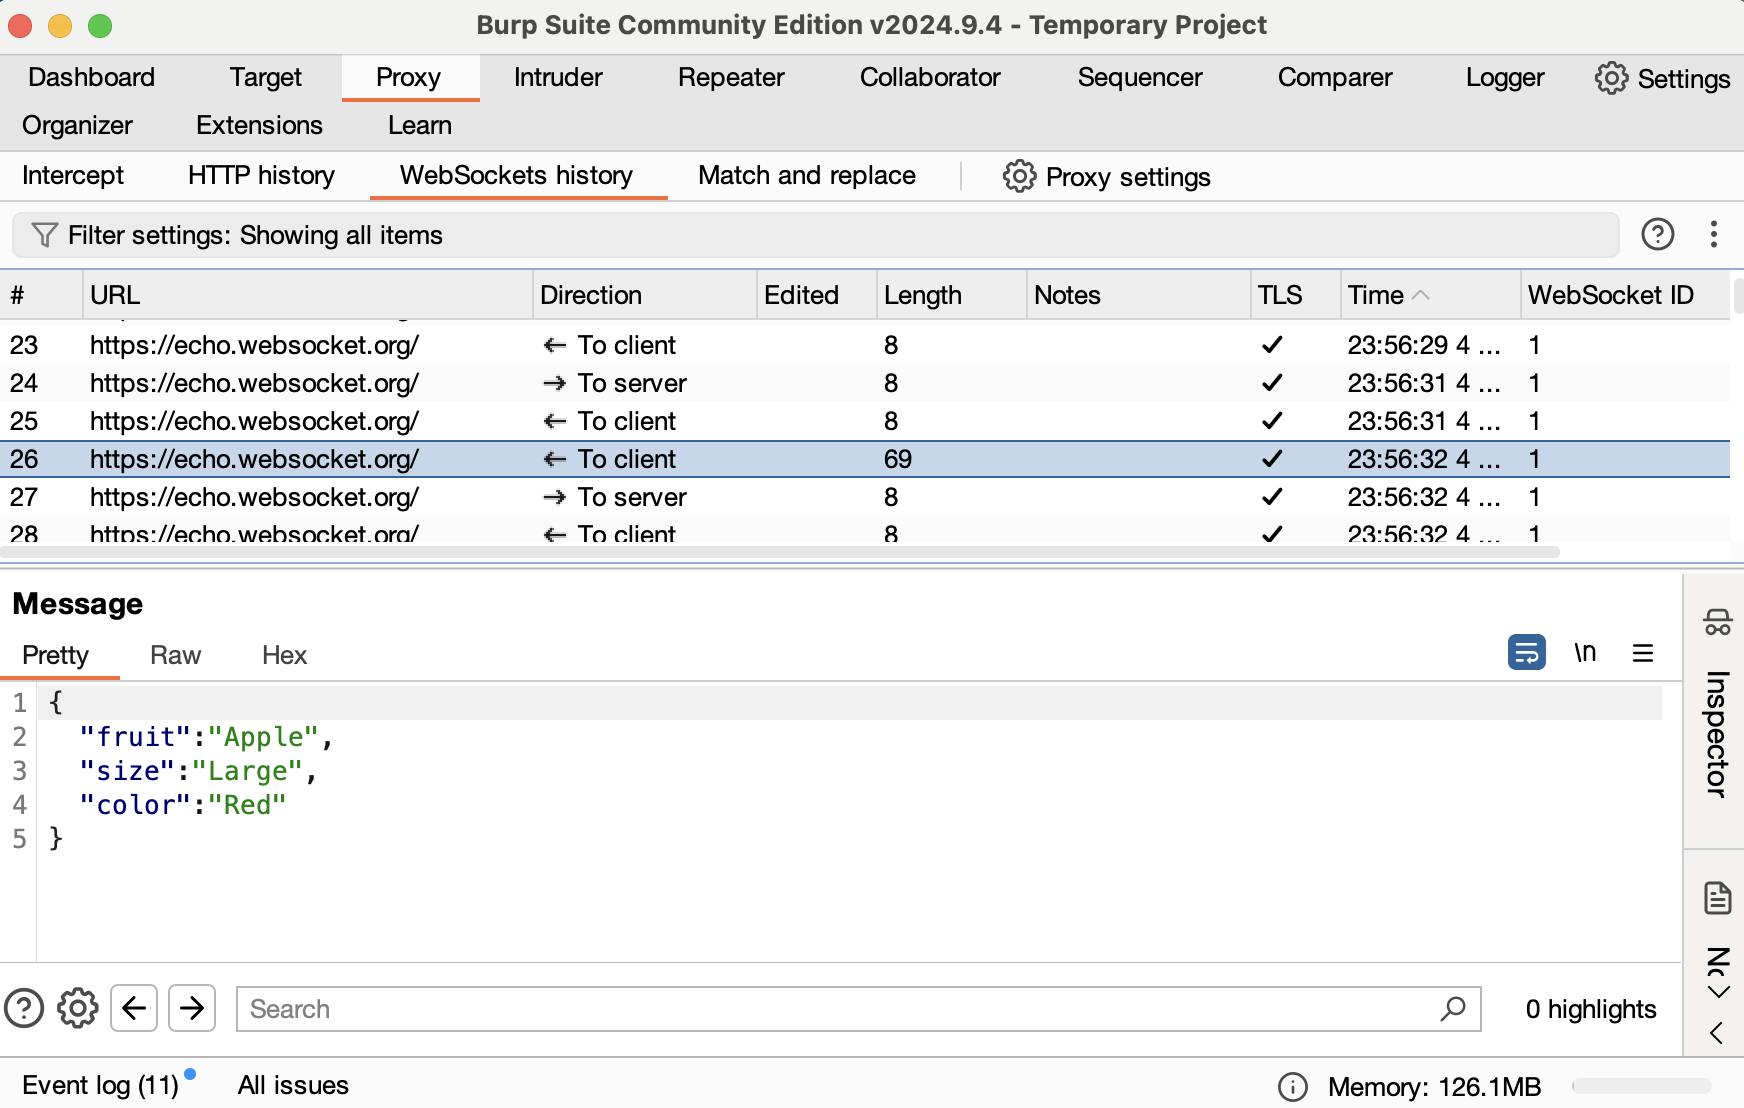
WebSockets history – view messages
Here, you can simply view the messages being exchanged over the WebSocket connection, sorting them by date, socket ID, etc.
When you click on a message, its body is displayed in a panel at the bottom.

Intercept
Since we already configured the settings to intercept only requests to the WebSocket address, all we need to do now is click the Intercept is off/on toggle.
After you enable it, all matching requests will be captured and displayed in the Intercept tab. Here, you can modify the request and then click → forward to send it.


Repeater – sending messages to websocket
When testing WebSockets, you often need to do more than just intercept traffic. It is also crucial to verify how the client handles various messages sent from the server. The most convenient way to do this is to directly send messages to the client through its WebSocket connection, emulating the server (or vice versa, if your test case requires it).
To do this, go to the WebSockets history tab, right-click on any message within an active connection, and select Send to Repeater. Then, switch to the Repeater tab (located at the same level as the Proxy tab).


On the left, you will find a panel for composing your message, while the panel on the right displays the WebSocket’s message history.
You can also terminate the connection from this screen by using the toggle switch.
Additionally, messages can be sent and edited in Hex format. This is particularly useful when the API contract requires sending specific byte sequences instead of plain text.
Conclusion
Now, when the need arises, you know how to intercept and modify WebSocket traffic. While these tools may not have the most modern or user-friendly interfaces, they are functional and, crucially, they exist.
It remains to be seen how long it will take for mainstream sniffers like Charles and Proxyman to implement robust WebSocket support. Until then, we must make do with the tools currently at our disposal.
I hope you found this guide useful. Feel free to follow me here and connect on LinkedIn– I’m always happy to hear from fellow professionals.


