
Why should you schedule Facebook posts ahead?
Scheduling posts on the Facebook app allows you to stay visible and organized without having to be online every time you want to publish. By planning ahead, you create a consistent flow of content that helps your audience know when to expect updates from you.
It also saves valuable hours each week because you can prepare posts in one session instead of interrupting your day to post manually. On average, people spend just over 10 minutes per visit on Facebook, which means every post has only a small window to make an impression. Scheduled posts ensure that you show up at the right time to capture attention.
Another reason is competition. In early 2024, only 18.7% of posts in U.S. Facebook feeds came from friends, while more than 31% came from accounts completely unrelated to the user. With so much outside content filling the feed, maintaining a consistent schedule increases the chances your posts are seen.
Finally, scheduling gives you the ability to map out campaigns, seasonal promotions, or announcements in advance so that your Facebook presence always feels deliberate and well planned.
How to schedule Facebook posts directly from the app
Here’s how you can schedule Facebook posts directly from the app:
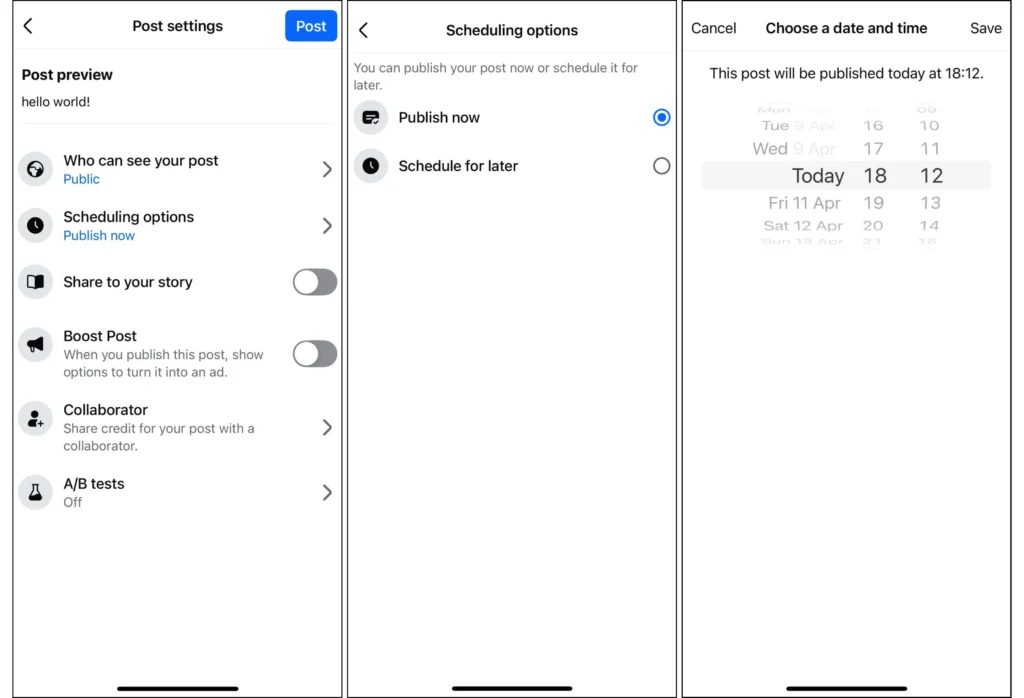
- Open your Facebook Business page
- Create a new post (it can be a text post, image, or reel)
- Once you’re done editing your post, click ‘Next’
- Find ‘Scheduling options’ and select ‘Schedule for later’
- Choose the date and time and click ‘Save’
- Click ‘Post’ and the content will be uploaded at the time you chose
How to schedule Facebook posts with Meta Business Suite on desktop
Meta Business Suite desktop lets you schedule Facebook and Instagram posts, Stories, Reels, and even ads from one place. Planning ahead here helps you stay consistent and keep campaigns organized.
Steps to schedule Facebook posts on desktop:
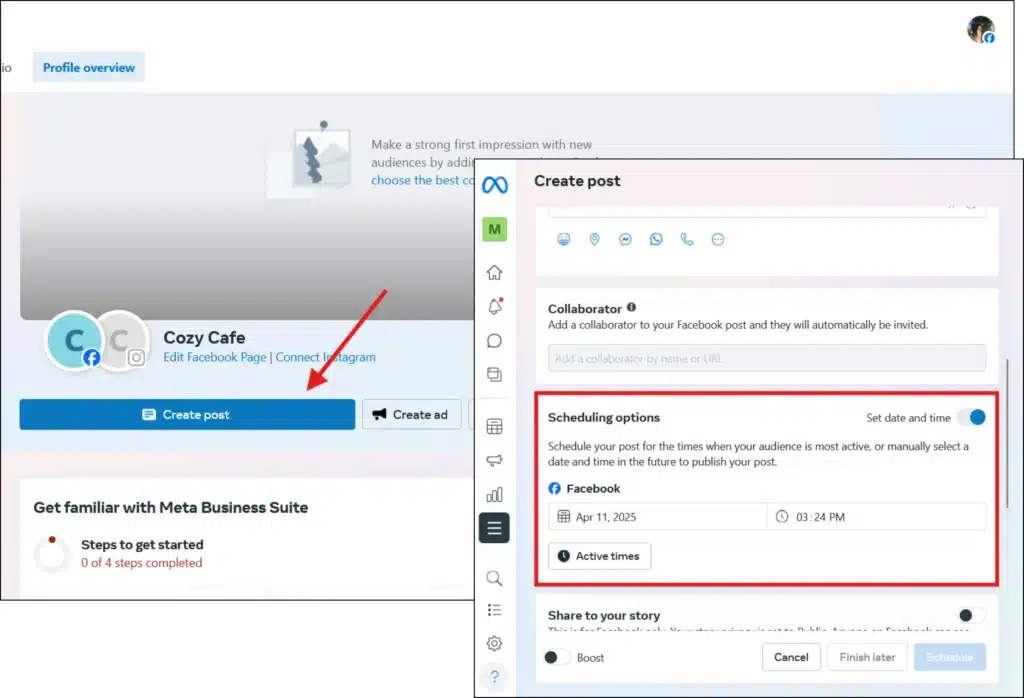
- Open ‘Meta Business Suite’ home page on your computer.
- Make sure you’re working in the correct business portfolio and select the Facebook Page you want to manage.
- Go to ‘Content’ or ‘Planner.’
- Click ‘Create post’ (or use the dropdown to create other types of content such as Facebook Reels).
- Enter your post details: text, images, or video. Add optional elements like a location or call-to-action button.
- Under publishing options, choose ‘Schedule.’
- Select the date, time, and privacy settings for your post (or whether you want to share it to your Instagram accounts or not).
- Review the preview on the right to see how it will appear on Facebook.
- Click ‘Schedule’ to confirm.
Your scheduled post will appear in ‘Content’ or ‘Planner’, where you can edit, reschedule, or publish it immediately if needed.
When scheduling posts, especially for targeted campaigns that involve custom domain settings, using platforms that prioritize secure API management is essential. This ensures your data stays protected and that integrations remain reliable across tools.
How to schedule Facebook posts with Meta Business Suite on mobile
The Meta Business Suite mobile app gives you scheduling flexibility directly from your phone. You can prepare Facebook posts, Stories, and Reels on the go.
Steps to schedule posts onn your Facebook page on mobile:
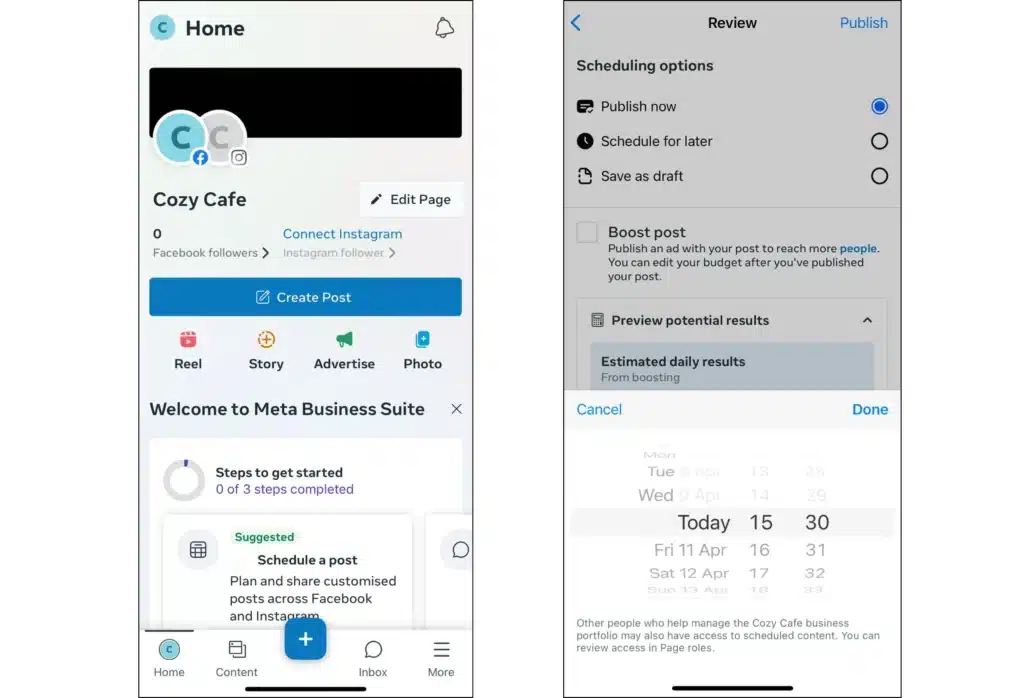
- Open the Meta Business Suite app.
- Tap ‘Content’ in the bottom menu.
- Select the type of content (Post, Reel, or Story).
- Tap ‘Create’ and grant access to your photos and videos if prompted.
- Write in your text box, upload media, then tap ‘Next.’
- Choose ‘Schedule for later.’
- Set the date and time you want, then tap ‘Schedule.’
Your scheduled content will appear in the ‘Planner,’ where you can edit, reschedule, or publish right away.
Another benefit of Meta Business Suite is its integration with the WhatsApp Business API. If someone reaches out after seeing your content, this feature makes it easier to manage conversations and interact with customers directly on WhatsApp.
How to schedule Facebook posts using SocialBee
SocialBee makes it easy to plan and publish Facebook posts across Pages, Personal profiles (via mobile reminders), and even Facebook Groups (via Universal Posting). You can post directly from the web app or use the companion mobile app for content that requires reminders.
Steps to schedule a Facebook post with SocialBee:
- From your main Dashboard, connect your Facebook Page, Group, or Profile.
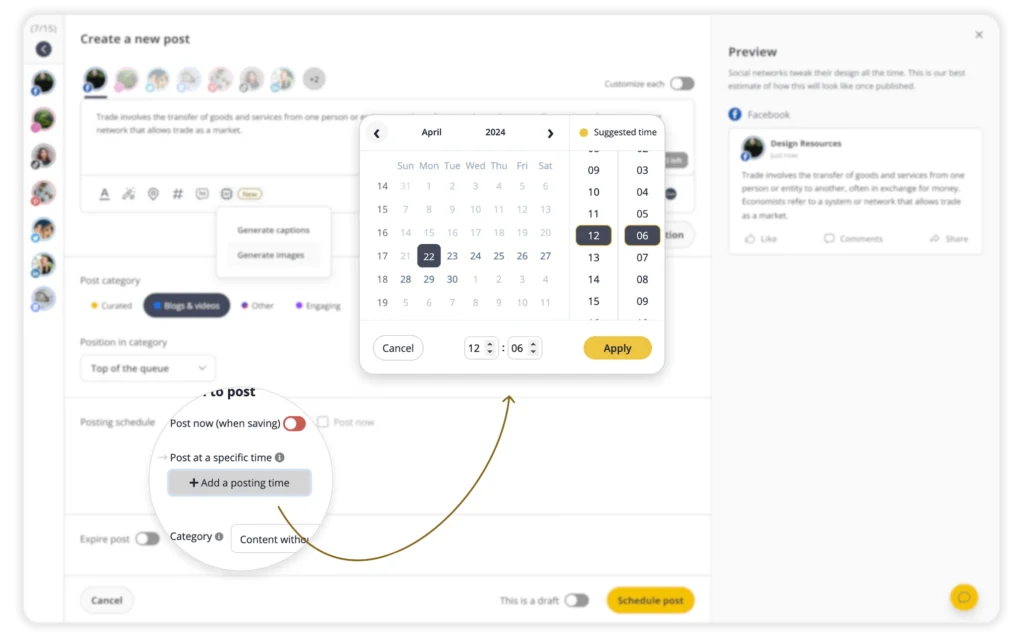
- Click ‘Create Post’ at the top of the page.
- Select your Facebook account from the left sidebar.
- (Optional) Activate the ‘Customize each’ option if you want to specify whether the post should appear as a feed post, Story, or Reel.
- Add your content: upload images or videos, write your caption, or use SocialBee’s AI to generate text and visuals. You can also pull assets directly from Canva, Unsplash, or Giphy.
- Assign the post to a Content Category (like promotional, educational, or community) to keep your calendar balanced.
- Choose ‘Post at a specific time’ to schedule. SocialBee will highlight the best posting times based on your past engagement.
- You also have the option to ‘Post now,’ ‘Re-queue after posting,’ and ‘Expire post’ after it was published or at a certain time.
- Save and approve the post. If direct publishing isn’t supported for your account type, SocialBee will send you a mobile reminder so you can post with one tap.
Beyond scheduling, SocialBee also helps you collaborate with your team, manage comments and messages, tag people, track your performance, and export reports, making it a complete Facebook management tool.
Facebook scheduling best practices
The goal isn’t just to load posts into a calendar. A good schedule keeps your page active without making it feel repetitive. That means posting regularly, mixing up your content, keeping some evergreen posts ready, paying attention to when your Facebook audience is online, and watching your results so you can adjust over time.
Best practice #1: Keep your content consistent and varied
If you want people to pay attention on Facebook, you need to show up regularly. Posting once in a while makes it easy for your page to fade from view. At the same time, your posts shouldn’t all look and feel the same. A good mix might include educational posts, product updates, customer stories, and something lighter or entertaining to keep things fresh.
What I recommend is a simple 3-part framework:
- Educate with tips, guides, or how-tos.
- Engage with questions, polls, or behind-the-scenes updates.
- Promote with product features, testimonials, or offers.
When I work with clients, I’ve found this mix keeps the calendar balanced without overwhelming followers with too many sales-driven posts.


