")
Why scheduling Pinterest posts matters
Pinterest is a visual discovery engine with over half a billion active users worldwide. Users open the Pinterest app to search for ideas, plan purchases, and get inspired. That means timing and consistency matter just as much as quality. When your content appears regularly, Pinterest’s algorithm learns to trust your account, increasing your reach and visibility over time.
Scheduling your Pinterest posts gives you three key advantages:
First, it keeps your profile active without extra effort. Instead of publishing manually each day, you can plan a full week or month of content in a single sitting. That steady rhythm helps you stay visible, even on days when you’re focused on other parts of your business.
Second, it saves time and reduces stress. With a scheduler, you can batch-create your Pins, upload visuals, add links and descriptions, and queue everything to go live automatically. No more reminders, alarms, or logging in at the last minute.
Finally, it helps with long-term planning. If your brand runs seasonal campaigns or sells evergreen products, you can schedule those Pins well in advance. This ensures your audience sees the right content at the right time, without the constant need to check your queue.
How to schedule Pinterest posts natively
Pinterest’s native scheduler is simple to use and perfect when you just need to plan a few posts ahead. You can schedule standard Pins with images or videos directly from the Pinterest platform, either on desktop or in the Pinterest app.
How to schedule Pins on desktop
If you prefer working on a bigger screen, follow these steps to schedule Pinterest Pins using the desktop version of the app.
- Log in to your Pinterest business account. Click “Create” in the top right corner and select “Create Pin” to start a new post.
- Upload your media. You can upload an image (JPG or PNG) or a video (MP4 or MOV). Vertical visuals with a 2:3 ratio perform best, so keep that in mind when designing your content.
- Fill in your details. Add your pin title, description, and alt text, then include your destination link. This could be a product page, blog post, or landing page that you want to drive traffic to.
- Select your board. Use the drop-down menu to choose the right Pinterest board.
- Set your date. Click “Publish at a later date,” choose the schedule date and time, and then click “Schedule Post.”
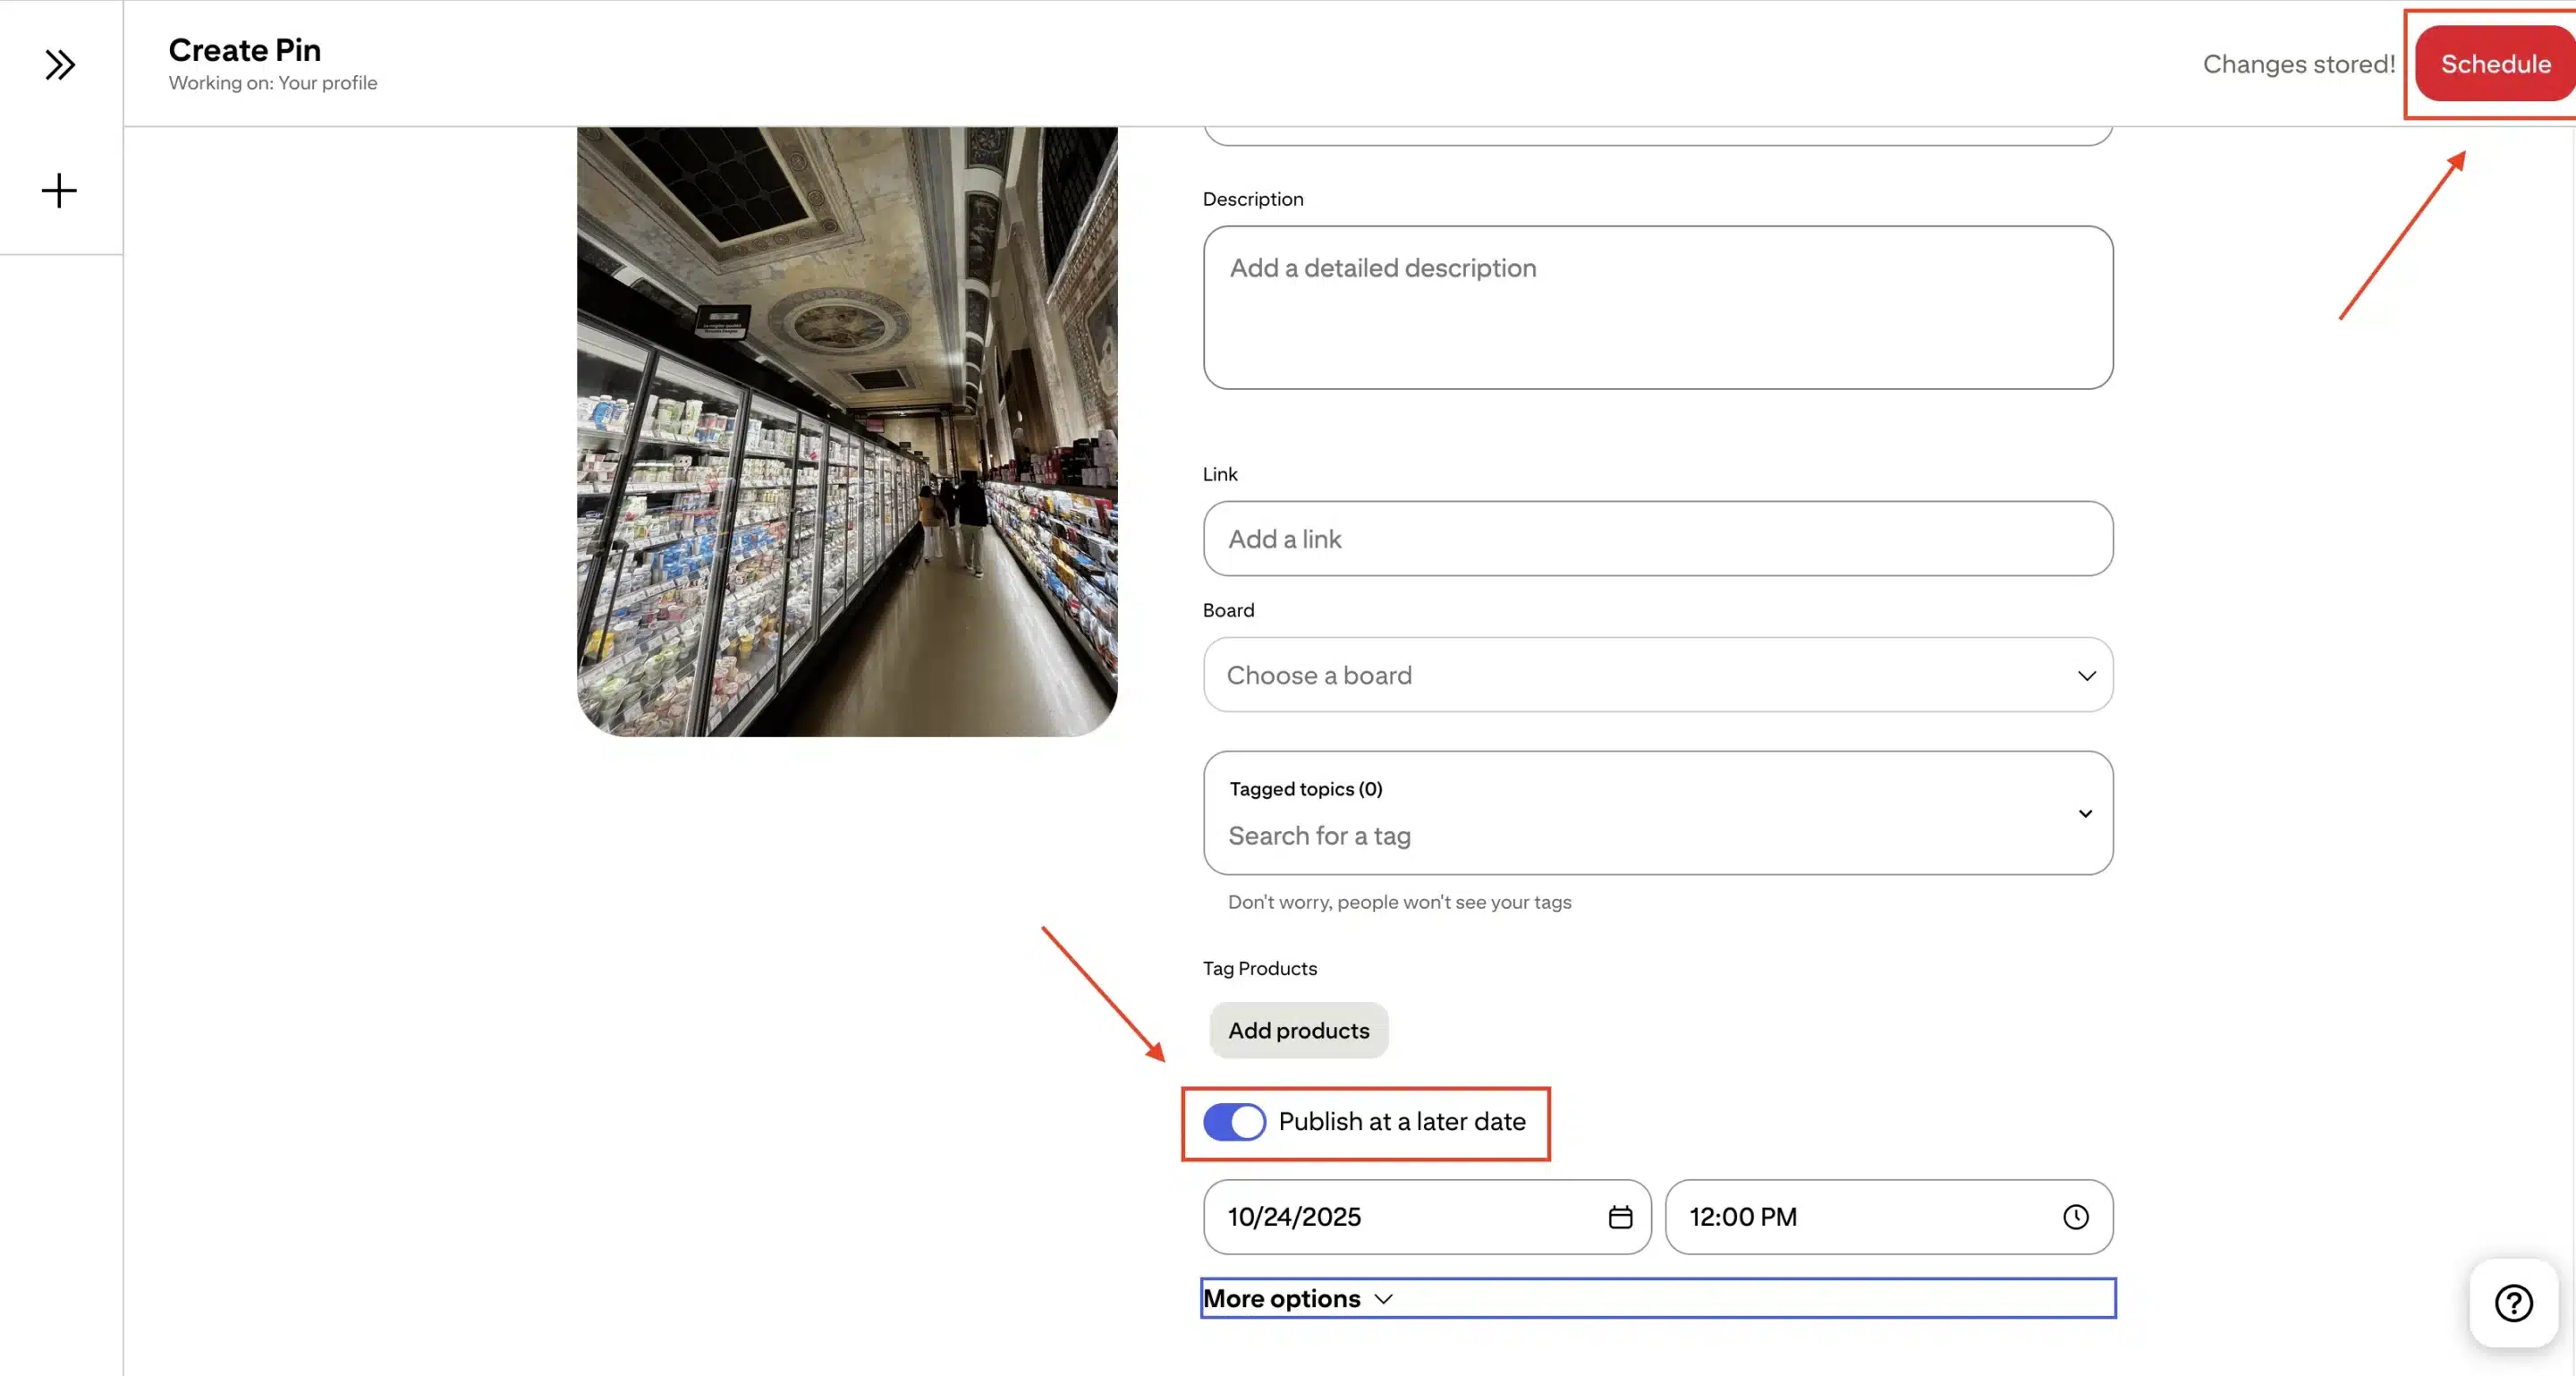
That’s it, your pin is now queued to publish automatically. It’s a super easy process that saves time, especially if you’re preparing multiple posts for the week.
However, there are some limitations to scheduling Pinterest posts natively. You can only schedule one pin at a time, and you can schedule up to 30 days in advance. For brands that post frequently or manage multiple boards, this can quickly become time-consuming, and a Pinterest scheduling tool would be better suited.
How to schedule Pins on mobile
Pinterest’s mobile app offers the same scheduling feature for Android and iOS users, with only a few small differences.
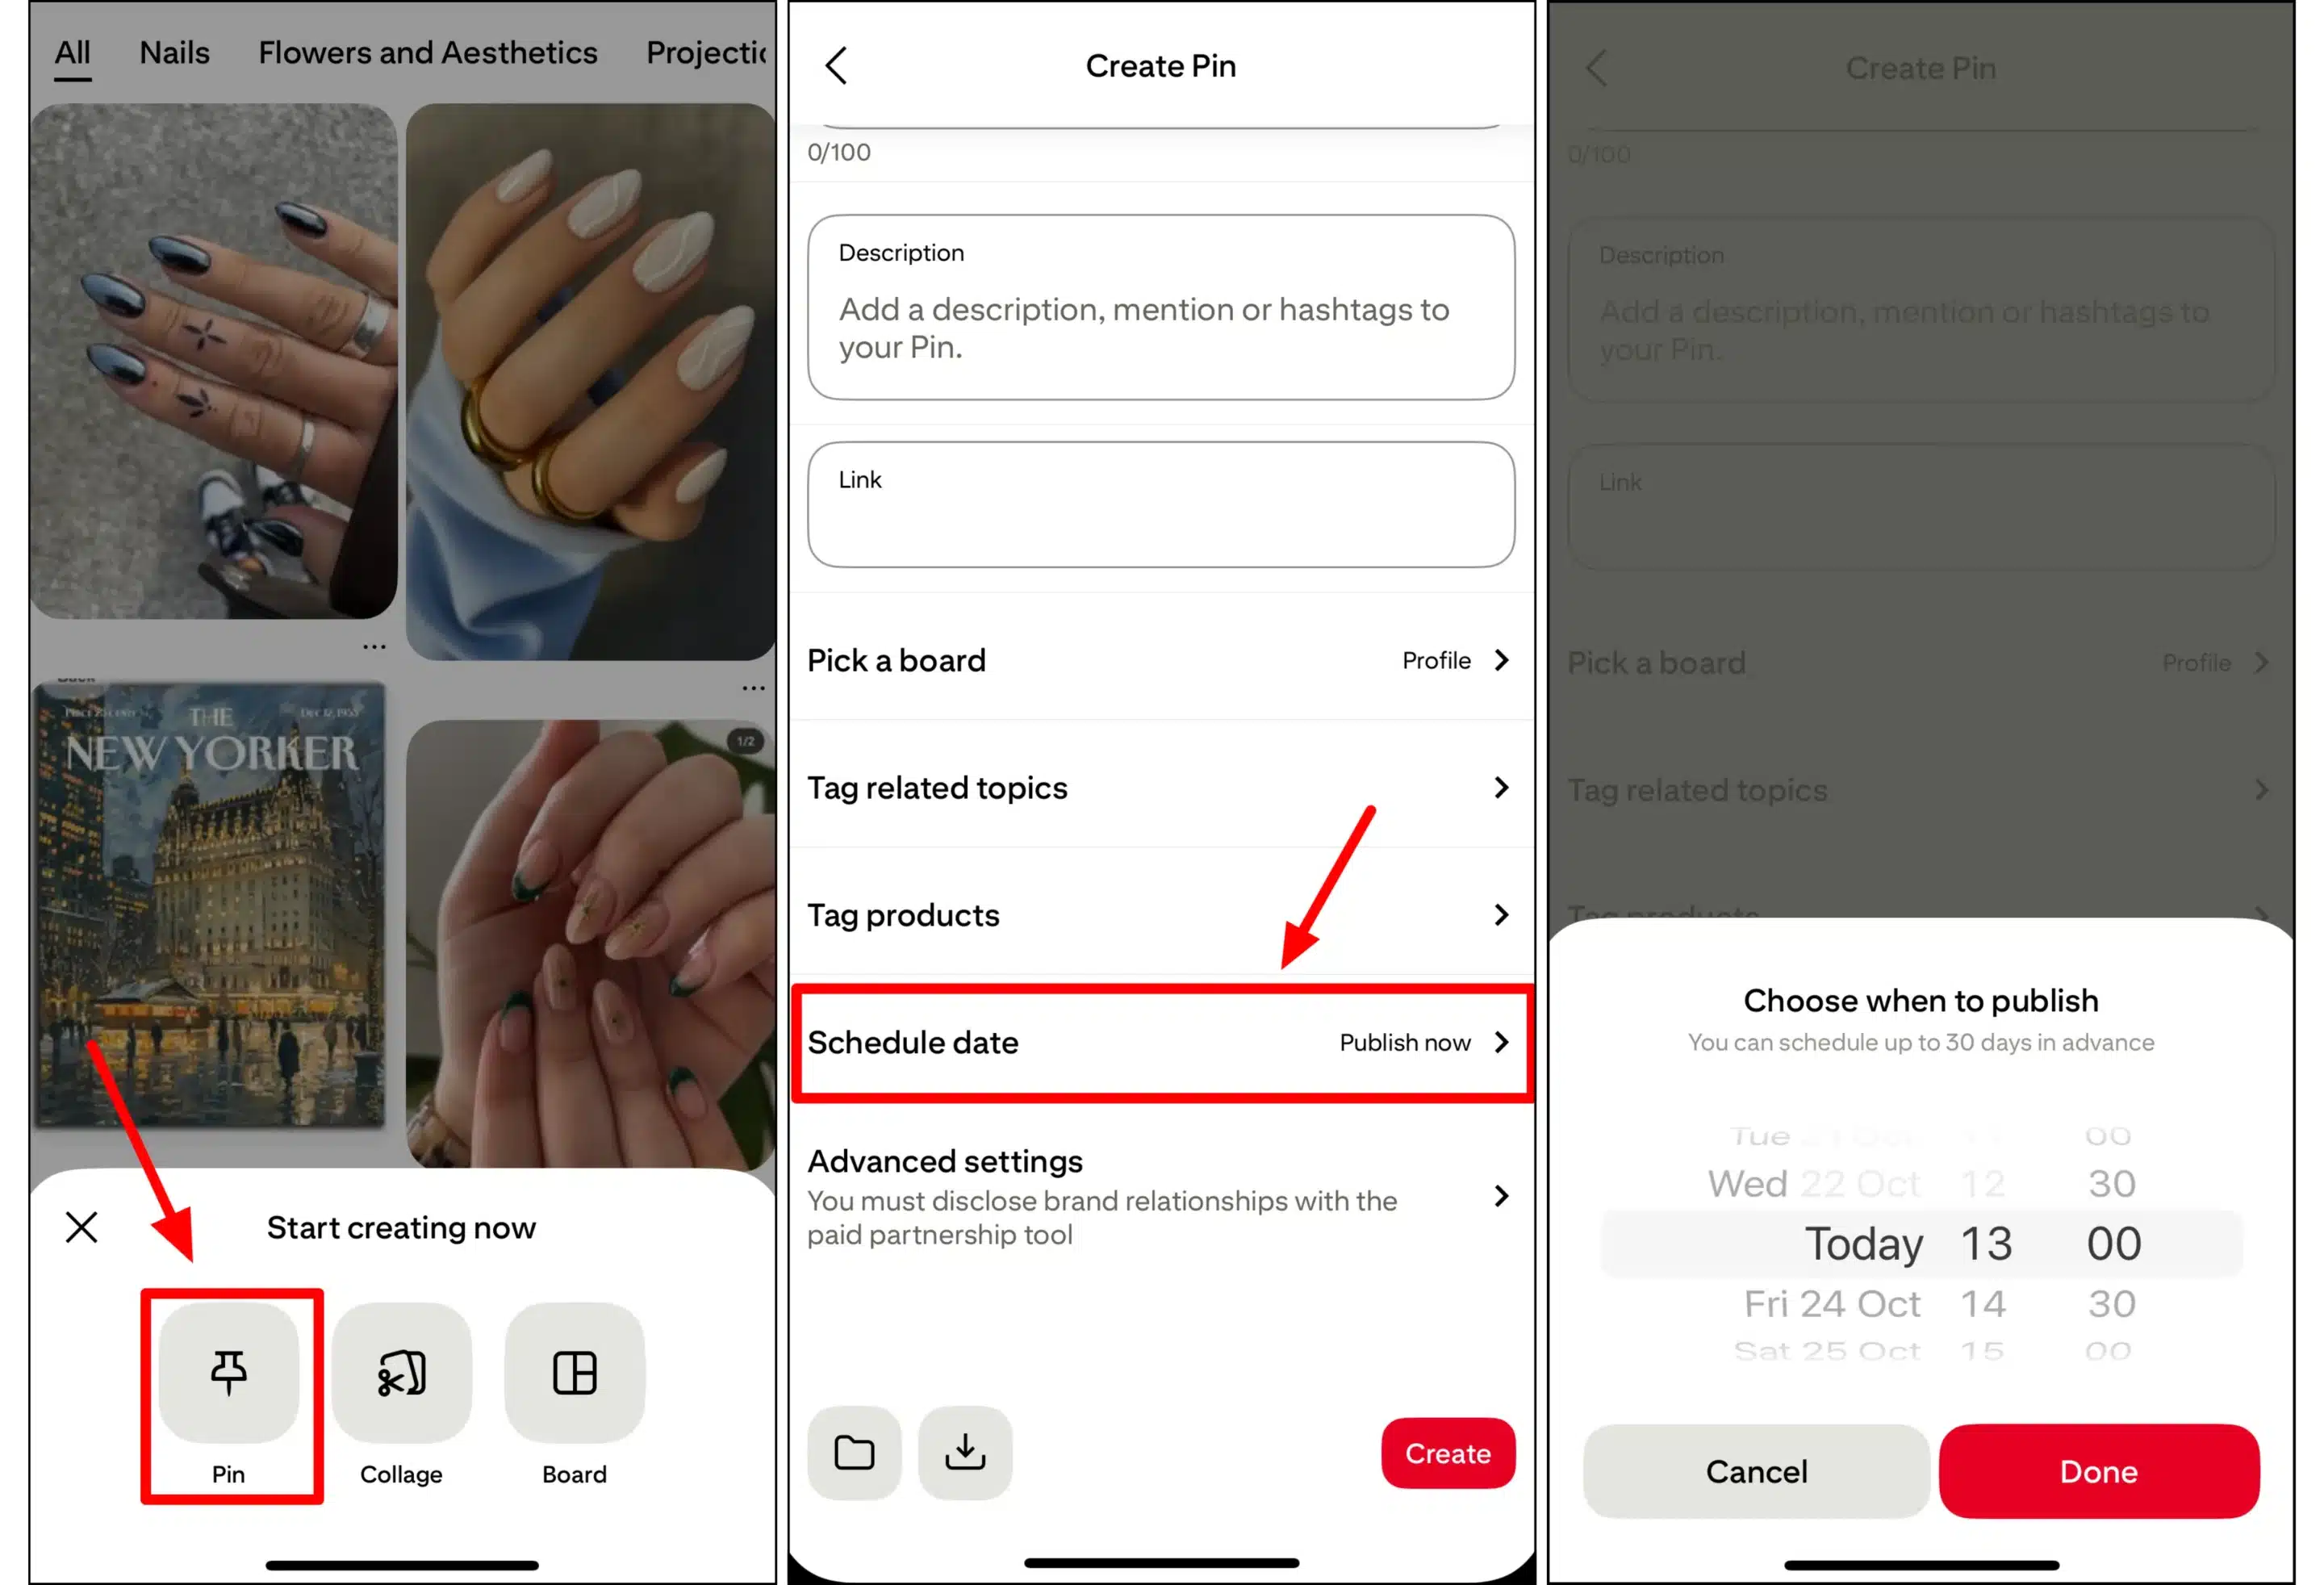
- Open the Pinterest app and tap the plus icon to create a new post.
- Upload your photo or video, then fill out the title, description, and destination link.
- Select the board, scroll down, and tap “Schedule date.”
- Choose your date, time, and tap “Done.”
This mobile process is ideal when you want to plan content on the go, but editing and previewing are easier on a desktop. If you manage multiple campaigns, you’ll likely prefer the full Pinterest interface for its broader view.
How to edit or view scheduled Pins
After scheduling, you can find your content under the Created tab on your Pinterest profile. Here, you can view all your upcoming Pins, check which boards they’ll appear on, and make small adjustments if needed.
You can usually edit the title, description, and schedule date before publishing. However, media changes, like swapping out an image or video, might not be available once the pin is in the queue. If something no longer fits your plan, you can delete the post and re-upload it with the new content.
Once a Pin has gone live, you can still edit text fields or delete Pins entirely, but remember that doing so removes all associated engagement data. It’s better to make corrections before your post publishes.
How to schedule Pinterest posts with SocialBee
Pinterest’s native scheduler covers only the basics. You can schedule one Pin at a time and plan up to 30 days in advance, which quickly becomes time-consuming if you post often or manage several boards or brands. The platform also lacks collaboration tools, AI assistance, and advanced analytics, so every step, from writing captions to designing visuals, must be done manually.
With SocialBee, you don’t face these limits. You can schedule multiple Pins across different boards and accounts at once, plan campaigns months ahead, and collaborate with teammates or clients directly from the same dashboard. You also get built-in Canva and Unsplash integrations for visuals, AI tools to generate optimized descriptions, and detailed performance analytics, features Pinterest doesn’t offer natively.
To start scheduling Pins, connect your Pinterest profile to SocialBee by following these steps:
- Go to your SocialBee dashboard, scroll to the bottom of the Accounts page, and click “Add Profile.”
- Select Pinterest and authorize SocialBee to access your account.
- Once connected, your Pinterest profile will appear in your dashboard.


