By using this site, you agree to the Privacy Policy and Terms of Use.
Accept
World of SoftwareWorld of SoftwareWorld of Software
  • News
  • Software
  • Mobile
  • Computing
  • Gaming
  • Videos
  • More
    • Gadget
    • Web Stories
    • Trending
    • Press Release
Search
  • Privacy
  • Terms
  • Advertise
  • Contact
Copyright © All Rights Reserved. World of Software.
Reading: How to schedule Reels on Facebook
Share
Sign In
Notification Show More
Font ResizerAa
World of SoftwareWorld of Software
Font ResizerAa
  • Software
  • Mobile
  • Computing
  • Gadget
  • Gaming
  • Videos
Search
  • News
  • Software
  • Mobile
  • Computing
  • Gaming
  • Videos
  • More
    • Gadget
    • Web Stories
    • Trending
    • Press Release
Have an existing account? Sign In
Follow US
  • Privacy
  • Terms
  • Advertise
  • Contact
Copyright © All Rights Reserved. World of Software.
World of Software > Computing > How to schedule Reels on Facebook
Computing

How to schedule Reels on Facebook

News Room
Last updated: 2025/10/14 at 11:19 AM
News Room Published 14 October 2025
Share
SHARE

How to schedule Reels on Facebook: 3 easy ways

As Mike Stelzner puts it, video tells stories better. So you should not miss the chance to tell your story through Facebook Reels.

You can schedule Facebook Reels in a few different ways, depending on what’s easiest for you. Whether you’re on your phone or computer, Meta gives you built-in tools to plan ahead, and social media management platforms like SocialBee make it even simpler to stay consistent.

Here are three easy ways to schedule Reels on Facebook:

  1. Schedule Facebook Reels via Meta Business Suite on desktop
  2. Schedule Facebook Reels using the Meta Business Suite mobile app
  3. Schedule Facebook Reels in SocialBee

How to schedule Facebook Reels via Meta Business Suite desktop

  • Go to Meta Business Suite on your desktop.
  • Click “Content” or “Planner” from the sidebar.

Meta Business Suite dashboard showing Posts & Reels tab, notifications about new metrics, and option to create posts or reels

  • Select “Create reel”.
  • Upload your video and add your caption, text, and thumbnail.
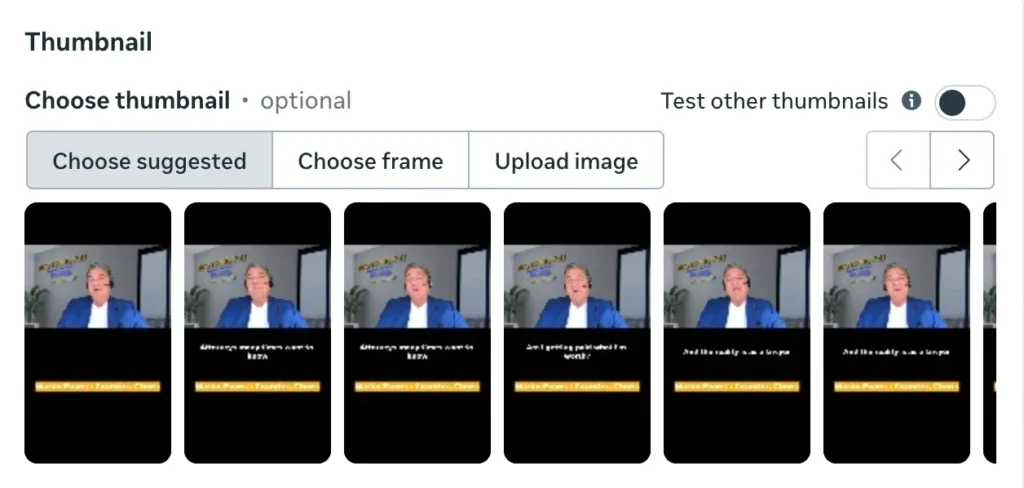
Facebook Reel upload interface showing thumbnail selection options including suggested frames and upload image optionFacebook Reel upload interface showing thumbnail selection options including suggested frames and upload image option

  • Choose where you want to share it: on your Facebook Page, or both Facebook and Instagram if your accounts are connected.
  • If this is your first time scheduling, you may need to sign in and reconnect your Instagram account.
  • Once your post is ready, click “Schedule”, then pick your date and time.
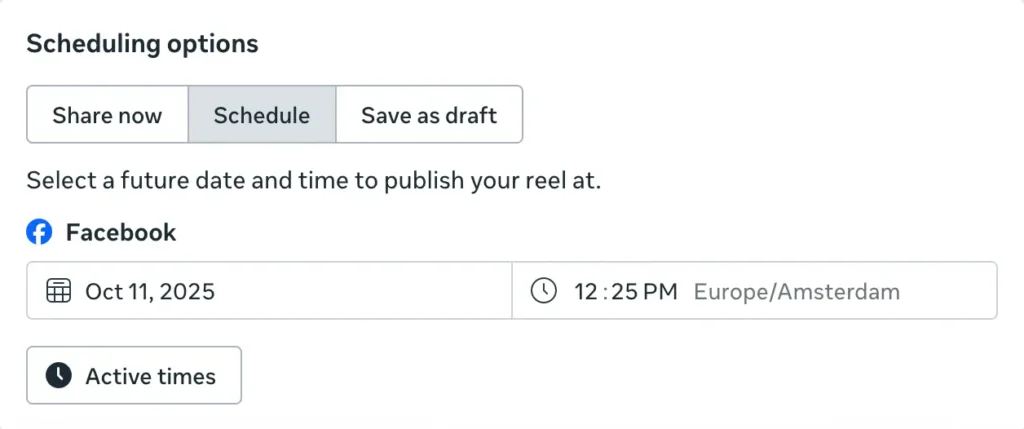
Scheduling options screen in Meta Business Suite with date and time picker for Facebook Reel publicationScheduling options screen in Meta Business Suite with date and time picker for Facebook Reel publication

  • Preview your post on the right to see how it’ll appear in the feed.
  • When you’re done, click “Schedule” to confirm.

Meta Business Suite showing confirmation message stating video is safe to publish with no copyright issues and a Schedule buttonMeta Business Suite showing confirmation message stating video is safe to publish with no copyright issues and a Schedule button

Your Reel will now appear under Scheduled posts in your Planner tab, where you can edit, delete, or enhance it before it’s automatically published.

How to schedule Facebook Reels via Meta Business Suite mobile app

  • Open the Meta Business Suite app.
  • Tap “+” from the bottom menu.
  • Tap “Create” to start a new post.
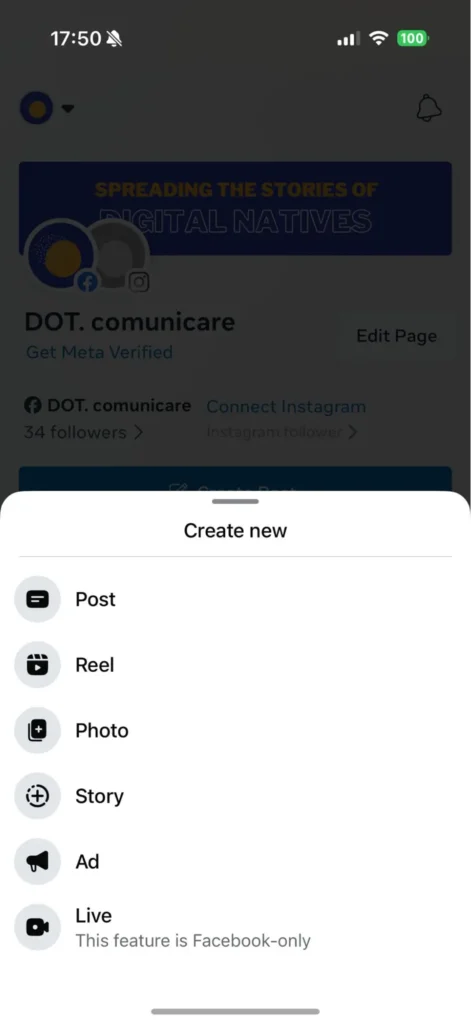
  • Select “Reel”.

Facebook mobile app screen with create new post options including Post, Reel, Photo, Story, Ad, and Live.Facebook mobile app screen with create new post options including Post, Reel, Photo, Story, Ad, and Live.

  • If it’s your first time, allow the app to access your photos and videos, then tap “Continue”.
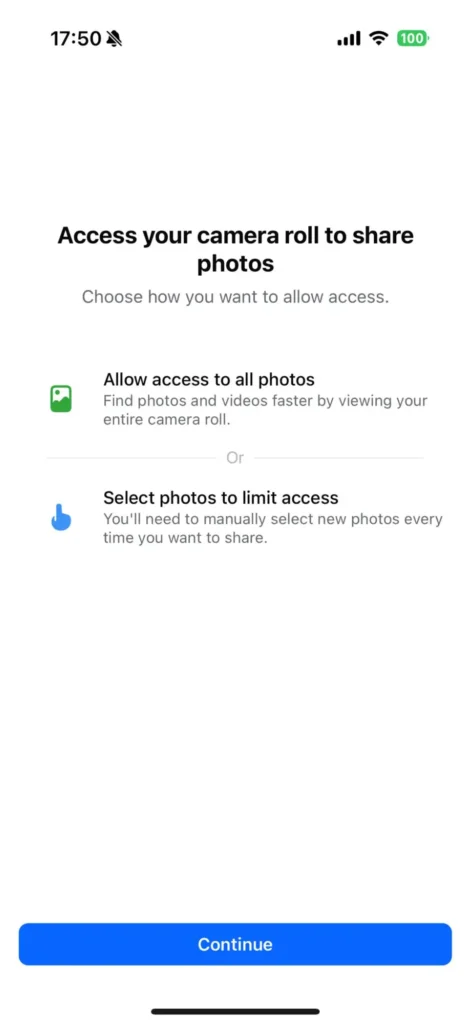
Meta app screen asking for camera roll access with options to allow all photos or select specific photos before sharingMeta app screen asking for camera roll access with options to allow all photos or select specific photos before sharing

  • Add your text, caption, and video.
  • Tap “Next”, then choose “Schedule for later”.
  • Select the date and time you want your Reel to go live, and tap “Schedule” to confirm.
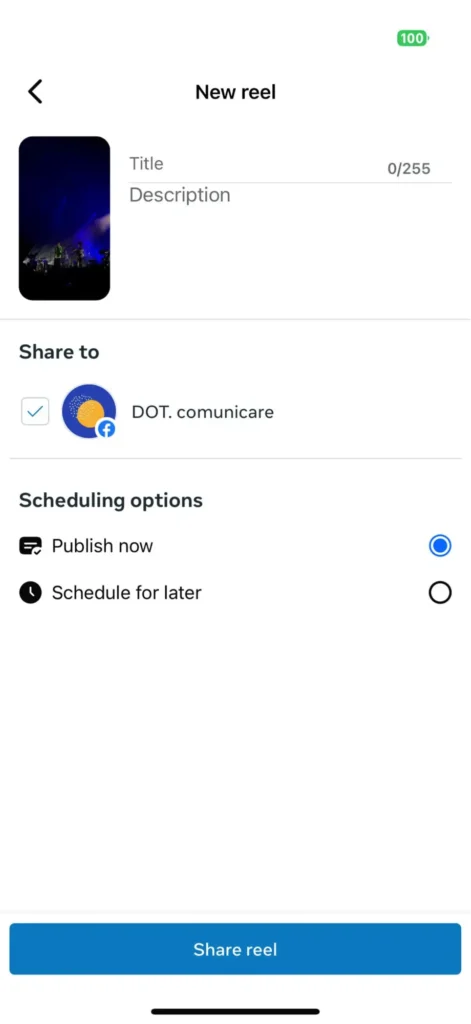
Facebook mobile app screen for uploading a new Reel with title, description, page selection, and scheduling optionsFacebook mobile app screen for uploading a new Reel with title, description, page selection, and scheduling options

Once scheduled, you can see your Reel in the Scheduled tab, where you can edit, review, or delete it before it’s published.

How to schedule Facebook Reels with SocialBee

If you’ve used Meta Business Suite before, you know it can get a bit clunky: limited flexibility, fewer scheduling options, and no easy way to manage multiple platforms. That’s where using a social media management like SocialBee makes a difference. You can schedule Reels and other content types (Stories and Facebook posts) from one dashboard, plan ahead using content categories, and even handle approvals and analytics in the same place.

Plus, SocialBee lets you post to Facebook Pages, personal profiles, and groups, all while managing other platforms like Instagram, LinkedIn, X, TikTok, and YouTube from one tool.

Here’s how to schedule Facebook Reels with SocialBee:

Step 1: In SocialBee, open the Post Editor and make sure your Facebook Page is selected.
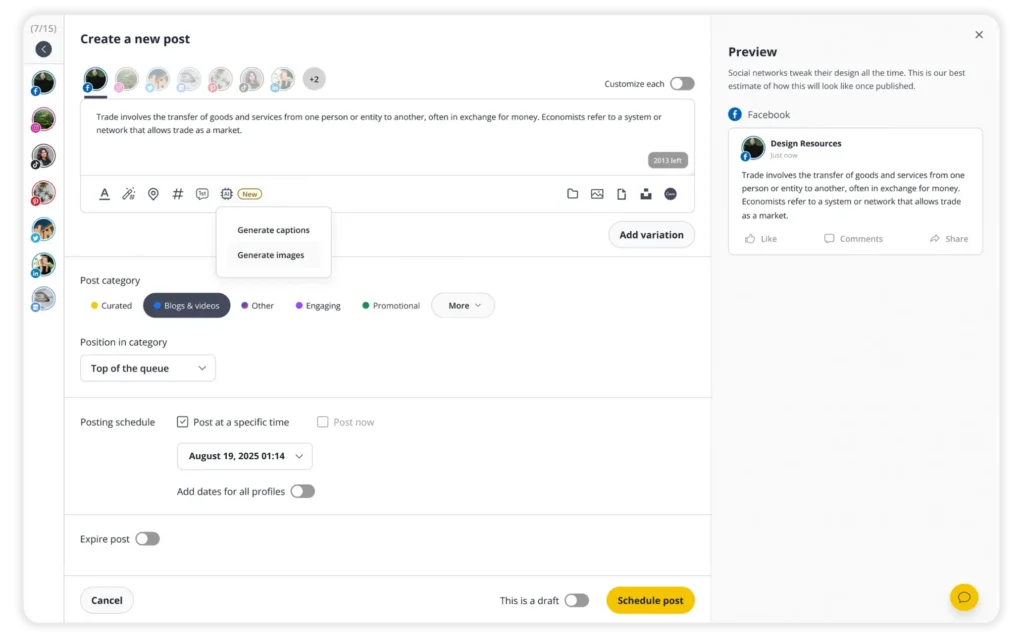
SocialBee’s new post editor interface showing options to create and format a social media post, add media, customize scheduling, and preview the post before publishing.SocialBee’s new post editor interface showing options to create and format a social media post, add media, customize scheduling, and preview the post before publishing.

Step 2: From the left sidebar, select the Facebook Page or Profile you want to post to.

Step 3: If you’re posting to multiple platforms, turn on “Customize each” to tailor your caption, visuals, or hashtags for each one.

Step 4: Choose the type of Facebook post you want to share: Reel, Story, or Feed post.

Step 5: Type your caption directly in the text box, or click the AI to generate ideas, captions, or image suggestions.
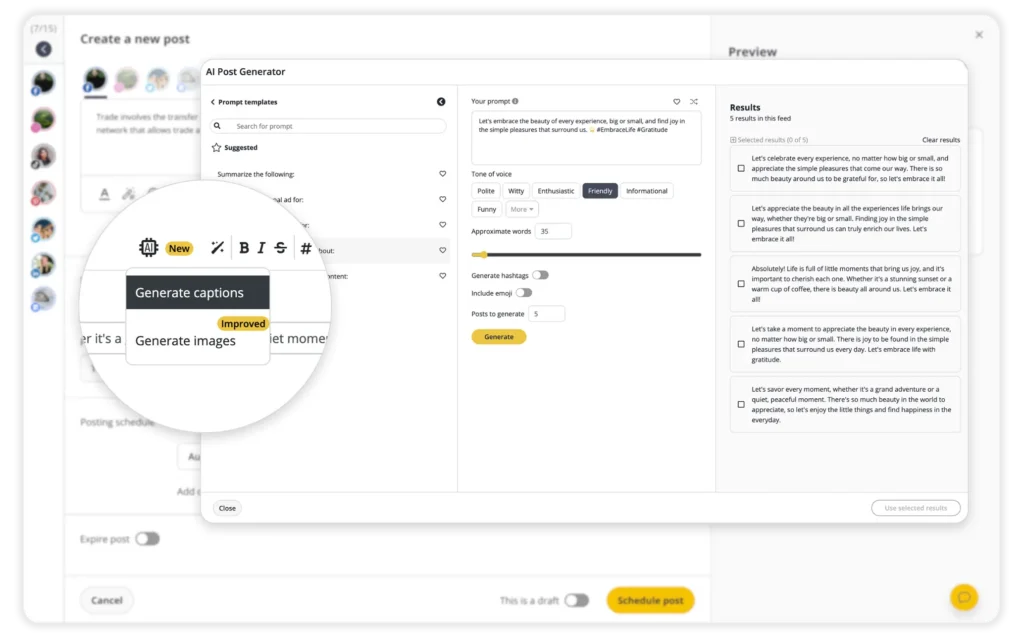
SocialBee’s AI Post Generator showing the option to generate captions, with fields to set tone of voice, word count, hashtags, and emojis, and a results panel displaying multiple AI-generated caption suggestions.SocialBee’s AI Post Generator showing the option to generate captions, with fields to set tone of voice, word count, hashtags, and emojis, and a results panel displaying multiple AI-generated caption suggestions.

Step 6: Upload your video or image and add alt text for accessibility. You can also edit your media: crop, flip, or resize to fit the right format.

Step 7: Tag accounts by typing “@” followed by their handle, or use the Hashtag Generator (the wand + hashtag icon) to find trending and relevant hashtags. Save your favorite sets for future use.
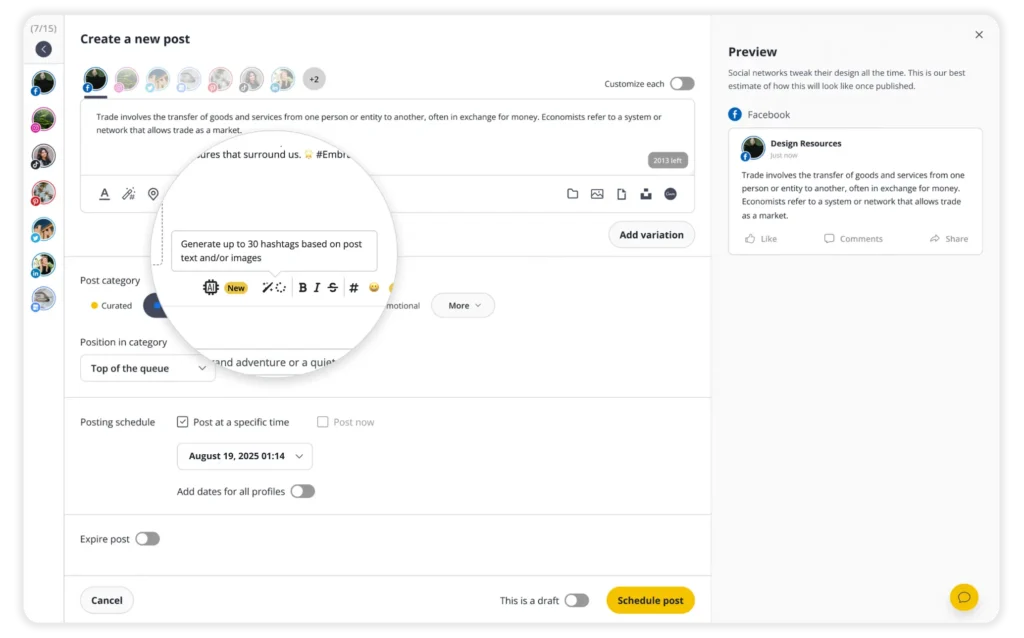
SocialBee’s post editor highlighting the AI hashtag generator feature, showing a tooltip that says ‘Generate up to 30 hashtags based on post text and/or images,’ with the post preview displayed on the right.SocialBee’s post editor highlighting the AI hashtag generator feature, showing a tooltip that says ‘Generate up to 30 hashtags based on post text and/or images,’ with the post preview displayed on the right.

Step 8: Format your caption with bold, italic, or strikethrough, and add emojis to make your post more engaging.

Step 9: Use GIPHY, Unsplash, or Canva integrations to design visuals or add creative elements without leaving the app.
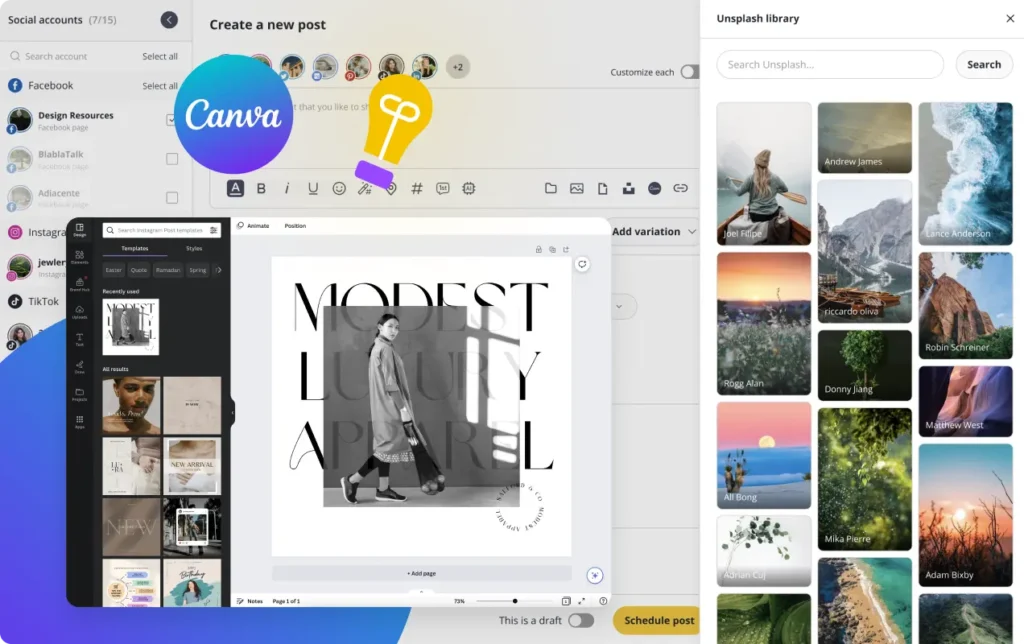
SocialBee’s post editor integrating Canva on the left and Unsplash image library on the right, enabling users to design and select visuals directly within the platform for social media content creation.SocialBee’s post editor integrating Canva on the left and Unsplash image library on the right, enabling users to design and select visuals directly within the platform for social media content creation.

Step 10: Add your post to a Post Category (your content folder). This helps you stay organized and automate your posting schedule.
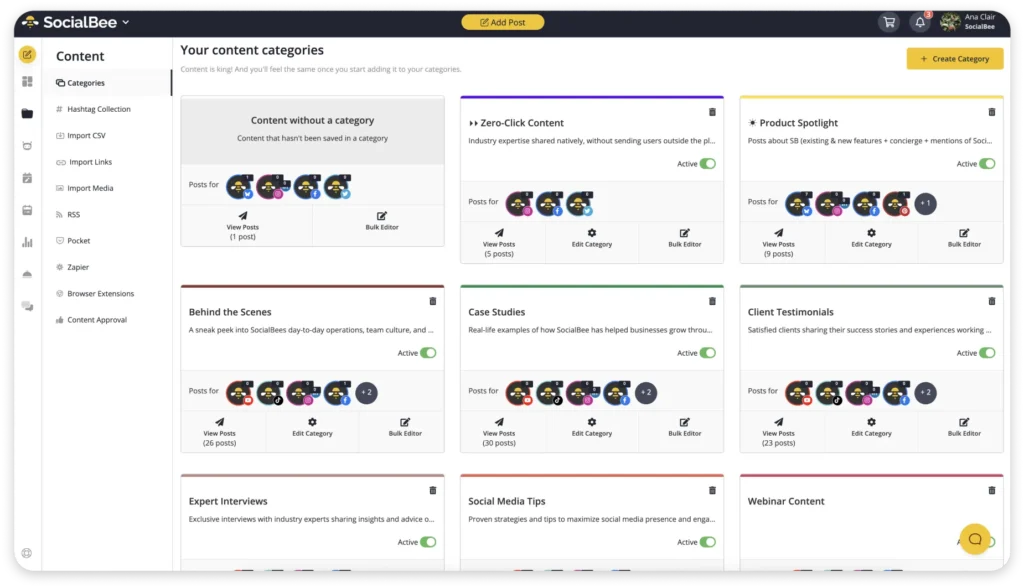
SocialBee’s content categories dashboard displaying organized sections for different post types, including Zero-Click Content, Product Spotlight, Case Studies, and Client TestimonialsSocialBee’s content categories dashboard displaying organized sections for different post types, including Zero-Click Content, Product Spotlight, Case Studies, and Client Testimonials

Step 11: Choose whether to “Post now” or “Schedule for later”. When scheduling, you’ll see best time suggestions based on your past engagement.

Step 12: Turn on “Re-queue after posting” to automatically repost evergreen content or enable “Expire post” to remove it after a certain date.

Step 13: Toggle “Approved” to publish right away, or keep it as a draft if you’re still editing or waiting for team approval.

Step 14: Click “Save Post” in the bottom-right corner to finalize your Facebook post or Reel.

Once it’s saved, your Reel will appear in your SocialBee calendar where you can preview, edit, or delete it before it’s automatically published.

Top tips for scheduling Facebook Reels

Want your Reels to reach more people without constantly being online? Scheduling helps you stay consistent, post at the right times, and keep your feed active even on busy days. 

Here are five simple ways to get better results when you schedule Reels on Facebook:

  1. Schedule Reels when your audience is most active
  2. Record and edit multiple Reels at once
  3. Alternate between content types
  4. Mix short Reels with slightly longer ones
  5. Track analytics and adjust posting times

1. Schedule Reels when your audience is most active

If you want your Reels to get noticed, timing matters. Open your Meta Business Suite and check when your followers are most active during the day or week. Maybe it’s during lunch breaks, maybe it’s late at night, every audience has its rhythm.

Once you know the pattern, start planning your Reels around those times. You can schedule posts in advance so they go live automatically, even if you’re busy or offline. If your audience spans multiple time zones, take that into account too: a morning post for you might hit perfectly in the evening somewhere else.


Sign Up For Daily Newsletter

Be keep up! Get the latest breaking news delivered straight to your inbox.
By signing up, you agree to our Terms of Use and acknowledge the data practices in our Privacy Policy. You may unsubscribe at any time.
Share This Article
Facebook Twitter Email Print
Share
What do you think?
Love0
Sad0
Happy0
Sleepy0
Angry0
Dead0
Wink0
Previous Article Sony WF-1000XM6: Will Sony’s flagship earbuds launch in 2025?
Next Article Pixel 10 crashing since October update? Google’s got a fix now
Leave a comment

Leave a Reply Cancel reply

Your email address will not be published. Required fields are marked *

Stay Connected

248.1k Like
69.1k Follow
134k Pin
54.3k Follow

Latest News

A Complete Checklist for Running Cross-Platform Social Media Campaigns
Computing
Motorola Says Sorry For Botching Moto X Sale, Will Offer $349 Deal Again – BGR
News
Interstellar Comet 3I/ATLAS Is Spewing Water Like a Cosmic Fire Hydrant
Gadget
Why Keir Starmer’s mandatory national digital ID system may be neither mandatory nor national | Computer Weekly
News

You Might also Like

Computing

A Complete Checklist for Running Cross-Platform Social Media Campaigns

18 Min Read
Computing

Would You Ride in A Self-Driving Car? | HackerNoon

4 Min Read
Computing

Path Cleared For Nix Package Manager On Fedora With /nix Approved

2 Min Read
Computing

China’s GAC backs self-driving car startup Pony.ai in new funding · TechNode

2 Min Read
//

World of Software is your one-stop website for the latest tech news and updates, follow us now to get the news that matters to you.

Quick Link

  • Privacy Policy
  • Terms of use
  • Advertise
  • Contact

Topics

  • Computing
  • Software
  • Press Release
  • Trending

Sign Up for Our Newsletter

Subscribe to our newsletter to get our newest articles instantly!

World of SoftwareWorld of Software
Follow US
Copyright © All Rights Reserved. World of Software.
Welcome Back!

Sign in to your account

Lost your password?