We all know referral programs are powerful. But let’s be honest – it isn’t easy to find genuine brand advocates.
Many programs attract people who are just looking to make a quick profit, leading to inauthentic promotions that convert no one. Just think about the times you’ve seen online influencers all promoting the exact same product in the same way – were you convinced by them?
Thankfully, as a WooCommerce store owner, you have a BIG advantage: a built-in community of customers who genuinely love and use your products. By converting these existing customers into affiliates, you can unlock the power of authentic word-of-mouth marketing.
In this article, we’ll show you how to recruit an army of motivated, enthusiastic brand ambassadors using the people who already shop at your WooCommerce store.

How to Turn Your Customers into Affiliates
A referral program is a tried-and-tested way to grow your business. But for the best results, you will need to partner with people who genuinely like your brand.
Who better to champion your products than your loyal customers? These people are already passionate about your brand, and this authenticity will shine through in their promotions. It’s the best way to build trust and credibility with potential new customers.
Even better, you don’t need to spend time finding and recruiting these affiliate partners. Instead, you can simply add a signup form to your WooCommerce store’s most important pages, such as the Accounts page.
And the best part? If you create a referral program using a plugin like AffiliateWP, then you can make this signup form and start converting your customers in just minutes.
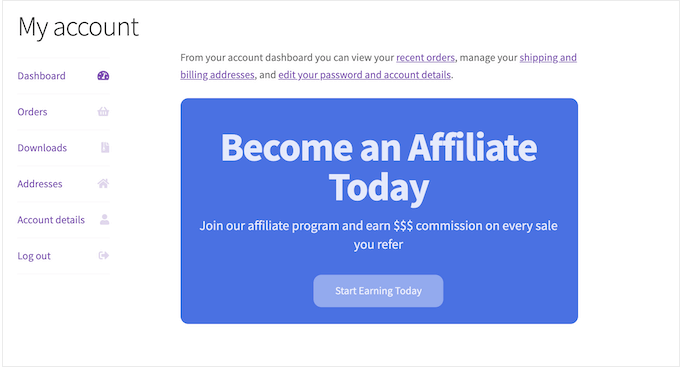

Even better, AffiliateWP only shows this form to people who’ve already made a purchase in your online store. This allows you to target engaged customers who are already familiar with your WooCommerce products.
This customer can then enroll with a single click. AffiliateWP will generate their affiliate link automatically so they can start promoting your brand straight away.
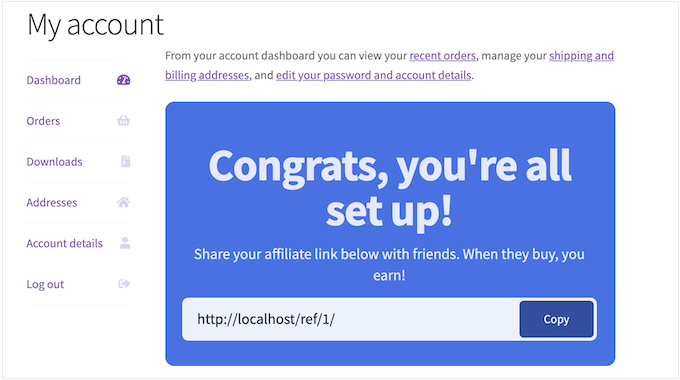

With that said, let’s see how you can add an affiliate program in WooCommerce and allow customers to sign up with one click.
Step 1. Set Up AffiliateWP
AffiliateWP is a powerful affiliate tracking and management tool for businesses that want to start their own referral program. Unlike other affiliate software, AffiliateWP is built as a WordPress plugin, so you can easily add it to your site.
It also integrates seamlessly with WooCommerce, so you’ll have no problems converting customers into affiliates. After creating your signup form, AffiliateWP will automatically add it to your store’s most important pages, such as the My Account page, Dashboard tab, and Checkout confirmation page.
First, you’ll need to install and activate the premium AffiliateWP plugin. For more details, see our tutorial on how to install a WordPress plugin.
Upon activation, the setup wizard will ask for your license key. You can get this information from your account on the AffiliateWP website.
With that done, click the ‘Continue’ button.
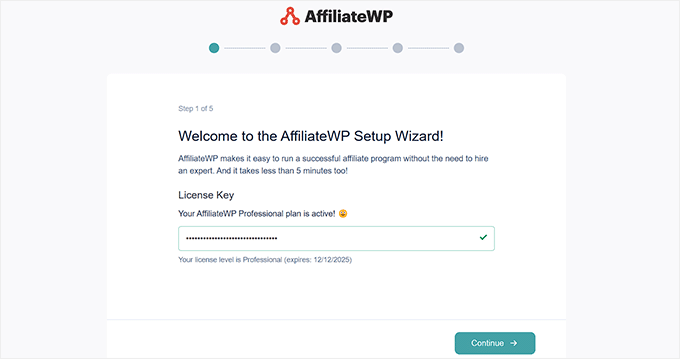

At this point, AffiliateWP will scan your site and then suggest some popular plugin integrations you may want to enable.
On this screen, you need to select ‘WooCommerce’ to connect your online store.
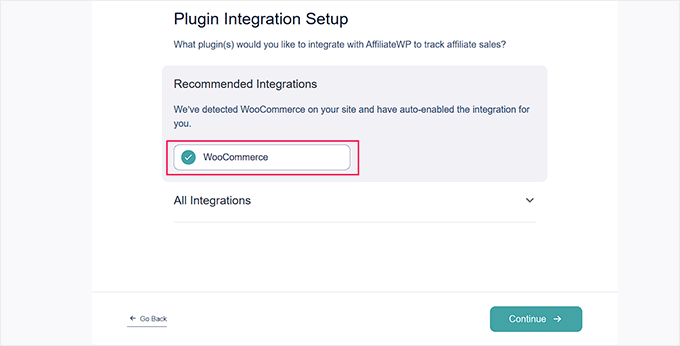

Then, click ‘Continue.’
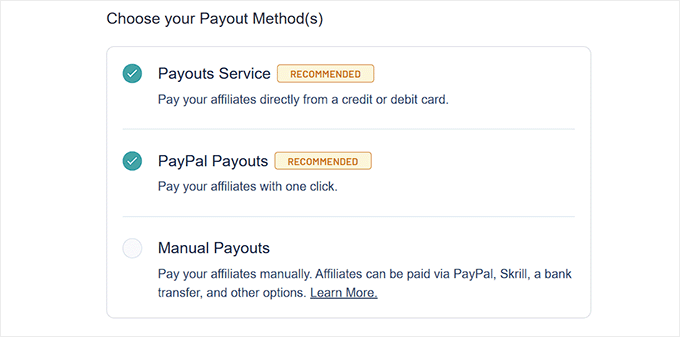
Next, you can choose how to pay your affiliates. You can select the ‘Payout Service’ option to pay with a credit card or ‘PayPal Payouts’ if you prefer one-click payouts.
After making your choice, just move on to the next step.

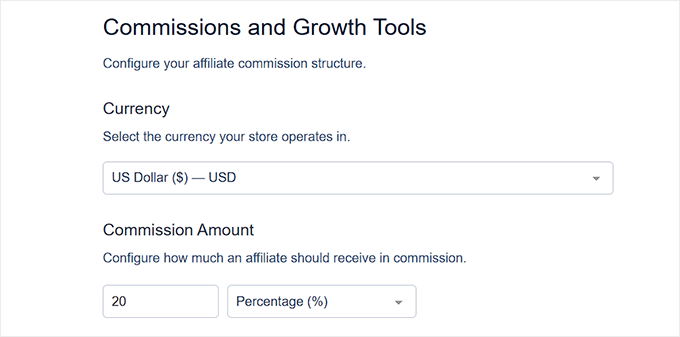
Here, you can choose a currency for your store.
You can also set a default commission rate for all your affiliates. If you’re unsure, then don’t worry – you can change the rate for individual affiliates at any point.

Finally, click the ‘Finish Setup And Exit’ button.
You can now configure emails, add opt-in forms, and track all your affiliates from your WordPress dashboard.
For more information, please see our tutorial on how to easily create a referral program in WordPress.
Step 2. Enable Affiliate Registration
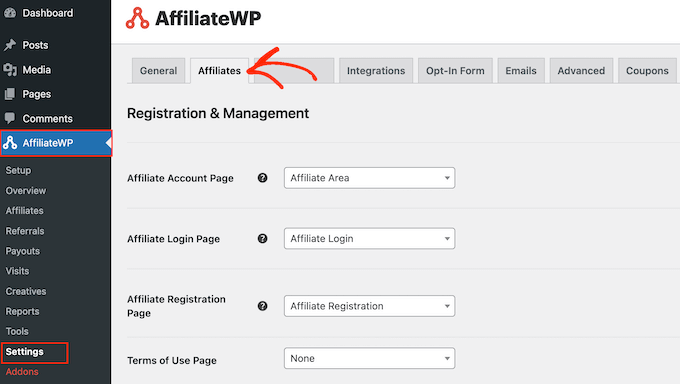
Next, it’s time to enable affiliate registration by heading to AffiliateWP » Settings. Here, you need to select the ‘Affiliates’ tab.

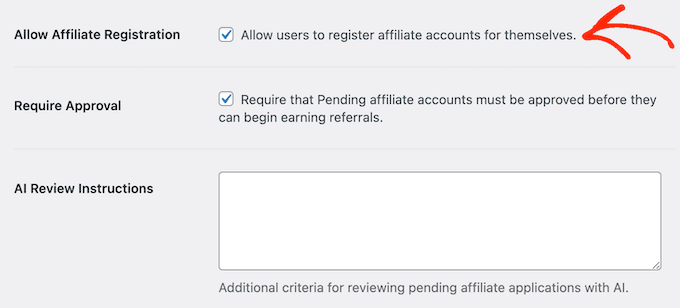
On this screen, check the box next to ‘Allow Affiliate Registration.’
That’s it! Customers can now join your referral program.

Step 3. Activate the Affiliate Signup Widget
Now that registration is open, the next step is to create your affiliate signup form.
On the current screen, scroll to the following option: ‘Convert customers into affiliates using the affiliate signup widget.’ Now, go ahead and select this radio button.


This will activate the signup widget and add an entirely new section where you can customize your form.
Step 4. Customize the Signup Widget
To start, AffiliateWP has a ‘Brand’ setting that lets you select a primary color that perfectly represents your brand.
Once you’ve picked it, AffiliateWP will automatically create a complimentary color palette for your widget.
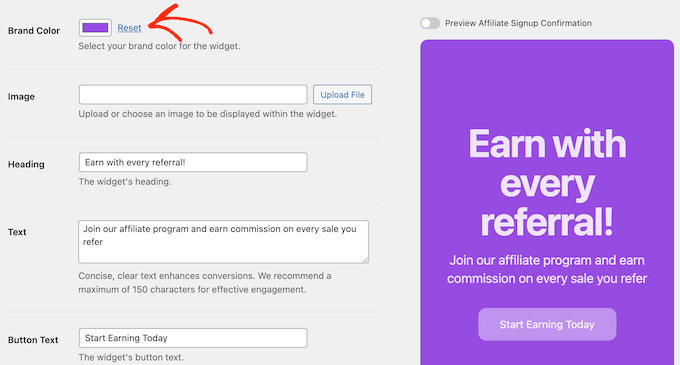

You can also add a background image and change the widget text by typing into the ‘Heading’ and ‘Text’ fields.
The text should motivate customers to join your referral program, so this is an ideal opportunity to explain the benefits of becoming an affiliate.
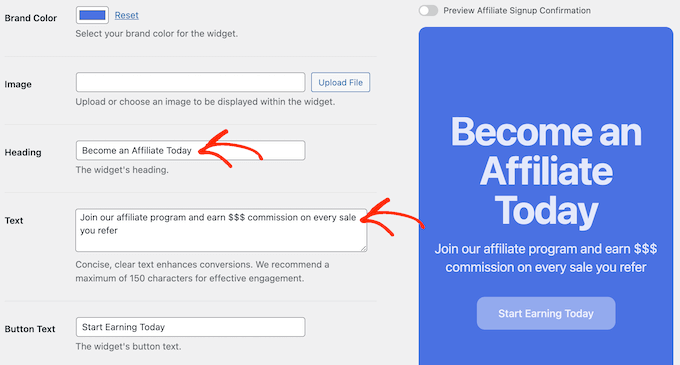

Similarly, you can change the call to action by typing into the ‘Button Text’ field. Once again, this should inspire the customer to enroll, so you should use something short and compelling.
As you make changes, the live preview will update automatically, so you can try various different settings to see what looks the best.
Step 5. Customize the Confirmation Screen
With that done, you can customize the layout that AffiliateWP will show when a customer joins your program. To do this, click the slider next to ‘Preview Affiliate Signup Confirmation.’
The live preview will then be updated to show the confirmation layout.
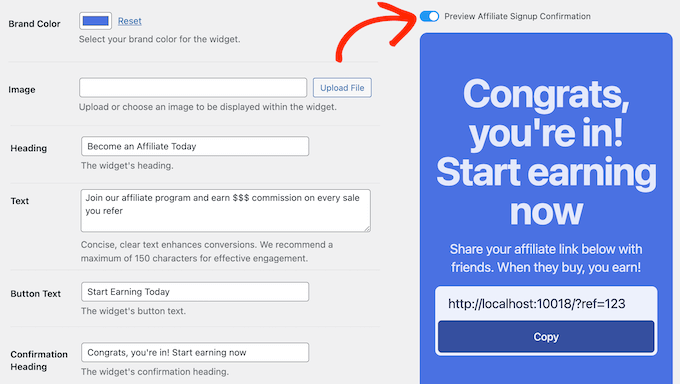

You can now replace the default ‘Confirmation Text’ and ‘Confirmation Heading’ text with your own messaging.
This is the perfect opportunity to thank new affiliates for joining your program or to explain the next steps.
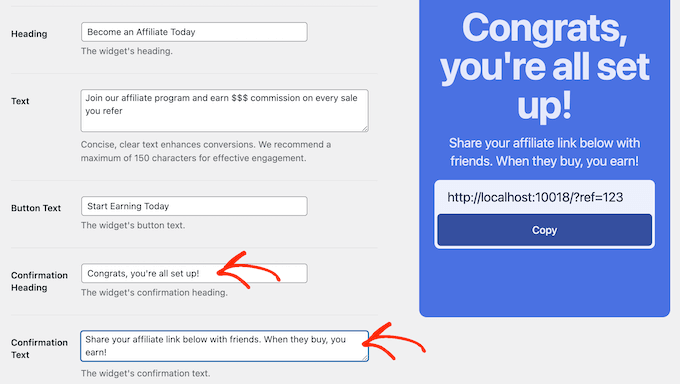

As you can see in the live preview, AffiliateWP generates an affiliate link and adds it to the confirmation layout automatically. This means new signups can start promoting your products right away.
Step 6. Publish Your Affiliate Widget
With all of that done, scroll to the bottom of the screen and click the ‘Save Changes’ button.
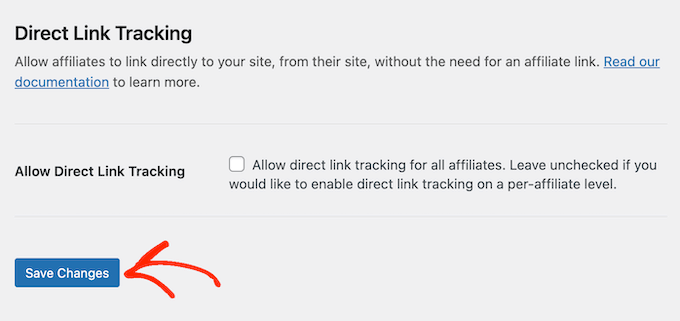

That’s it! AffiliateWP will now add this signup form to your store’s high-traffic areas. If you want to see it in action, then just remember the widget will only appear to customers who have completed at least one order.
Tips and Tricks to Supercharge Your WooCommerce Referral Program
So, you’ve now successfully added a referral program to your WooCommerce store. That’s great, but it’s only the first step.
If you’re going to convert your customers into an army of enthusiastic affiliate partners, then you need to get them excited about your program.
To help you out, here are our top affiliate marketing tips for how to convince your customers to sign up and start spreading the word about your products.
Announce Your Program
AffiliateWP automatically adds the signup widget to your store’s most important pages. But why wait for customers to log into their account and discover it?
By announcing your affiliate program to your mailing list, you can make sure everyone knows about it. This means you’ll likely see signups straight away.
For the best results, the email should clearly explain the benefits of joining your affiliate program. You can also use segmentation and personalization to make your messages even more compelling.
For example, if someone has bought a specific product from your store, then you might write something like: “Did you love [product-name]? Now you can share it with your friends and earn some cash!”
For an added boost, you can also announce your program via your blog, social media accounts, YouTube channel, and any other platforms where you have a presence.

Offer an Extra Incentive
Earning money is already a great motivator, but why not give customers another reason to join your program? For example, you might offer a one-time bonus when an affiliate makes their first sale.
You can even use the fear of missing out to drive signups by offering a limited-time perk, such as a higher commission rate. This creates a sense of urgency and encourages customers to convert right now – rather than waiting and potentially forgetting about your program.
Offer Exclusive Store Perks
Similarly, you can motivate customers to join your program by offering them exclusive store perks. Think coupon codes, early access to new products, free shipping, faster delivery – anything that makes them feel like they’re getting special treatment for being an affiliate.
However, be strategic. You don’t want customers signing up with no intention of actually promoting your products.
For example, you might offer a free month of shipping upfront and then unlock another free month every time the affiliate makes a sale. This keeps them engaged and promoting your products rather than just enjoying your perks.
We hope this article helped you learn how to turn your customers into affiliates. You may also want to see our guide on how to do lead generation like a pro or check out our expert pick of the best lead generation plugins.
If you liked this article, then please subscribe to our YouTube Channel for WordPress video tutorials. You can also find us on Twitter and Facebook.

