Computers get bogged down with temporary files and other junk that we often don’t have time to clean. This is exactly why automatic cleanups exist, and you should start using them right away.
Benefits of Automatic PC Cleanups
PC cleanups do a lot for your system. For starters, they free up valuable space by removing any temporary files, cache data, and other digital clutter that builds up on your PC over time. These files pile up faster than you think, consisting of Windows update files, browser and app caches, temporary installation files, and system error dumps. They can end up consuming gigabytes of precious drive storage.
Apart from saving drive space, PC cleanups can also significantly improve your system’s performance and responsiveness. When your storage drive is cluttered with unnecessary files, Windows has to work harder to find and access important files.
This means that regular, automated PC cleanups end up in performance benefits like programs launching faster, Windows booting up quicker, and a more responsive system that doesn’t lag or crash as much. The benefits are more visible on laptops, where you might even gain a battery life boost.
To be clear, automatic PC cleanups aren’t a magical way of extracting more performance out of your system. Instead, they’re a way of maintaining system performance and longevity. This is a part of basic PC maintenance you should regularly perform to keep your system in top shape. It won’t make your PC run any faster than the hardware you have, but it will keep it running longer and without as many issues.
How to Set Up Automatic Cleanups in Windows
Windows has a couple of built-in tools to keep your PC automatically clean and optimized. These include Storage Sense, automatic disk cleanup with Task Scheduler, and some built-in automations that keep Windows lean.
Storage Sense
Storage Sense is the easiest Windows automatic cleanup tool to configure. Just follow these steps:
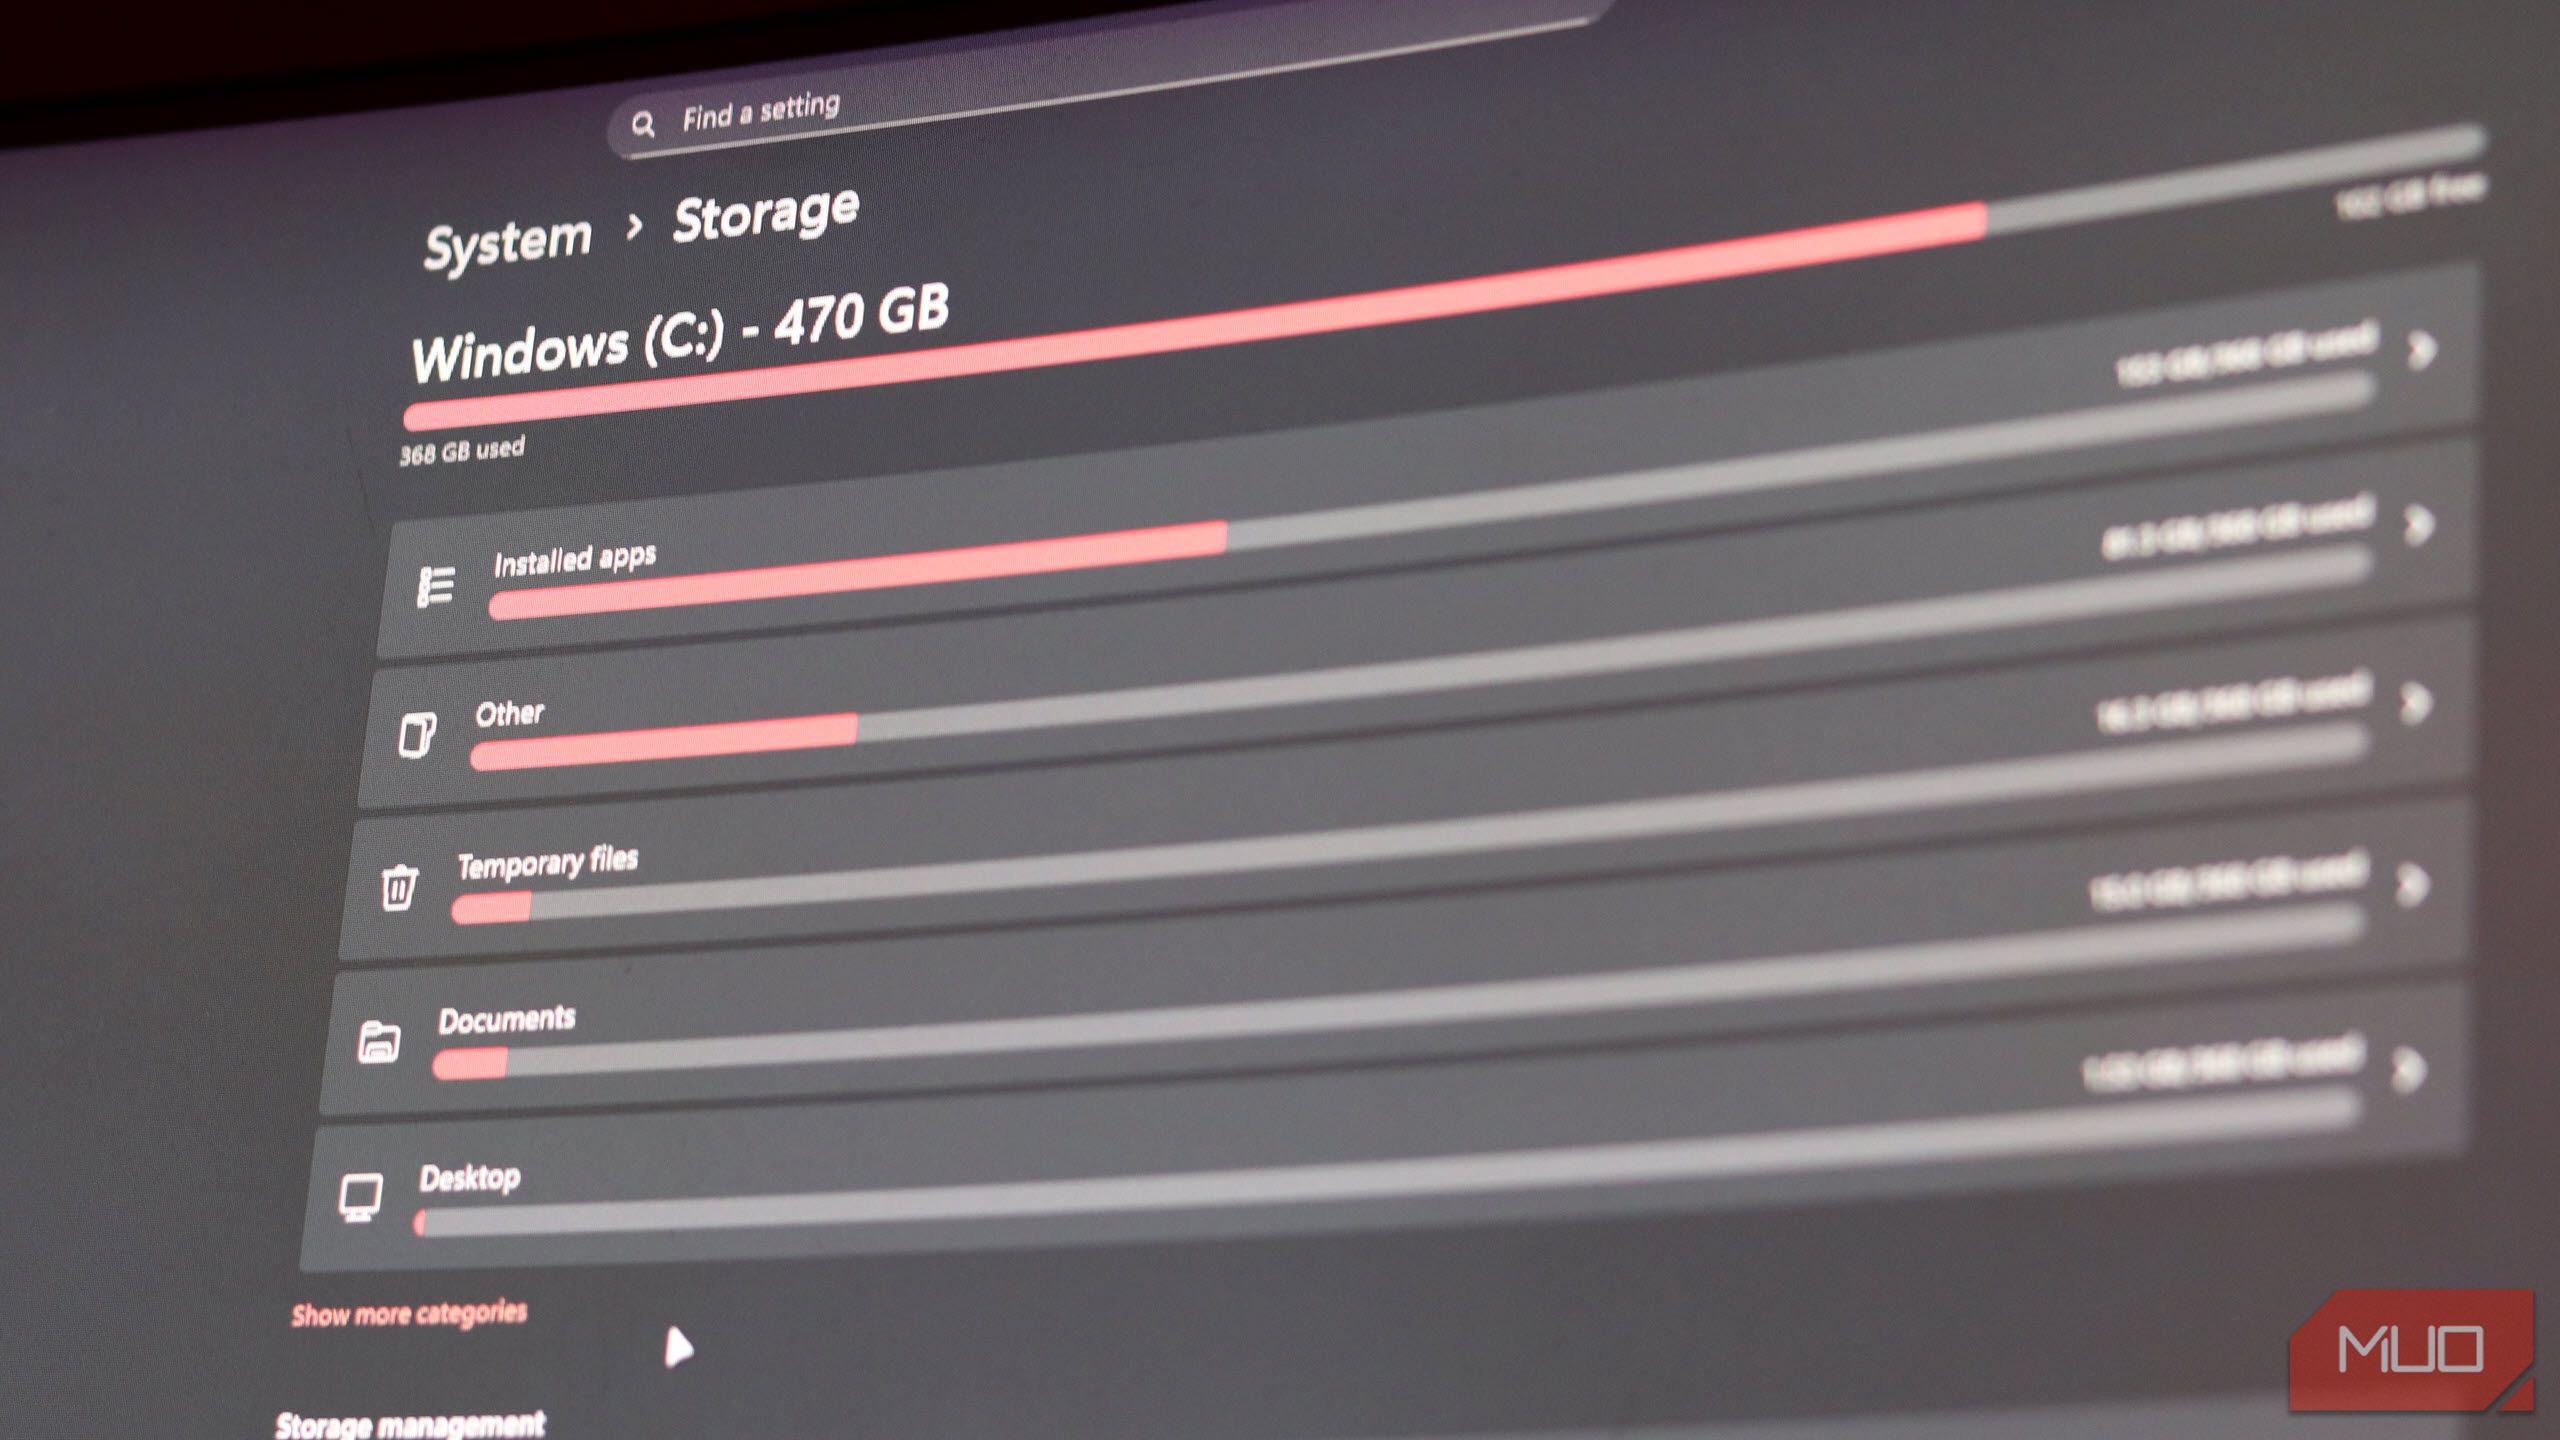
- Open Windows Settings and head to the System tab. Click Storage to proceed.
- You’ll see the Storage Sense slider under Storage management. Enable the slider, then click the setting to access more options.
- In this menu, you can configure how often Storage Sense runs, and what files it removes.
- Notably, you can choose whether to remove any unsued content on your PC that’s also saved in your cloud storage. If you use Phone Link (the only app you’ll ever need to connect your phone to Windows), you can enable a similar cloud setting for files from that.
Once you’re done setting everything up, I recommend clicking the Run Storage Sense now button at the bottom of the screen to start the automatic cleaning cycle instantly.
Automatic Disk Cleanup With Task Scheduler
Storage Sense is convenient to set up, but doesn’t offer you a lot of control over what gets cleaned up. If you don’t mind getting a little technical, you can set up automatic disk cleanup with Windows Task Scheduler:
- Open the Command Prompt and type cleanmgr / sageset:1. This creates a new sageset configuration and opens Disk Cleanup, where you can select what files you want deleted automatically. Click OK when done.
- Open the Task Scheduler. You can search for it in Windows Search by typing “Task Scheduler” and clicking the corresponding option.
- Click Action in the toolbar menu, followed by Create Task…
- In the Create Task window that appears, head over to the Triggers tab. Click the New… button and set a daily, weekly, or monthly schedule for the task to run.
- In the Action tab, click the New… button, select Start a program in the Action dropdown, and type cleanmgr / sageset:1 in the Program/script field. Click OK when done.
From this point on, the selected files will automatically be deleted as per your schedule, with no further interaction required.
Built-in Windows Automatic Maintenance
Apart from tools, Windows also runs automatic maintenance on your PC by default. Generally, Windows automatically configures this to run daily at 2 AM on your system, but you can change these settings in the Control Panel:
- Open the Control Panel and click Security and Maintenance (under the System and Security section if using Category view).
- Expand the Maintenance tab, then click Change maintenance settings to modify schedules. You can also choose to manually start maintenance right away.
This tool doesn’t do a lot, but it’s better than nothing, which can make a difference over extended periods. Additionally, it can wake your computer to perform maintenance tasks, then send it back to sleep. So even if you shut down your PC every night, this maintenance still happens.
Other Automatic Cleanup Methods You Can Use
If Windows’ built-in tools aren’t cutting it for you, there are third-party alternatives you can use too. These tools often offer more control and flexibility in the cleaning process. Some even provide additional features like software and driver updaters, and show a clearer picture of overall system health, all in one place:
- CCleaner: This is one of the most popular PC cleanup and maintenance programs available and might even be pre-installed on your system. Apart from scheduled cleaning, you also get real-time monitoring and a software and driver updater. CCleaner can even optimize Microsoft apps on Windows 11.
- BleachBit: This is a free, open-source alternative that offers similar automation and cleanup capabilities as CCleaner. However, you have to schedule it manually using Task Scheduler using the steps described above.
The biggest catch when using third-party programs to automate PC cleanup is that you’ll likely have to pay for a license (except BleachBit) to get the most use out of them. The free versions or trials of these utilities are often quite limited and easily replaced by built-in Windows tools.
Part of ensuring your PC runs at peak performance for as long as possible is good system maintenance, for both of hardware and software. Thankfully, Windows has quite a few options—built-in and third-party—to help fix the problem.


