In a tool as feature-packed as Notion, sometimes there are underrated features that slip by your radar. Notion’s Feed view feature is one of them, and if you haven’t started using it already, you need to start now.
What’s a Feed View in Notion?
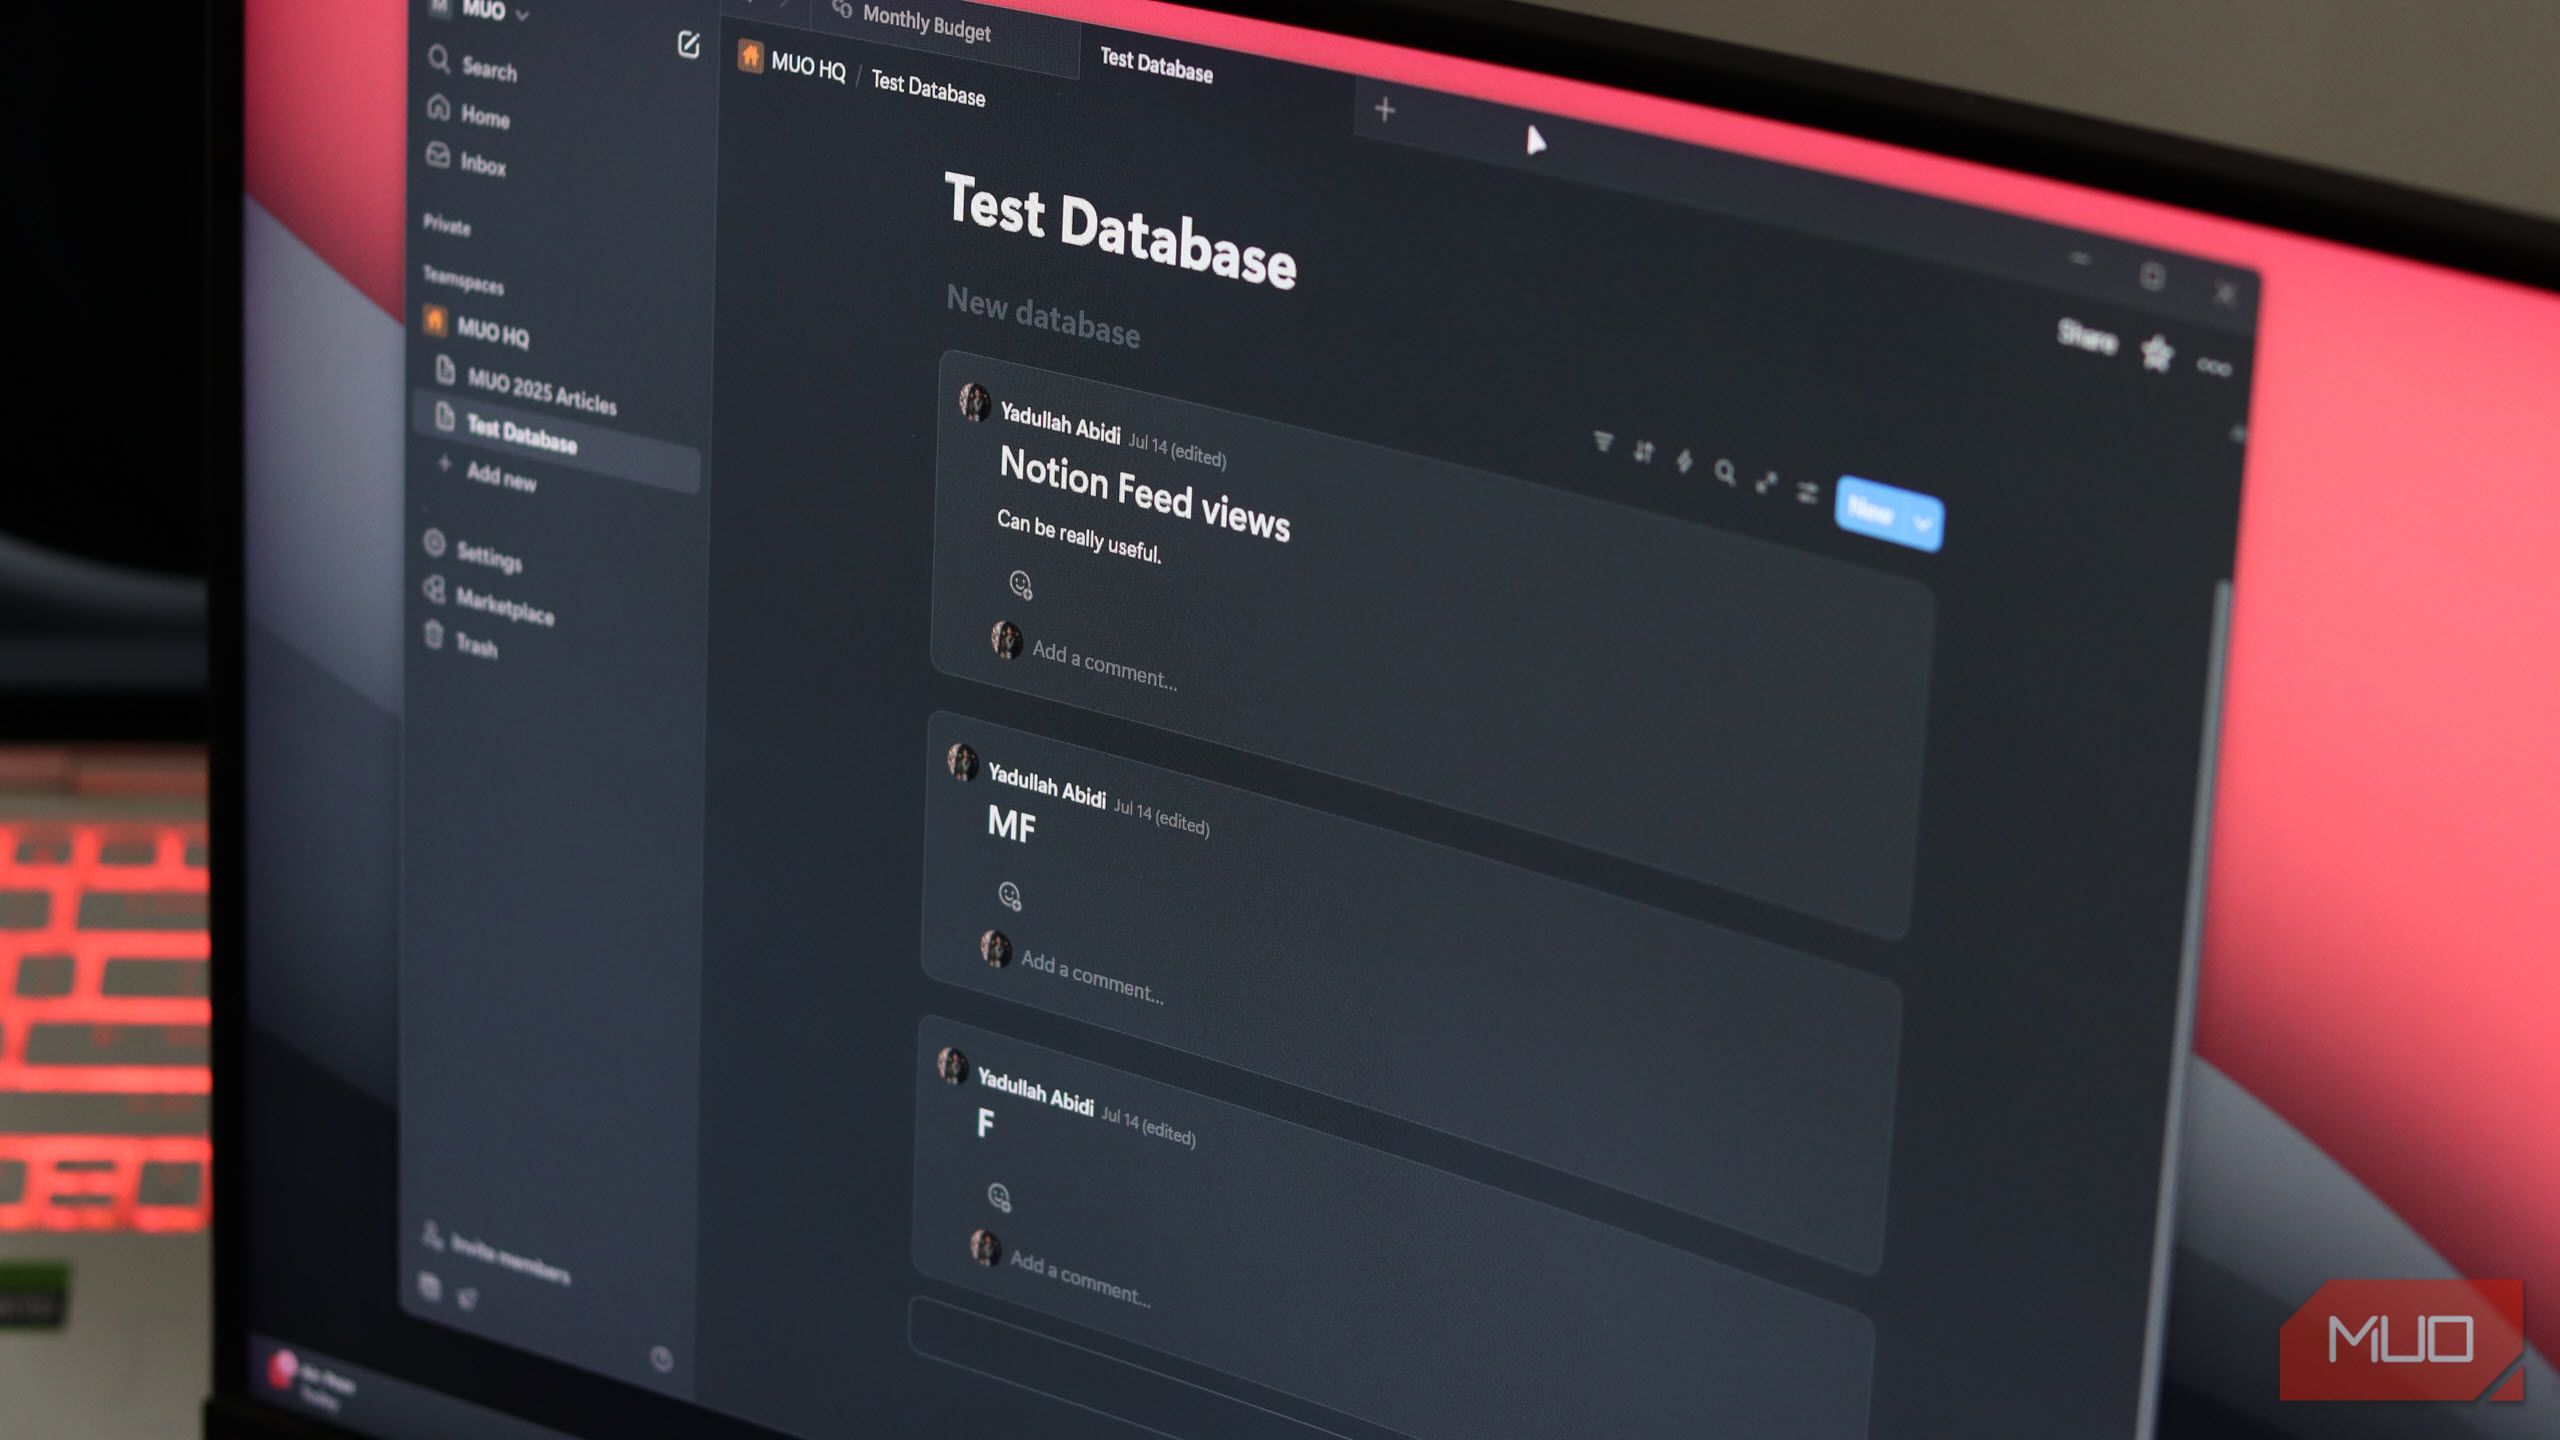
Imagine scrolling Instagram, but instead of social media posts, you see your to-do list. That’s how the Feed view shows you your Notion databases. Each entry is shown as a scrollable, stacked card that shows the actual page content without requiring you to click and open a new page. You can preview, comment on, and otherwise interact with your content directly from the main view. I run my entire life in Notion, so this simpler way of visualizing tasks and data makes a huge difference.
What makes this feature powerful is that it maintains all the database functionality we’ve come to see and like from Notion. You can still filter, sort, group, and organize your data. However, instead of seeing everything in a table and clicking individual items to open their corresponding pages, you see everything in one view.
Feed view gives you the most amount of information from your databases in the simplest way possible. Each entry appears as a post with the page content visible in the feed. You can see task descriptions, notes, updates, and whatever data you added to each task without any friction.
Setting Up and Configuring Feed View
Getting started with Feed view is as simple as using it. Just click the settings icon at the top right of your database, then click layout, and select the Feed view from the list of available views. Alternatively, you can type /feed view on any page to create a new database with Feed View as the default layout.

There are several configuration options you get with Feed View that can help customize the view to your preferences:
|
Load Limit |
Choose to show the first 10, 25, 50, or 100 entries in a database. |
|
Open page in |
Controls how individual items open in pages. You can have them open in a focused, centered modal, a sidebar, or as a full page. |
|
Property visibility |
Choose what database properties you want to show under the entry name. |
|
Filter |
Filter the view order based on specific database properties. |
|
Sort |
Sort all items based on specific database properties. |
|
Conditional color |
Add a custom color to any item in the list based on its database properties. |
As mentioned before, you also have access to your usual database settings, such as locking the database, editing properties, automations, and more. Additionally, you can also modify the individual layout of each page within the feed view.
To do this, open any page and click the Customize layout button on top of the page title. This button only appears when you’re hovering over your page name, so don’t panic if you don’t see it show up at first. Once you click it, it lets you adjust settings like the page structure, enable or disable page discussions and property icons, and how the inline comments are shown.

The way you configure your feed will vary based on your specific requirements. Enabling Feed view will make it extremely easy to use databases for planning your day, so adding a due date property and using it to sort your feed is the easiest way of ensuring high-priority tasks show up first.
Another recommendation is to disable Page discussions in the Customize layout menu if you’re using the feed for personal planning and won’t be working with a team. This way, you reduce an unnecessary element from your view.
Feed View Makes Databases Easy to Work With
Feed view makes databases significantly easier to work with. Big tables with plenty of rows and data visible at first glance can actually be quite intimidating, especially if you’re running short on time. Not to mention that to check a task’s details, you’d have to click the task and open a new page.
On the other hand, with Feed view, you can see your entire day’s workload sorted or filtered as you like in a single glance—instead of cryptic task titles in a table. If you’re working with a team, leaving comments on individual items is a great way of updating everyone involved and having quick discussions. Since these comments are right underneath each item, they can be easily referred to later if required.
Feed view has also helped me overcome the “database anxiety” I used to feel when working in Notion. You see, I’m used to creating elaborate tables in Excel and Google Sheets. However, in those spreadsheets, all the data is visible, and you don’t have to click to open any annoying pages. I built my workflow entirely in Notion and ended up regretting it because these complicated databases were killing my productivity.

Additionally, while you can use formulae in Notion, you don’t get the freedom of picking data from any cell or cell range as you desire. This is one of the reasons why Notion didn’t work for me, but Excel did.
In the long run, this resulted in extremely inefficient tracking, to the point I was forced to go back to my spreadsheets. However, Feed view is a lot more practical way of presenting more relevant data (that you can pick) at a glance while keeping major details hidden. This means I spend less time scratching my head over what a task requires and more time quickly glancing at the information I need before moving on.
Feed view reduces the cognitive load on your brain and makes it far simpler to check relevant information quickly. If you’re feeling overwhelmed by that massive table to pending tasks and don’t know where to start, maybe visualizing your data differently can help. Table view definitely has its uses, but Feed view takes the win for daily planning.


