When it comes to Windows, it’s always handy to know a couple of tricks for those moments your computer starts acting out. This exact scenario happened to me recently, and I brought my machine back to life with this super simple startup trick—it can be the difference between pulling your hair out and getting back up and running immediately.
The Windows Startup Trick That Saved Me
I’ve been lucky in recent years. My Windows 10 PC has been working fine and without issue. But with the end of Windows 10 support looming large, it’s almost like my machine knows what’s coming—and I started encountering issues.
When my PC refused to boot normally, I didn’t panic. I knew about Windows’ fallback startup options, and in my case, booting into Safe Mode gave me the access I needed to restore my system.
Safe Mode isn’t flashy. It strips Windows down to the bare minimum—just the essential drivers and processes needed to run. That makes it a perfect environment for troubleshooting, uninstalling problematic programs, or running malware scans.
And if Safe Mode isn’t enough, you can go one step further: boot from a USB recovery drive. This bypasses your broken Windows installation entirely and lets you load a fresh copy of Windows or access built-in recovery tools.
How to Boot Into Safe Mode
Safe Mode has been part of Windows for decades, and it’s still one of the best first-line defenses when your computer misbehaves. There are a couple of ways to boot into Safe Mode.
Use the Restart Shortcut
If you still have access to the Windows desktop (or the login screen), you can use the restart shortcut. It’s the easiest method to access Safe Mode.
- From either the login screen or the power settings in the Start menu, hold Shift and press Restart.
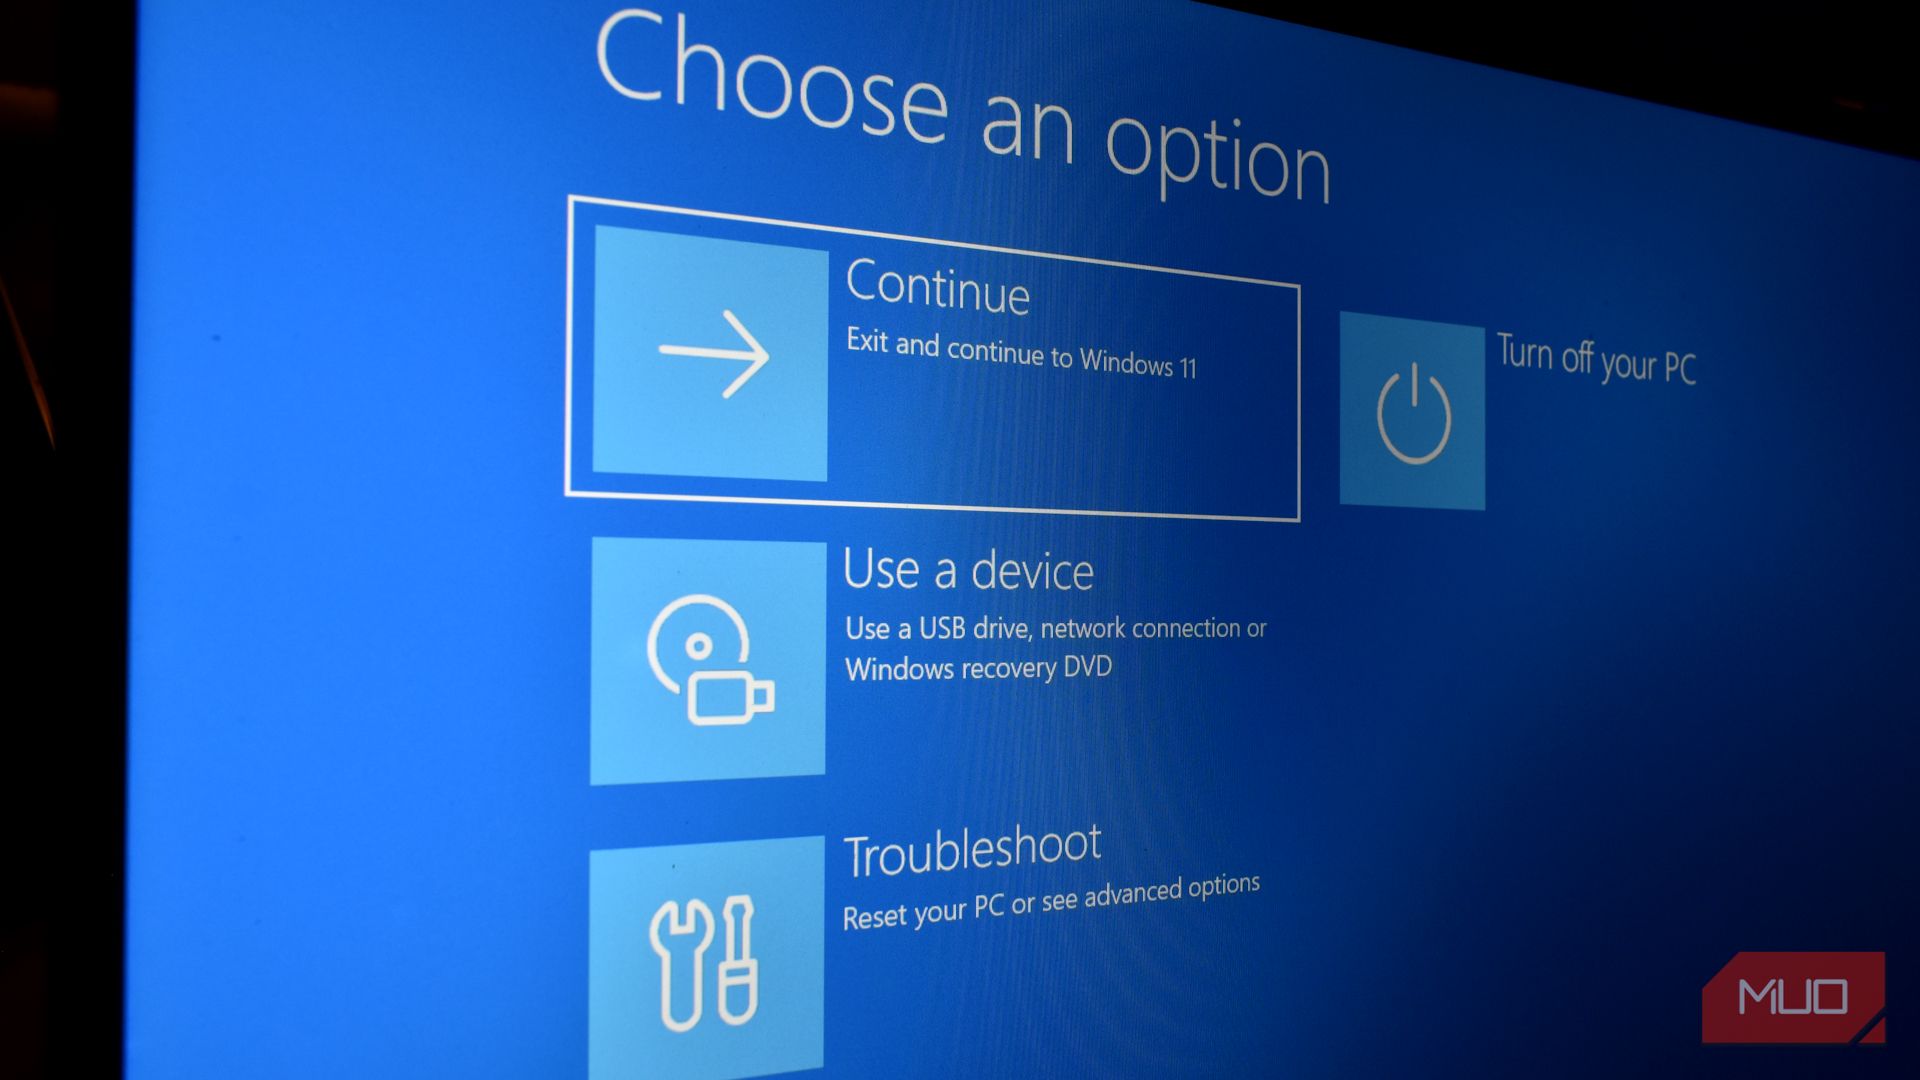
- Now, your PC will reboot into the Windows Recovery Environment.
- Select Troubleshoot > Advanced Options > Startup Settings.
- Choose Restart.
- On the next screen, you can choose either Safe Mode or Safe Mode with Networking.
If you’re unsure about what’s causing your Windows machine issues, I’d advise booting without internet access.
Use System Configuration (MSConfig)
Another option, again, if you still have access to the desktop, you can use the Windows System Configuration tool to boot into Safe Mode. MSConfig is a Windows system utility built into the operating system that you can use to manage drivers, services, and more.

- Press Win + R to open the Run dialog.
- Type msconfig and press Enter.
- Under the Boot tab, select Safe boot.
When your computer reboots, it’ll be in Safe Mode.
In both cases, once your machine boots into Safe Mode, you can begin to clean out any nasty malware lurking on your device. There are some very handy free antivirus and antimalware tools you can use to remove malware.
How to Boot From a USB Drive
Safe Mode is great, but sometimes your Windows installation is too far gone. That’s when a bootable USB drive comes to the rescue.
Booting from a USB drive is super useful for a few reasons:
- It lets you start Windows from a clean environment, separate from your potentially infected or broken system.
- You can reinstall Windows if needed, repair boot files, or access advanced recovery tools.
Some bootable USBs even allow offline malware scans before Windows ever loads. These special rescue USBs are super handy to keep around, as they can be used whenever your machine begins to show signs of strain, malware, or otherwise.
However, with that said, I’ve detailed how to use a Microsoft installation USB to revive your machine below. Having a bootable Windows USB around is always a great idea, as it can be used on effectively any Windows machine.
How to Create a Bootable USB
A bootable USB is a handy option, as you can create it on another PC and then use it on your own.
- Download Microsoft’s Media Creation Tool.
- Run the tool and choose Create installation media for another PC.
- Insert a USB drive (at least 8GB) and select it as the target.
- The tool will download Windows and make the USB bootable.
Once the Media Creation Tool finishes the USB creation process, you can use it to boot from.

- Insert the USB drive into the affected PC.
- Restart and enter your BIOS/UEFI settings (commonly by pressing F2, Del, Esc, or F12 during startup).
- Set the USB drive as the primary boot device. The process for this varies depending on your motherboard manufacturer, so you may have to look this up on a separate device.
- Save the changes and reboot—your PC will load from the USB.
- Now, head to Troubleshoot > Advanced Options > Startup Repair.
Let the process complete, and then you should be able to access Windows once again.
As before, once you access Windows, run your antivirus or antimalware tool and start repairing your machine.
Now, you don’t want to be preparing a recovery USB drive when your computer is already dead in the water. Do it now, while things are running smoothly. This one Windows startup trick has saved me from disaster, and it could save you, too. The next time your computer refuses to cooperate, you’ll know exactly how to fight back.


