This tutorial will guide you through the process of integrating OpenAI’s powerful Codex coding agent directly into your Visual Studio Code environment. This tool functions as an AI pair programmer, capable of understanding complex prompts to execute commands, write code, run tests, and even build entire applications from scratch.
Before you begin, ensure you have the following:
- Visual Studio Code: The latest version is installed on your machine.
- ChatGPT Plus Account: The Codex agent extension requires a paid OpenAI subscription (ChatGPT Plus, Team, Pro, or Enterprise) to function.
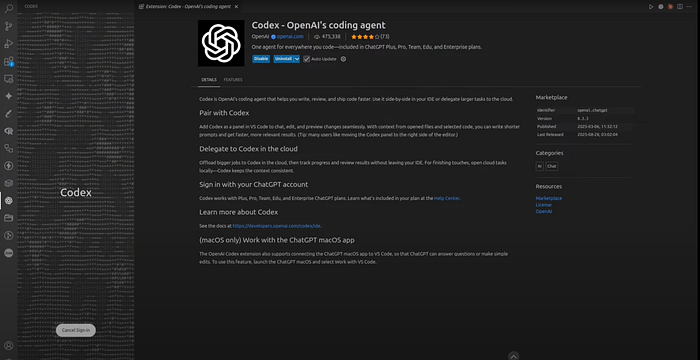
Step 1: Install the Codex Extension
First, you need to add the official OpenAI extension to VS Code.
- Launch Visual Studio Code.
- Navigate to the Extensions view by clicking the icon on the left-hand sidebar.
- In the search bar, type Codex.
- From the search results, locate and select Codex — OpenAI’s coding agent published by OpenAI. It’s crucial to select the official extension to ensure proper functionality and security.
- Click the Install button. You may be prompted to trust the publisher; confirm to proceed.
Step 2: Sign In and Authenticate
Once installed, you must connect the extension to your OpenAI account.
- After installation, a new Codex icon will appear in the top-right corner of the activity bar. Click it to open the Codex panel.
- In the Codex panel, click the Sign in with ChatGPT button.
- Your default web browser will open, prompting you to log in to your OpenAI account.
- After successfully logging in, you will be authenticated, and the Codex panel in VS Code will activate, ready for use.
Step 3: Understanding the Codex Interface
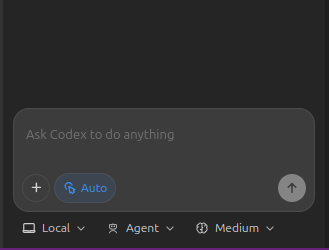
Main Chat Panel: This is where you will interact with the agent. The bottom of the panel contains several important settings:
Environment: Choose where Codex will run its commands.
- Work locally: The agent will use your local machine’s file system and terminal. You must have a project folder open for this to work.
- Run in the cloud: The agent operates in a sandboxed cloud environment provided by OpenAI.
Mode: Select how the agent behaves.
- Chat: A standard conversational mode.
- Agent: The agent can read files, write code, and run commands, but will ask for approval before executing.Agent (full access): The agent has full permissions to perform tasks without requiring approval for each step.
Reasoning Effort: Adjust the complexity of the agent’s planning and execution. The default is Medium, which is suitable for most tasks. Higher settings may yield better results for complex problems but will take longer.
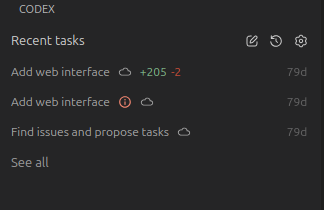
Top Menu Icons:
-
New Chat: Starts a new, clean conversation.
-
Task History: View previous conversations and tasks.
-
Settings: Access account information, help docs, keyboard shortcuts, and advanced configurations.
Step 4: Run Your First Prompt
Now you’re ready to give Codex a task. For this example, we’ll ask it to create a simple web application.
Press enter or click to view image in full size
- Open a Project Folder: Before starting, ensure you have a folder open in VS Code. If not, go to File > Open Folder… and select or create a project directory. This is required for the agent to work locally.
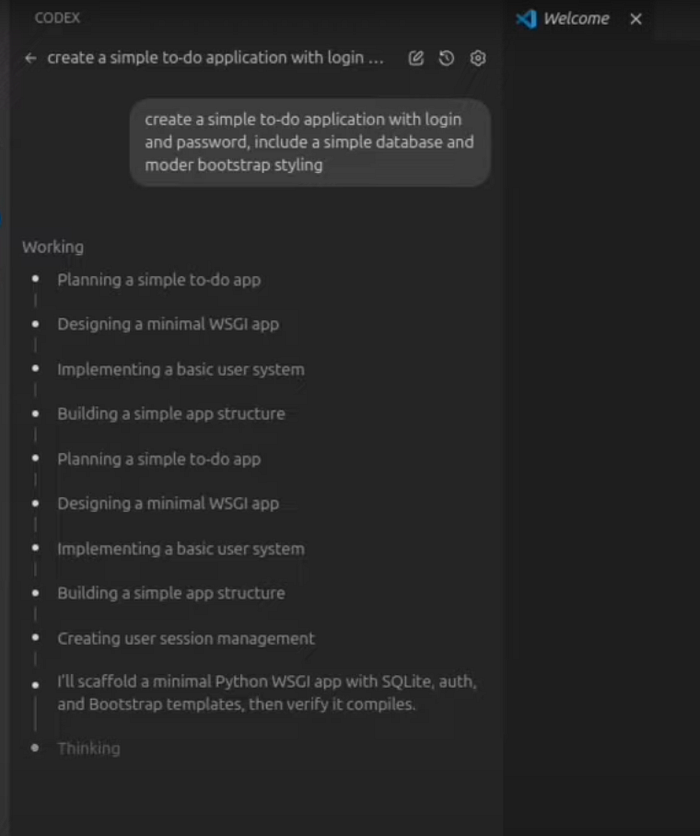
- Write a Detailed Prompt: A good prompt is descriptive and clear. In the Codex chat input, type the following: create a simple to-do application with login and password. include a simple database and modern bootstrap styling.
- Launch the Agent: Press the send button. The agent will begin by outlining its plan, showing steps.
- Monitor the Progress: The agent will show its work in real-time, creating files (app.py, data.db, etc.) and writing code. Once complete, it will provide instructions on how to run the application.
Step 5: Run the Generated Application
Codex will provide the command needed to start the application it just built.
-
Open the integrated terminal in VS Code (View > Terminal).
-
Run the command provided by Codex. In this case, it’s: python3 app.py
-
The terminal will show that the server is running, typically on http://127.0.0.1:8000.
-
Open this URL in your web browser. You can now interact with the fully functional to-do application, complete with user registration, login, and task management.

Additional Configuration and Tips
- Data Privacy: If you wish to prevent your data from being used to train OpenAI models, go to the Codex Settings, where you can find a link to your Data controls on the ChatGPT website to opt-out.
- Model Selection: In the advanced settings, you can see which AI model is being used. By default, the extension uses powerful and up-to-date models (like GPT-5, as shown in the video) optimized for coding tasks.
Video Codex in VS Code Tutorial
Watch on YouTube: Codex CLI in VS Code
Conclusion
You’ve now seen how simple it is to get OpenAI’s Codex agent running in VS Code. By following these steps, you can bring a powerful AI pair programmer into your daily workflow, automating tasks and accelerating your projects.
Cheers! 😉


