I used to think Excel macros were overkill because I had to go through the trouble of recording steps and tweaking code for something I could easily do manually. Then I was tasked with standardizing report layouts (a deceptively simple task), but I quickly realized how tedious it would be since there were many sheets. That’s when I looked into macros and discovered I had them all wrong.
With one click, the macro I created saved me hours of work. Once I got a taste of how a well-executed macro enhances my workflow, I was hooked. Now I rely on them so much that I sometimes use macros instead of formulas.
Why I thought macros were too much
And why I was wrong
Like many, I avoided macros because I thought the learning curve was too steep. I also thought they were unnecessarily complex to build and required advanced programming skills. Sure, you can easily record a macro and use one without coding, but then it would be sheet-specific and difficult to scale due to it having hard-coded cell references, file paths, or UI elements.
This meant that I would definitely need to learn some Visual Basic for Applications (VBA) so that I could refactor the code of the recorded macros into something flexible and reusable. Luckily, recording a macro is very easy. Furthermore, VBA is relatively easy and intuitive, with its readable syntax and the fact that it works within Excel, providing instant feedback.
On top of helping me refactor recorded macros, knowing VBA helps me inject some error handling into them. Furthermore, if I get stuck and need help with bugs, there is a helpful online community that can assist me in resolving them. I had every reason to learn it—so I did.
The macro that changed everything
Hours of work done with a single click
When the aforementioned workbook was sent to me, it had over 20 sheets that needed to be formatted and exported. I knew more were coming down the line, and that I would hate manually doing it every time. It was time to become a macro wizard.
Setting up the macro took a lot of trial and error, especially when it came to getting the VBA code right (thanks, Stack Overflow!). Since I’m already familiar with coding, I just had to look at a VBA crash course video on YouTube to get to grips with it. What I built in the end was efficient and easy to use.
Enabling the Developer tab
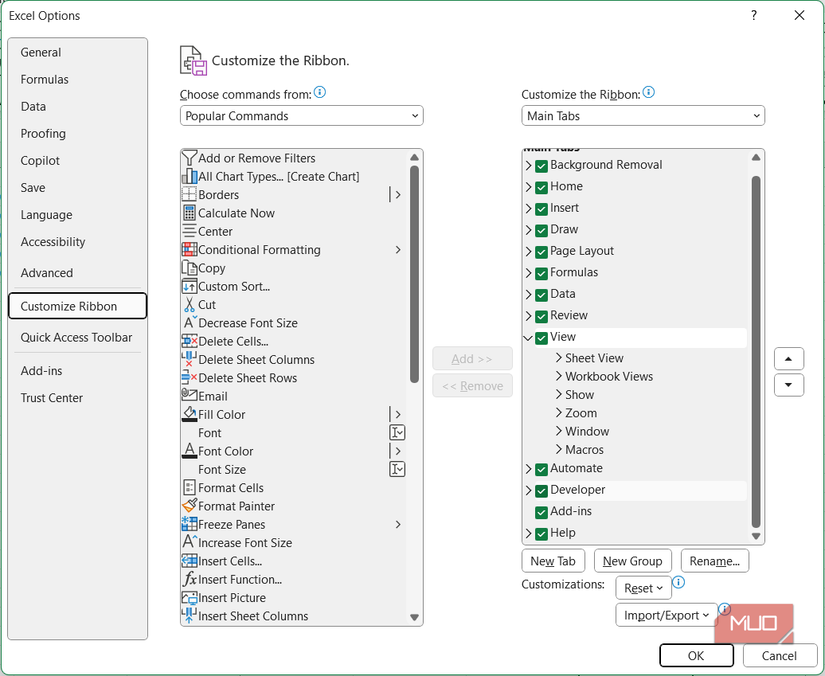
Creating a macro with VBA requires accessing the Developer tab, which is not visible by default. To enable it, click File -> Options -> Customize Ribbon. In the Main Tabs section, check Developer and click OK.
Creating the macro and refining
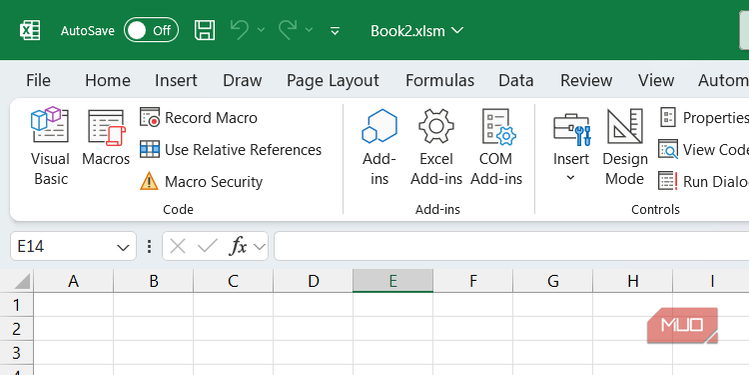
To create the macro, I clicked Macros in the Code command group of the ribbon to open the Macros window. I gave the macro a name and clicked Create to open the VBA editor window. Afterward, I wrote the code, saved the script (Ctrl + S), and closed the editor.
Over the course of the weeks, I refined the script. It started just formatting one sheet at a time, but this also got tedious. Now it formats all Excel sheets in a workbook with a single click.
Below is the final code with comments included to explain what each section does. I have removed some lines, such as those that apply the color scheme of the company I worked for and its logo in the header, to keep the script relatively short.
        Sub FormatAndExportSheets()
   Dim ws As Worksheet
   Dim rng As Range
   Dim pdfPath As String
   Dim cell As Range   'Setting the desired font and color scheme
   Const FONT_NAME As String = "Calibri"
   Const FONT_SIZE As Integer = 11
   Const HEADER_FONT_SIZE As Integer = 14
      'Setting PDF export folder
   pdfPath = ThisWorkbook.Path & "Formatted " + "Sheets"
   If Dir(pdfPath, vbDirectory) = "" Then MkDir pdfPath   'Looping through each sheet
   For Each ws In ThisWorkbook.Worksheets
       With ws
           'Standardizing the column widths
           .Cells.ColumnWidth = 15           'Applying font settings
           .Cells.Font.Name = FONT_NAME
           .Cells.Font.Size = FONT_SIZE

           'Formatting the header (first row)
           Set headerRange = .Range("A1:" & .Cells(1, .UsedRange.Columns.Count).Address)
           With headerRange
               .Font.Bold = True
               .Font.Size = HEADER_FONT_SIZE
               .Interior.Color = RGB(220, 230, 241) 'Giving the header a light blue background
               .Borders.Weight = xlMedium
           End With           'Applying number formatting
           For Each cell In .UsedRange
               If IsNumeric(cell.Value) Then
                   If cell.Value > 1 Then
                       cell.NumberFormat = "$
                   ElseIf cell.Value <= 1 And cell.Value >= 0 Then
                       cell.NumberFormat = "0.00%" 'Formatting the percentages
                   End If
               End If
           Next cell           'Exporting the sheet to a PDF
           .ExportAsFixedFormat Type:=xlTypePDF, _
               Filename:=pdfPath & .Name & ".pdf", _
               Quality:=xlQualityStandard, _
               IncludeDocProperties:=True, _
               IgnorePrintAreas:=False, _
               OpenAfterPublish:=False
       End With
   Next ws   'Displaying a success message
   MsgBox "All sheets formatted and saved as PDFs in: " & pdfPath, vbInformation
End Sub
Basically, the script loops through each sheet in the workbook to format the cells that have values. Specifically, it standardizes the column widths and fonts, as well as formats numerical values into either currencies or percentages.
Afterward, it exports each sheet as a PDF to a folder named Formatted Sheets. If the folder doesn’t exist, it will create one—this is the error checking you can’t do with recorded macros alone. Finally, it displays a success message upon successfully completing the formatting.
Using the macro
Before I used the macro, I assigned it a shortcut. Some people get creative by creating a GUI button for it, but a shortcut works if you don’t have many macros.
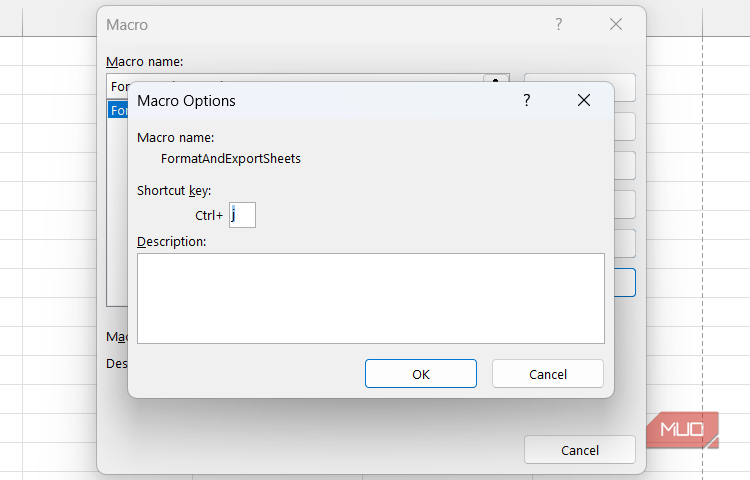
To do that, open the Macros window, select the macro, and click Options. Under Shortcut key, press the key to use with Ctrl—I chose Ctrl + J—and click OK. When choosing the key, just make sure it doesn’t already belong to other Excel shortcuts to avoid conflicts.
After hitting the shortcut, the macro does its thing, and you will get a message saying the sheets have been formatted and saved as PDFs. And if you check the folder specified in the script, you will find the formatted PDFs there. Keep in mind that the PDFs will be overwritten every time you run the macro.
I’ve created many more macros ever since
That one macro reduced a task that would have taken me hours down to minutes, while ensuring consistent results every time. More importantly, it completely changed my stance on macros. They aren’t overkill.
I have since built additional macros that handle everything from formatting and calculations to data validation and data cleaning. Sure, Power Query can easily clean up your data, for example, but only with macros do you get full control over Excel features to automate repetitive tasks.


